


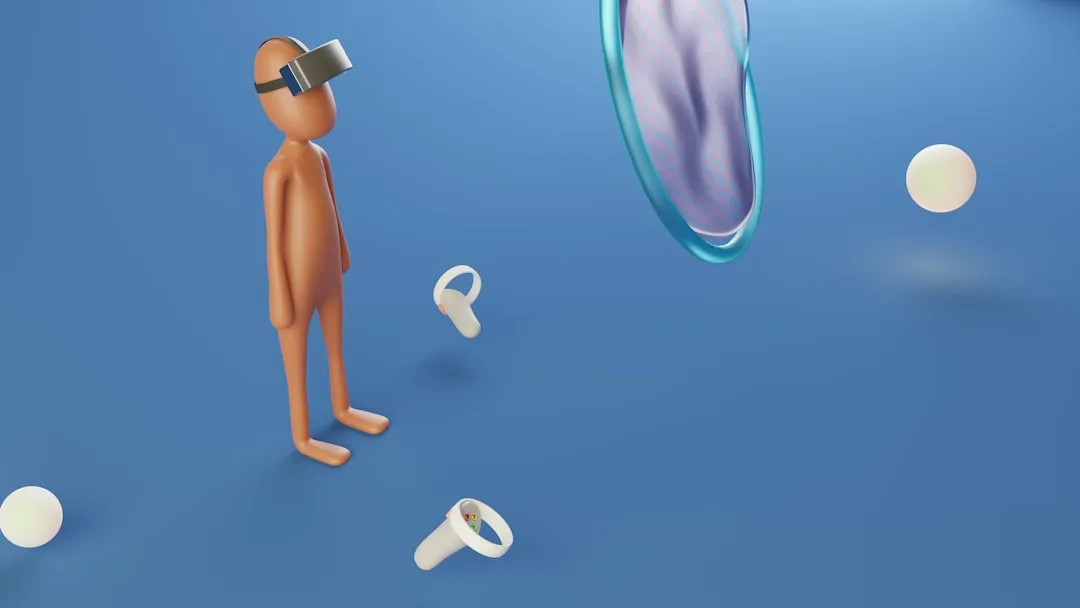
As we aim for a wireless world, technology's reliance on cloud computing services is becoming more apparent every day. As 5G begins rolling out later this year and network communications become even faster and more reliable, so grows our dependency on the services offered in the cloud.
Software developers, even those without a background in networks, need to be able to either leverage the range of choices offered to us by the cloud or create our own services altogether. Fortunately, cloud providers understand that and have begun working on solid entry points into cloud computing for developers.
In this second installment in our series on creating cross-platform AR experiences, we will create a Unity project and install the software from the previous lesson. As you make it through this second setup tutorial for the client side of our project, it may cross your mind that there is a good deal of preparation involved, and you would be right. That said, many of the efforts put into place by cloud providers make the work needed to utilize the cloud much easier than it used to be.
At one point, I remember trying to dig into the network code for a project, and for just about every four lines of regular code there were three lines of network code. Without speaking to the quality of the code, aside from it not only requiring someone to write the network code, the code bloated the project considerably.
APS.NET, or as it is known by most, "DotNet" or ".Net," is a Microsoft-created software framework that has gone a long way toward making the above example obsolete. Now considered one of the more popular standards, DotNet has played a big part in simplifying the ways clients and servers communicate while strengthening security and streamlining the code to accomplish those feats.
Mix this simplification of code with what a cloud service like Microsoft Azure brings to the table (quick and easy creation and setup process through the Azure portal, with clean and clear endpoints to move data) and you have a formula that makes it pretty easy to get basic app ideas cloud-enabled.
That said, let's get our tools extracted and our project built.
Unzip the Repository Clones
Assuming you've already downloaded the MixedRealityToolkit (MRTK) and Project Nether from the previous part of this series, go to the directory you downloaded the files to and unzip each of these toolsets into their own subdirectories.
You may have a different uncompression process than I do since I prefer WinRAR, but there should be zero issues no matter which unzipping software you're using — even Windows' default one.

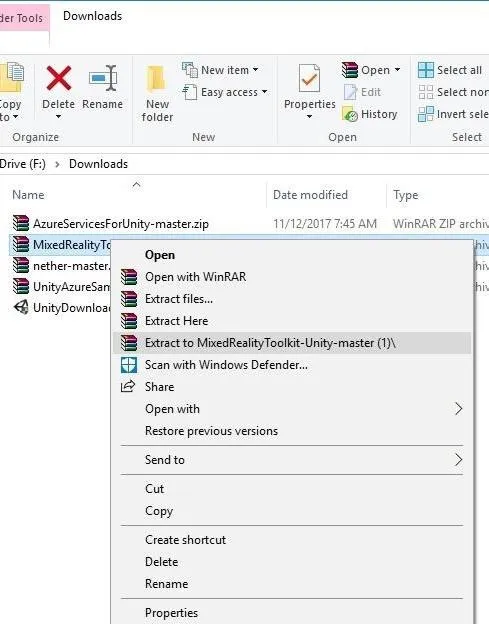
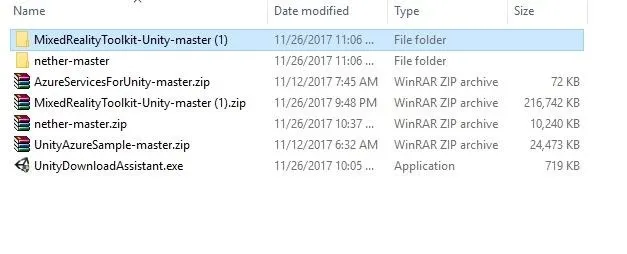
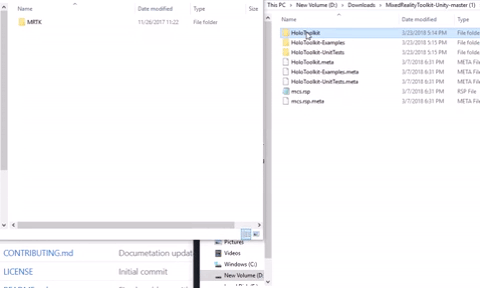
In this case, I extracted both files into my "Downloads" directory, so as you can see in the image below, I have subdirectories that are named after the archive filename.
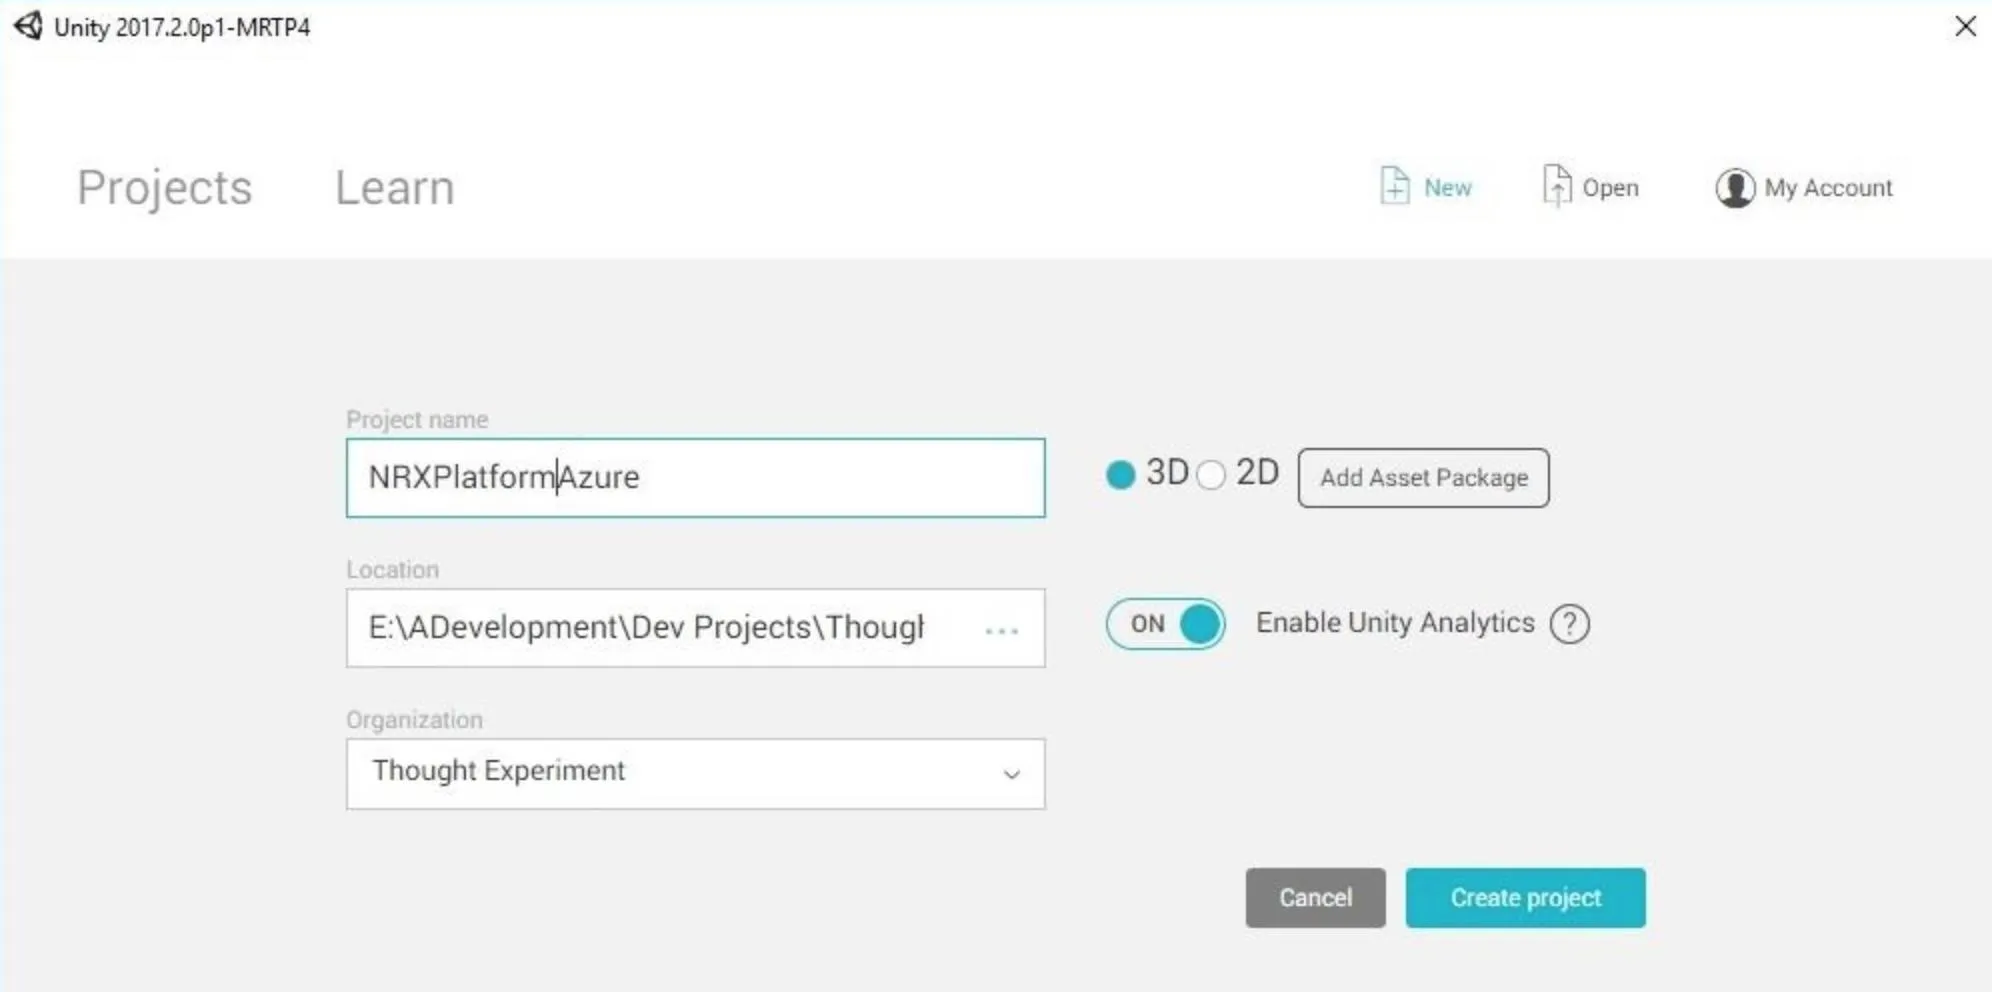
Create a New Project in Unity
Open Unity and create a project named NRXPlatformAzure (or whatever you want to call it).
Import the MRTK into Your Project
The MixedRealityToolkit is an amazing resource for getting started developing for the HoloLens or Windows Mixed Reality headsets. If you begin to do this type of development regularly, you will likely be doing this step often, so it may be worth remembering this process.
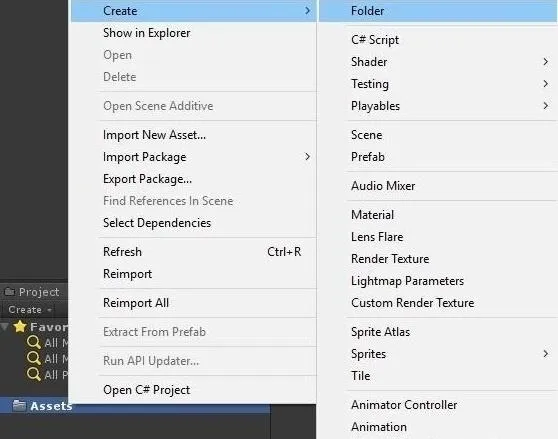
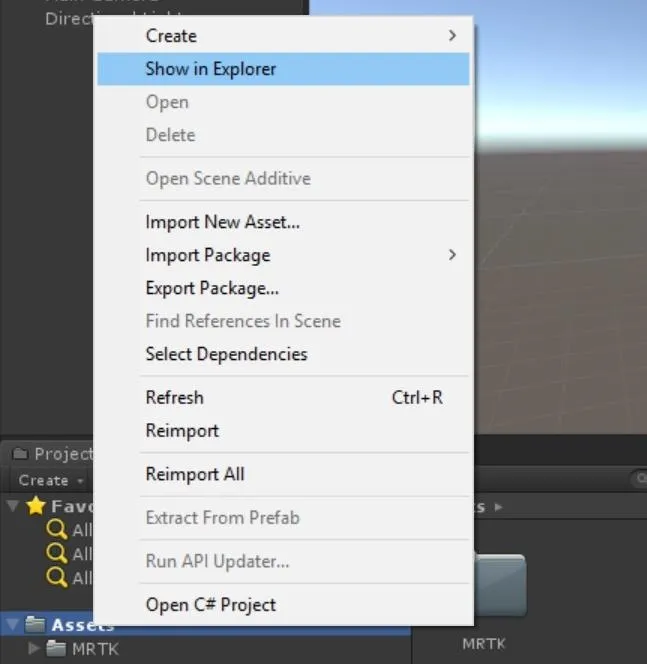
Right-click on the "Assets" folder in the Project window in Unity. Click "Create," then "Folder." Name the new folder MRTK.
Right-click on the new "MRTK" folder, and click on "Show in Explorer." This will bring up a File Explorer window that is already pointing to the directory you will need. Move this window to one side of the screen.
In a separate File Explorer window, press Windows + E on your keyboard to find your downloads directory, then drill down to the "Assets" folder in "MixedRealityToolkit-Unity-master" folder. Move the window to the opposite side of the screen. The purpose here to be able to see both instances File Explorer windows.
Now, select all of the files and folders in the "Assets" folder. If you didn't know already, MixedRealityToolkit used to be called HoloToolkit, so that's what those files are named as such. Next, drag all of the selected files from the window containing the Mixed Reality Toolkit to the to the other window and drop them in the MRTK folder. Alternatively, you could use Control + A to select all the files, hit the Control + C to copy the files, then move to MRTK folder and hit Control + V to paste them.
There really isn't too much to this, and there are a few different ways to get the MRTK installed in your Unity project. Drag and drop is my personal preference.
Import Nether into Your Project
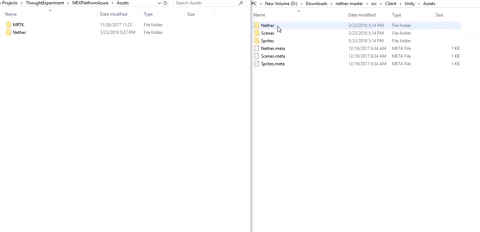
In the File Explorer window with the MRTK folder open that you just copied items into, go back one directory to "Assets," which should now have the "MRTK" directory. Then, create a new folder in there called Nether.
Now in the File Explorer window from our downloads, drill down into the "Assets" folder in nether-master –> scr –> Client –> Unity. Now, select all of the files and folders in there, and using whichever method you prefer from the previous step, copy them to the "Nether" directory in the other window so that you now have "HoloToolkit" and "Nether" folders in there.
And with that, we are done with file structure surgery and can get into Unity and play.
Update the UIScript.Cs Files (Optional)
Authorization systems are a necessary evil in the world we live in. Even if you live in a nice neighborhood and don't feel like you ever have to lock your house or car doors (yes, this is a reality for some people), you set passwords for just about anything computer related. Of course, there is the other side of that issue, and that is having way too many passwords to keep up with since you need a separate password for everything you do. And using the same password over and over is not a good idea.
One practice that has become common in recent years is tying the authorization process to more popular systems like Facebook, Google, and Microsoft. The benefit here is that these technologies provide a token system that allows the user to connect to their account and pass the usage token to the developer.
What makes this step optional is that, if you have the Facebook for Unity stuff already installed, you will not need to do this step. Otherwise, it wants to reference classes that are not installed, thus requiring this step.
For those who do need to follow this step, we are simply going to delete a few lines of code. And these lines of code are relatively obvious as they will contain keywords or variable names with red lines under them.
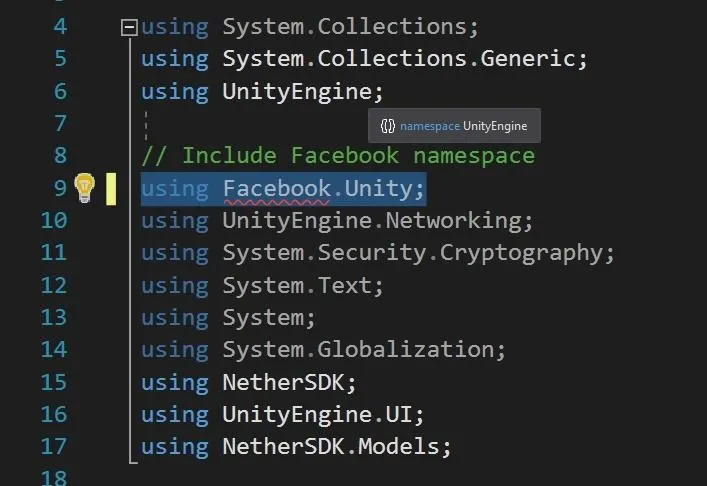
Inside the Unity Project window, find the "UIScript.cs" file and open it in Visual Studio by double-clicking it. Delete the using Facebook.Unity; line in the picture below.
Next, scroll down to the Awake method. Select all of the code inside that function (lines 25–34 in the image below), and delete them.

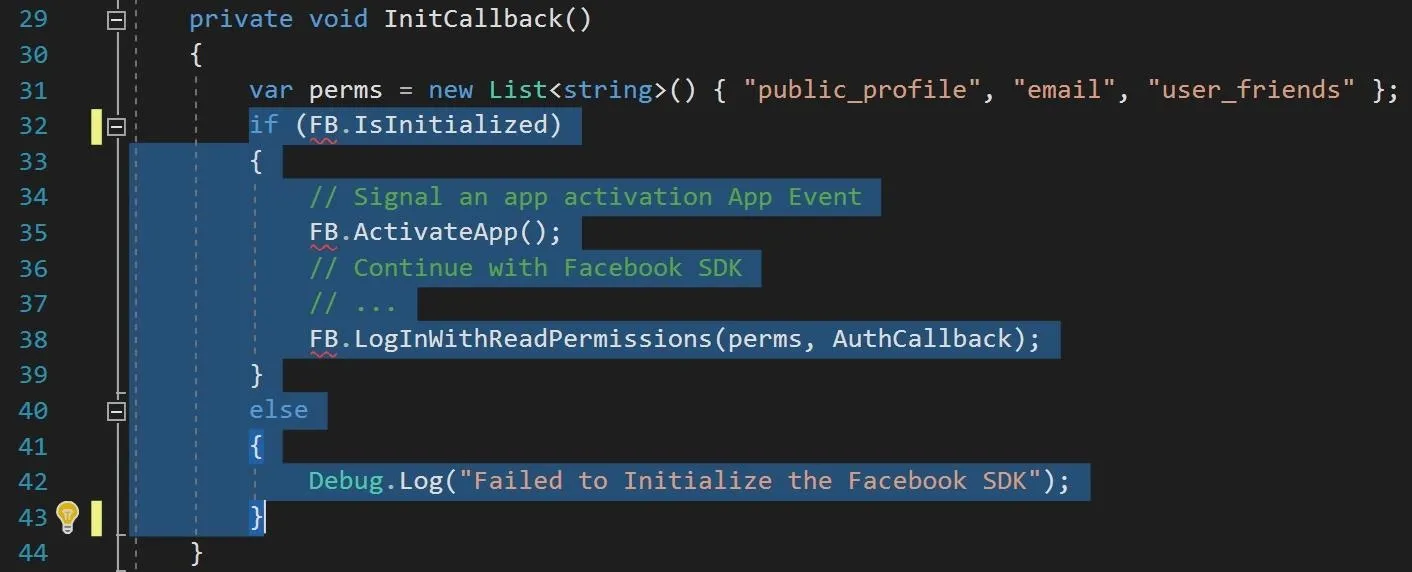
Now, scroll down to the InitCallback method, and delete the code selected in the picture below (lines 32–43).
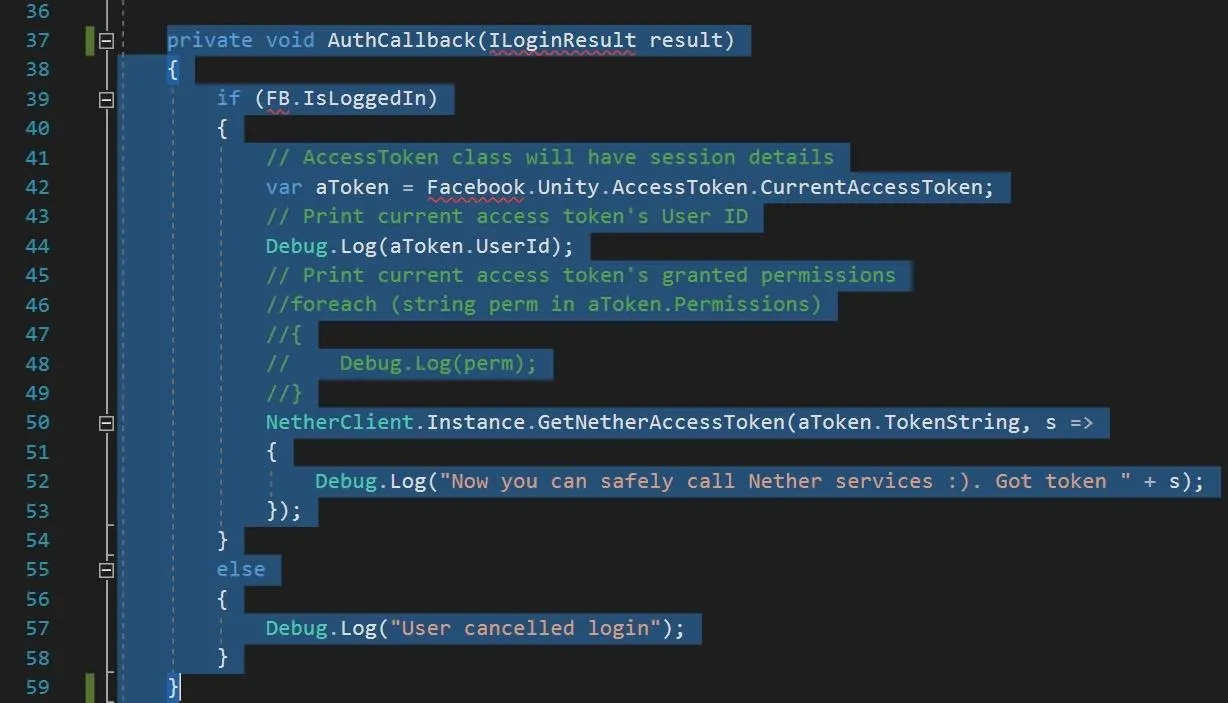
Afterward, delete the entire AuthCallback method (lines 37–59).
Save the New Scene
In order to complete the Mixed Reality Toolkit setup process, we need to have a scene to work with. Scenes are the primary encapsulating workspace for Unity. Though a project in Unity can be made up of many scenes, we will only need one for this series.
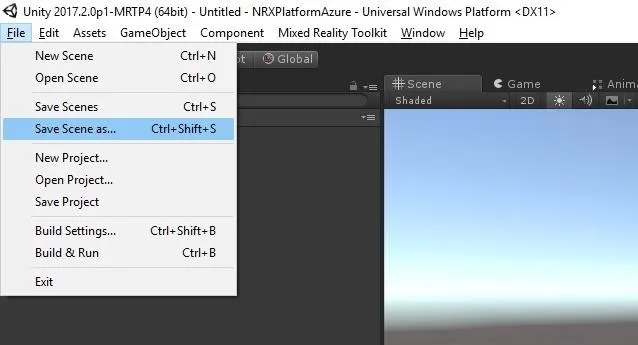
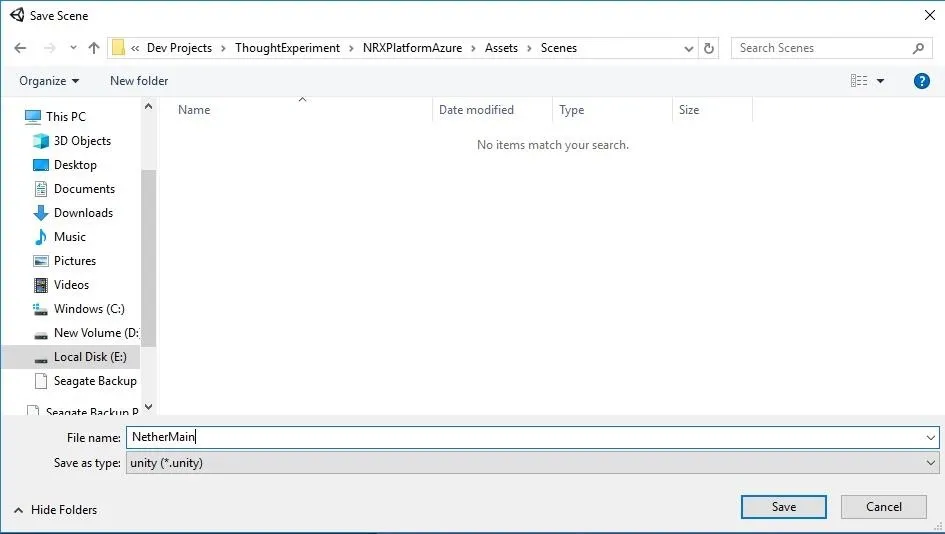
In your Unity projet, click on "File," then "Save Scene as."
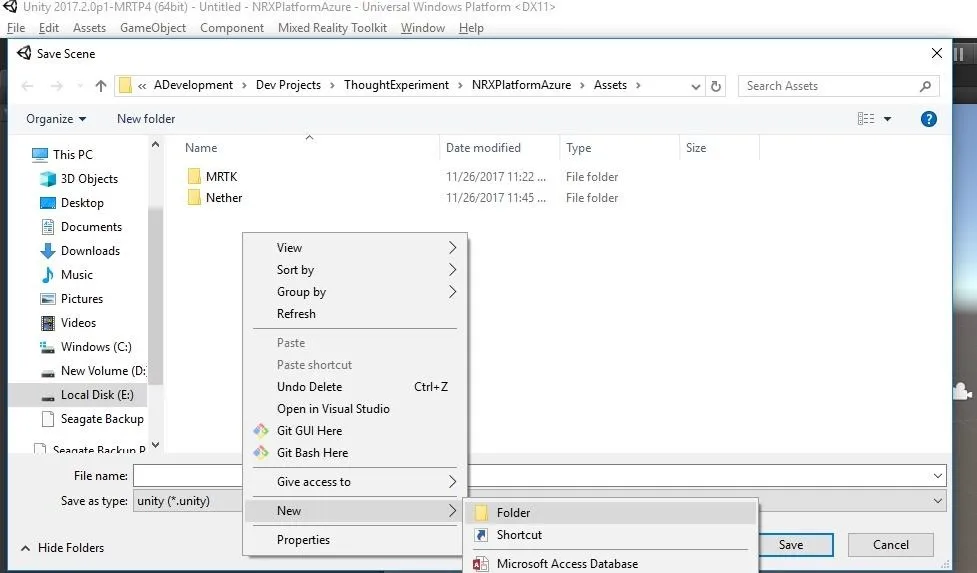
Once the Save Scene window appears (see image below) right-click in the open space in the window, select "New," then "Folder," and name it Scenes. Press return to finish.
In the File name field of the dialog box, name your scene name something that you will remember like NetherMain, and press return.
Configure the Scene to Use the MRTK
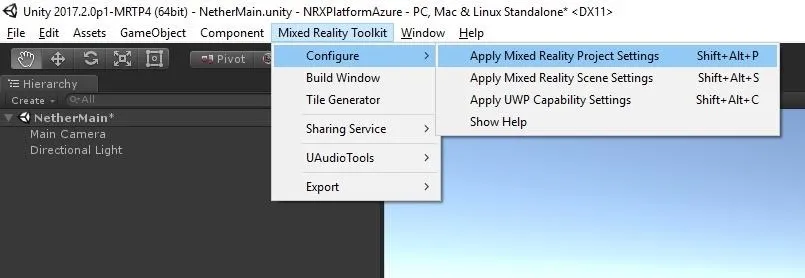
Now we need to go through the process to prepare Unity to use the important elements of the MRTK. While I have previously covered doing this process manually, the community around the MRTK has made it really easy to do from the menu system.
On the main menu, click "Mixed Reality Toolkit," then "Configure," and then "Apply Mixed Reality Project Settings."
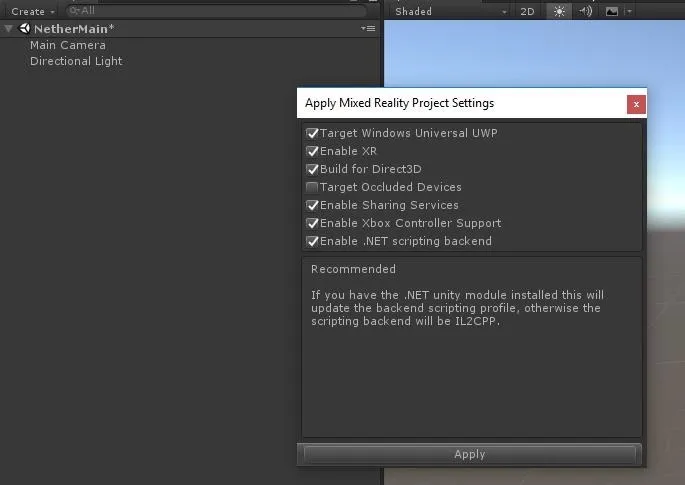
Aside from the defaults in the Apply Mixed Reality Project Settings window, select "Enable Sharing Services" and "Enable Xbox Controller Support," then click the "Apply" button.
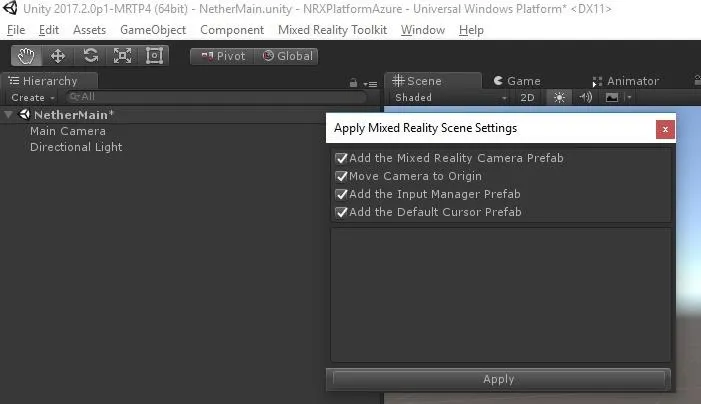
On the main menu, click "Mixed Reality Toolkit," click "Configure," and then "Apply Mixed Reality Scene Settings."
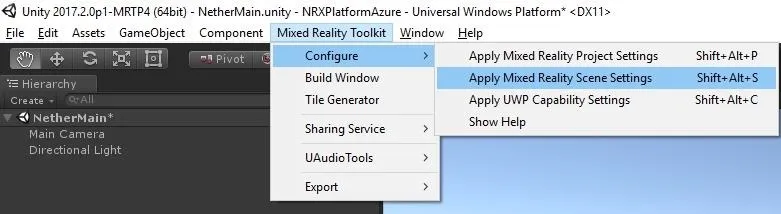
When the Apply Mixed Reality Scene Settings window appears, click the "Apply" button.
Alright, our initial client-side set up is done. In the next lesson, we will then create an Azure account and get our servers set up on the Azure portal. See you then!
- Follow Next Reality on Facebook, Twitter, and YouTube
- Sign up for our new Next Reality newsletter
- Follow WonderHowTo on Facebook, Twitter, Pinterest, and Google+
Cover image, screenshots, and GIFs by Jason Odom/Next Reality


Comments
Be the first, drop a comment!