


Whether you're a veteran augmented reality developer looking for a quick access point to add a new platform to your arsenal or just getting started with your first AR head-mounted display, get ready to start developing for the Meta 2.
In this short breakdown, we'll use the Unity engine as our core. In terms of AR development, Unity has become the unifying standard. A benefit of this standard is that (much like Unity has done for game development), eventually, you'll be able to develop an application once and export it to any AR platform from this smart and easy-to-digest 3D engine.
"Thank the old gods and the new for Unity" is a phrase I find myself saying often.
What You Will Learn:
This tutorial has been created to get you started on the basics. With that in mind, after installing the necessary software, we're going to import a 3D model and replace a texture from the original model. Then we'll bring in the minimum necessary components that will allow the Meta 2 headset to work in a standalone Unity application.
In this tutorial, in order to keep the process of getting started as basic as possible, we won't be covering things like input, sound, or any other of a number of possible development topics. (Those might be covered in subsequent tutorials.)
Also, there will be no need to understand code to make it through this tutorial, since there's not a single line of it that we'll need to deal with in this case. However, I'm assuming that you at least have some basic knowledge of Windows navigation and operation (understanding of folders, navigation, ZIP files, etc.).
What You Will Need:
- Meta 2 SDK: Version 2.4.1 is the version available as of this writing.
- Unity 2017.2.1: Version 5.6 is the officially supported version, but the Meta 2 seems to work fine with 2017.2.1.
- A billboard model from TurboSquid: As of this writing, the one linked is a free model. However, if for some reason the model is no longer free when you try this, any other textured billboard model will do.
- Texture for our billboard: Right-click on the image below and choose "Save Image As." Find a directory to save this to that is easy to access for later and click the "Save" button.

Save this texture for the billboard.
Once everything above is downloaded and stored somewhere quick and easy to get to, you should be ready to get started.
Install the Software
If you've purchased a Meta 2, you likely have already installed the Meta 2 SDK, as it's the only way to really play with the headset at this point. But just in case you haven't, you'll need to go ahead and go through the installation process.
After you double-click on the Meta 2 SDK installer file you've downloaded, the installation window will appear. When the install options dialog opens, although you don't need Unity 5.6.0f3 (since we downloaded a newer version), make sure the "Meta Unity SDK" option is selected.

Go ahead and follow the on-screen prompts to install Unity, assuming you haven't already. During the Unity installation process, use the default installation options. Depending on the version of the installer you're using, it can take a little while to download everything. At the end of the installation process, leave the "Launch Unity" option selected and continue.
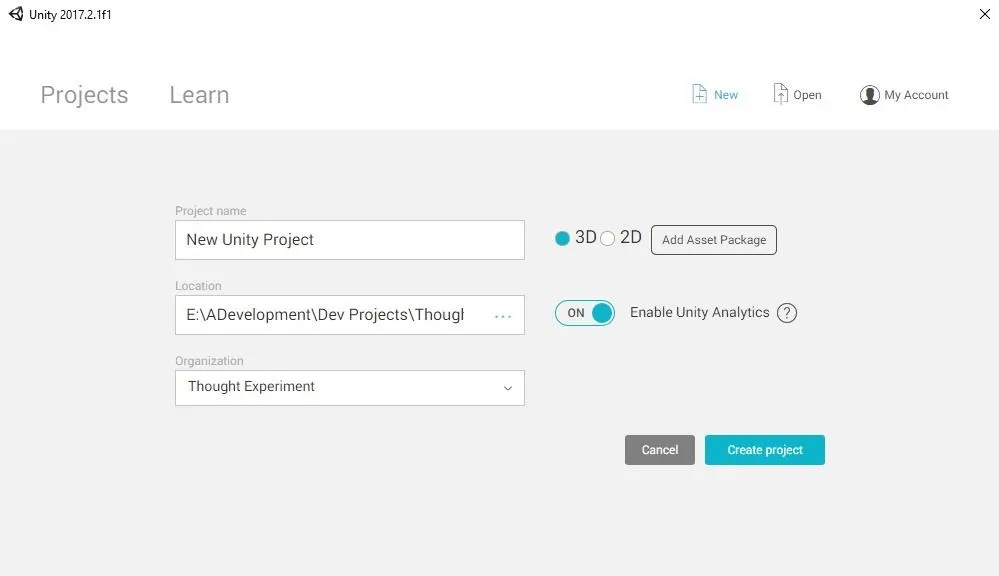
As Unity Launches, you will need to log into your account. If this is your first time using Unity, you'll need to create an account. While Unity does have a free tier, it also has paid subscription tiers. If you need help figuring out that process, you can learn more about that in our guide on getting set up for Windows Mixed Reality developing (see Step 6).
Once Unity is loaded, click on the "New" button. Name the project "NR Meta Tutorial 1" (or something like that) and we are ready to get the project started. Next, click "Create project."
Import the Meta 2 SDK into a Fresh Project
Meta provides a Unity-specific package that will need to be installed in any Unity-based project that we would build for the Meta 2. This package contains everything you need to get going, including code, library files, and examples.
A quick aside: As someone who spends a good portion of my days using Unity software, the screen layout I use is very different from the default layout (besides just the color, which comes as an option for users with a subscription). That said, I have all of the same windows available, they're just in different places.
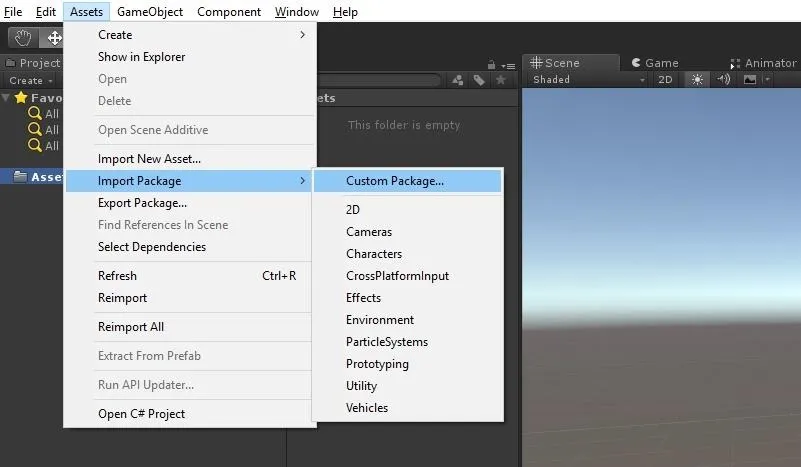
In the main menu, click on the "Assets" option, select "Import Package," then click on "Custom Package."
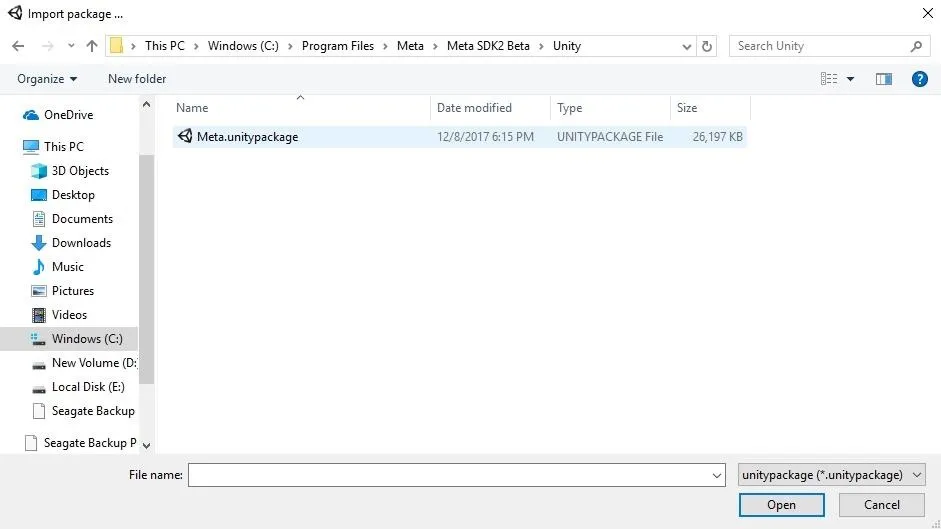
When the Import Package window appears, navigate to the directory where Meta was installed. If you left it on the defaults settings, the location should be:
C:\Windows\Program Files\Meta\Meta SDK2 Beta\Unity
Select the Meta.unitypackage that is there and click on the "Open" button.
Then, the Import Unity Package window will appear. After this happens, click on the "Import" button.

Add the Meta 2 Camera
Now we'll make a few changes to the settings and set up our camera.
In AR development, as with video games, the user's view is created through a virtual camera inside the engine. It is, simply put, a pyramid-shaped object that tells the engine what the output that's being sent to the user's view should render.
What separates an AR camera from what one might use in a 3D game is that AR devices are typically sending sensor information and other forms of input data to the device (in video games, the input devices are typically a game controller). In most AR development tools, a custom camera is made to accept that data and help the program use it to accomplish whatever the developer is trying to do.
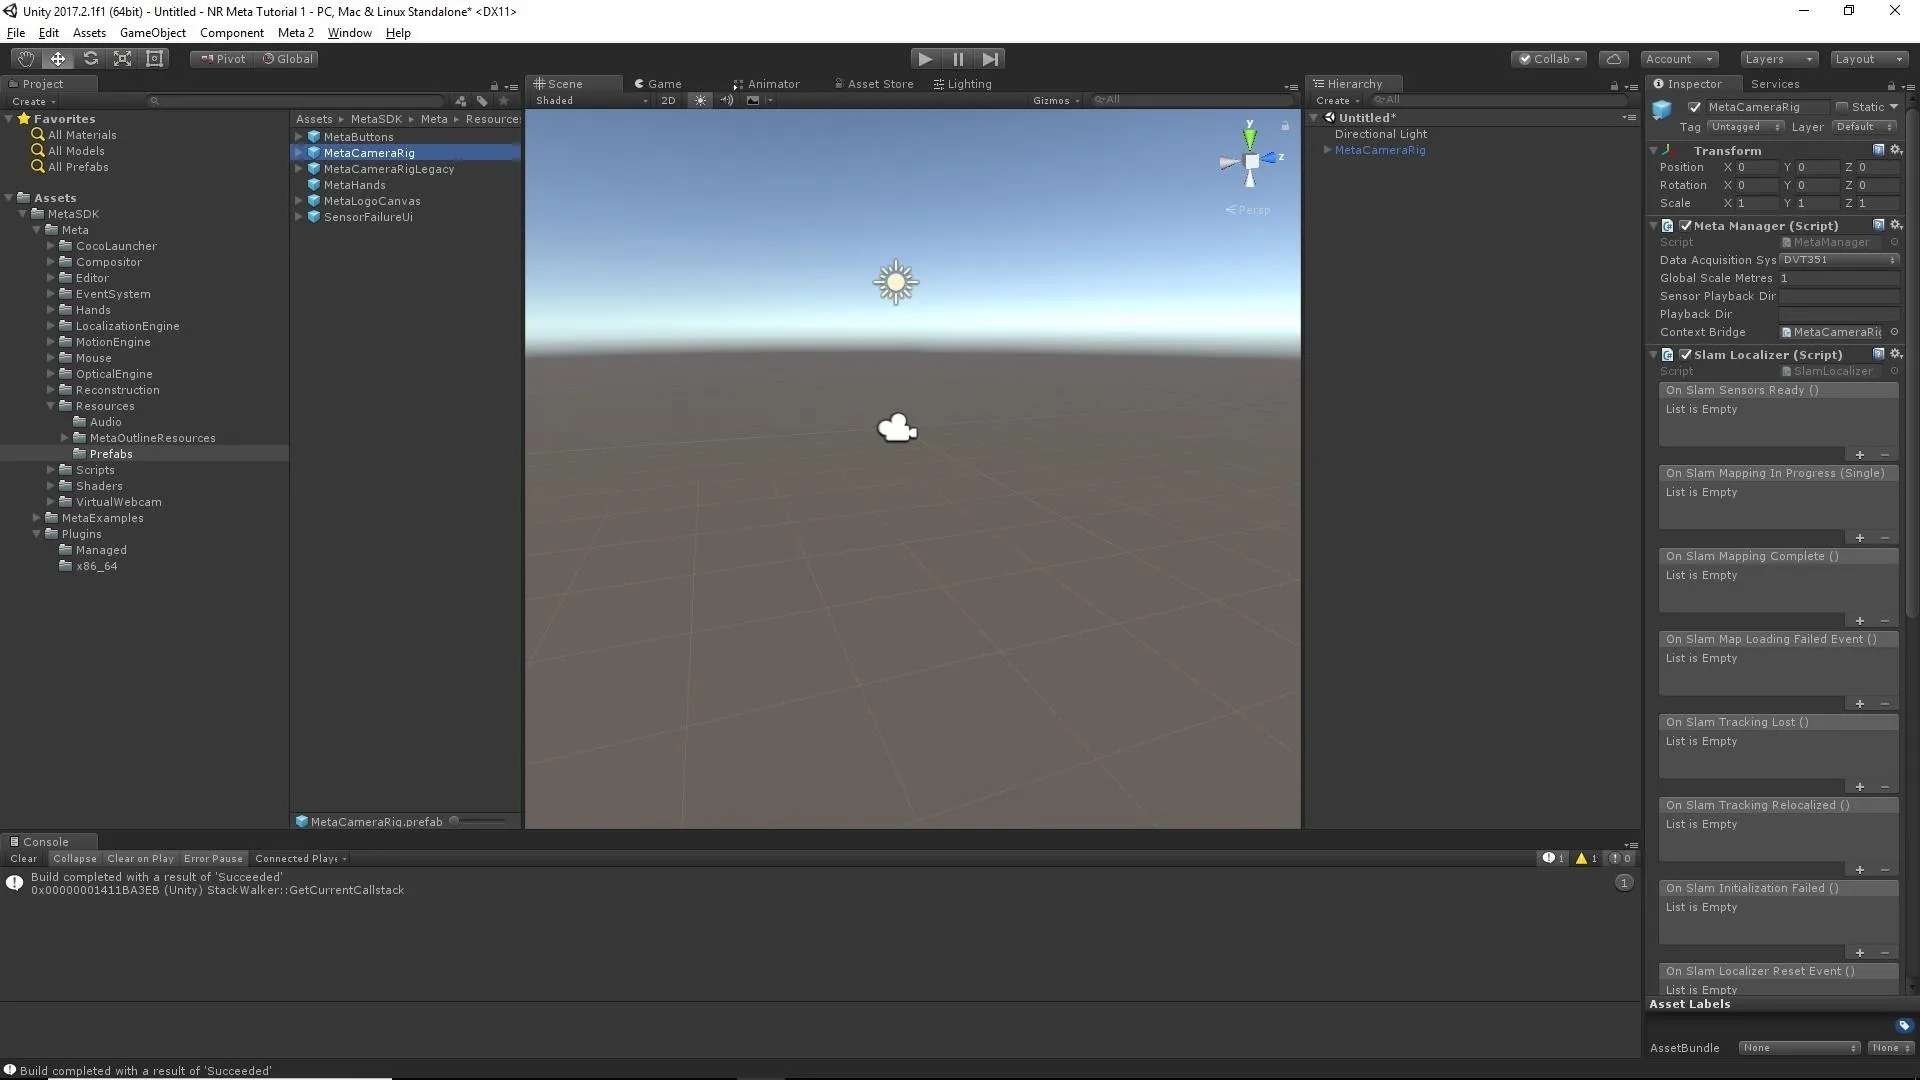
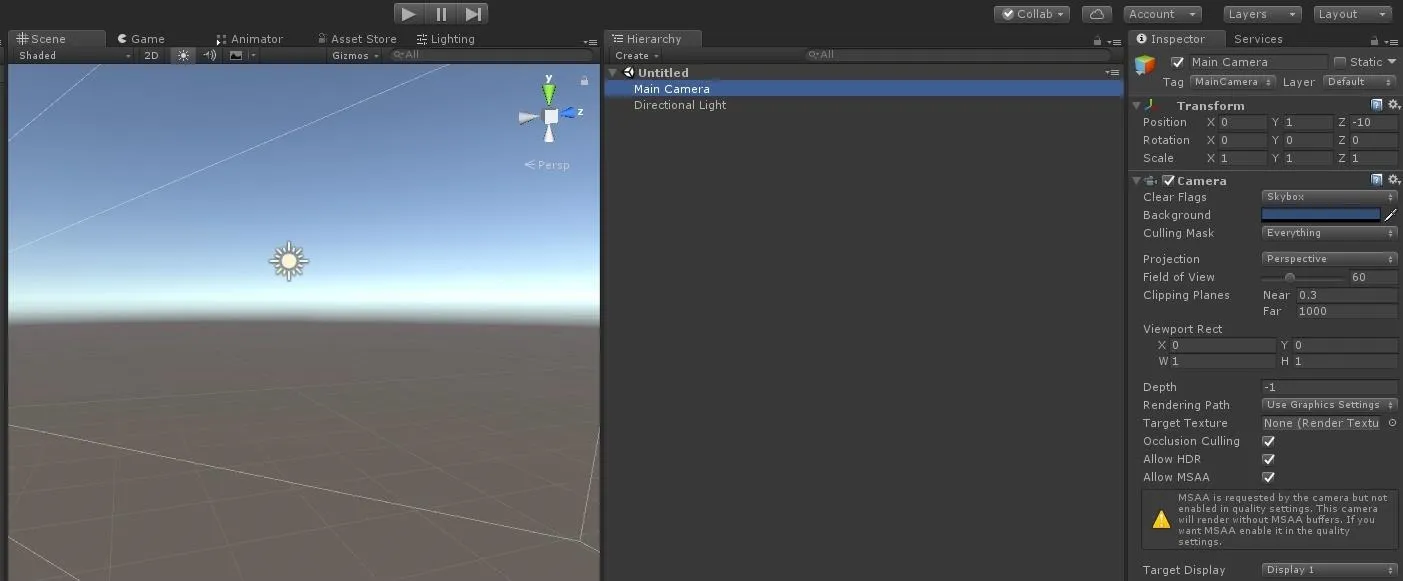
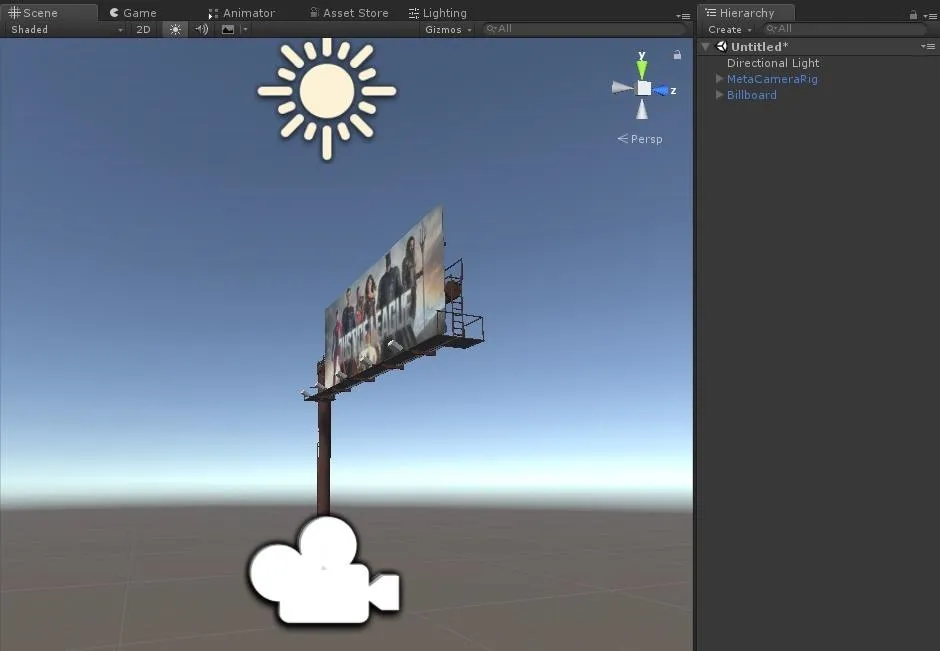
In the Hierarchy window, select the object named "Main Camera." Then press the "Delete" key on your keyboard.
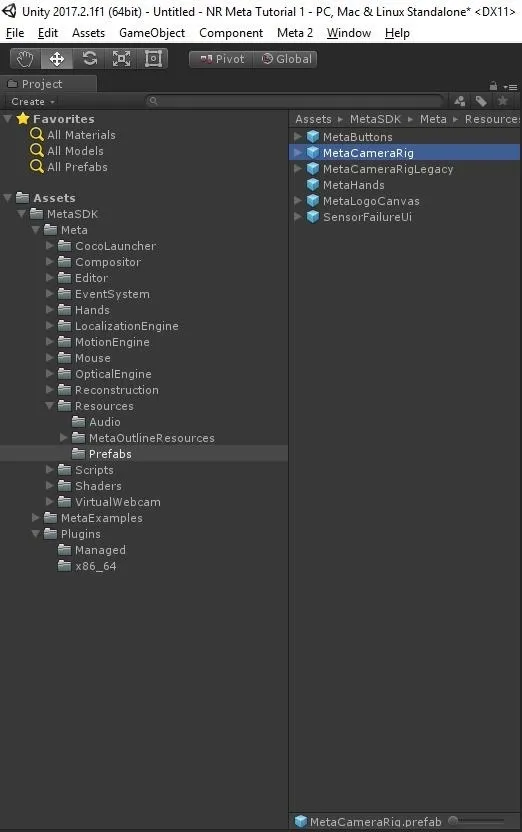
Now look in the Project window. This is the view that shows us all of our asset files for the project (our sounds, textures, 3D meshes, prefabs, script files, etc.). Expand the "MetaSDK" folder by clicking on the small arrow next to it. Then do the same for the "Meta" and "Resources" folders. Finally, click on the "Prefabs" folder. Next, select the MetaCameraRig object.
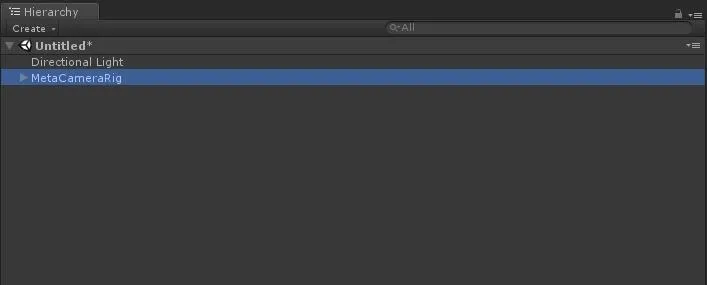
Drag the selected object over to the Hierarchy window and release it.
Adjust the Project Settings
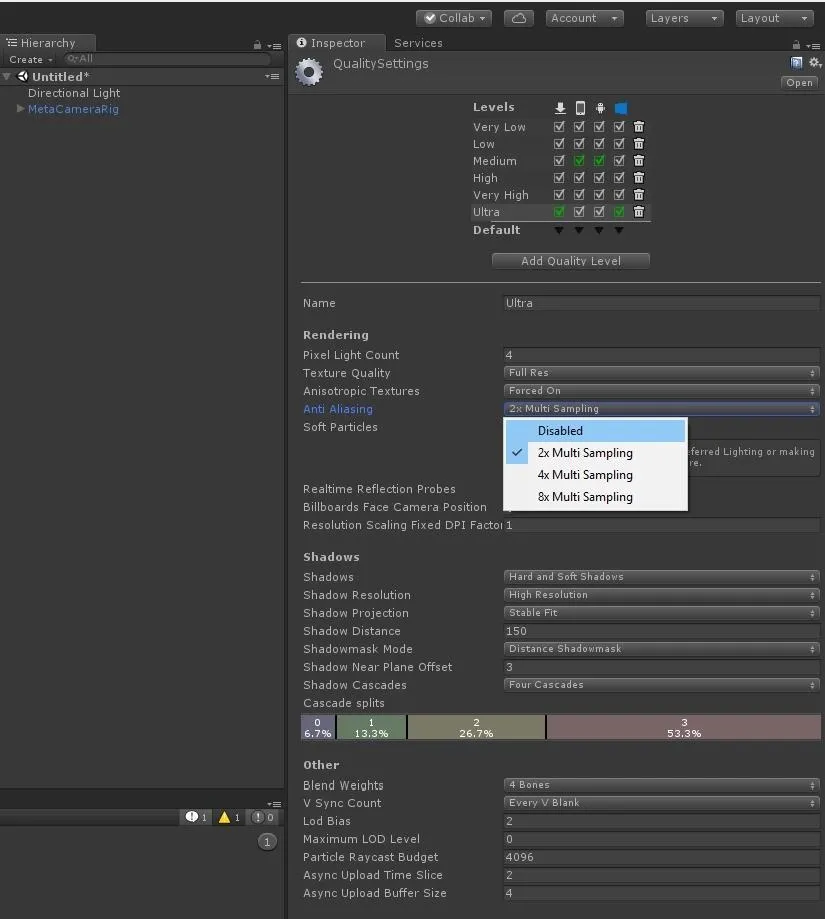
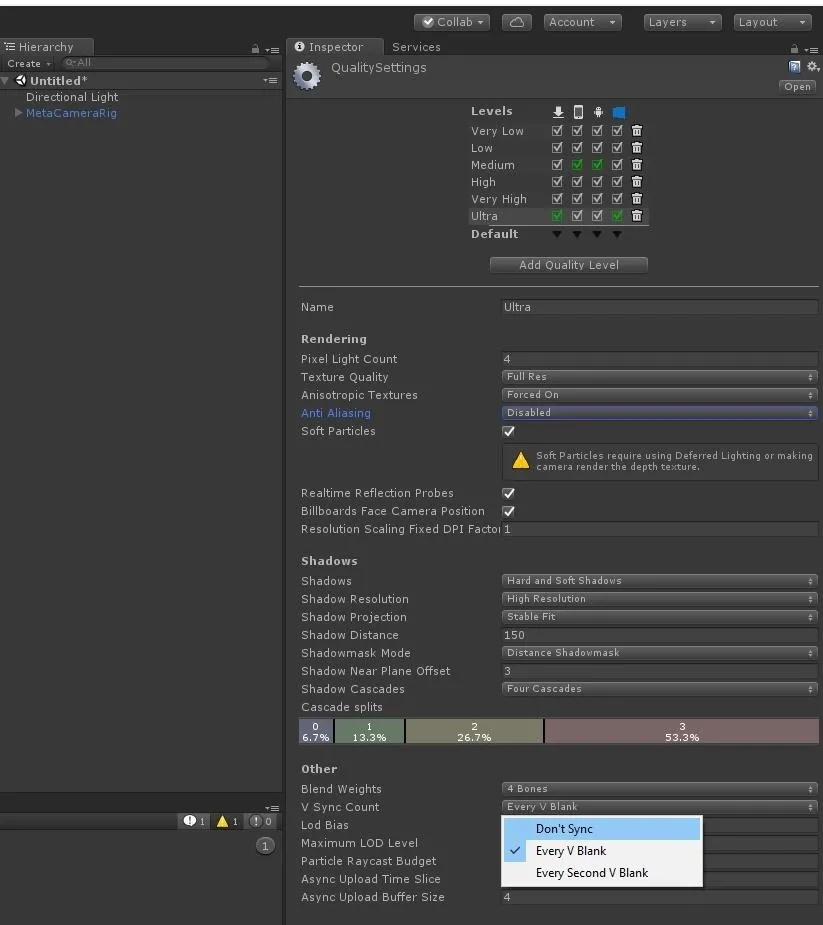
As Meta implements its own rendering pipeline, there are a few settings that need to be turned off so they don't conflict with Unity's rendering pipeline. So now we'll make a few quick adjustments to the rendering settings. Specifically, the Anti-Aliasing and V-Sync.
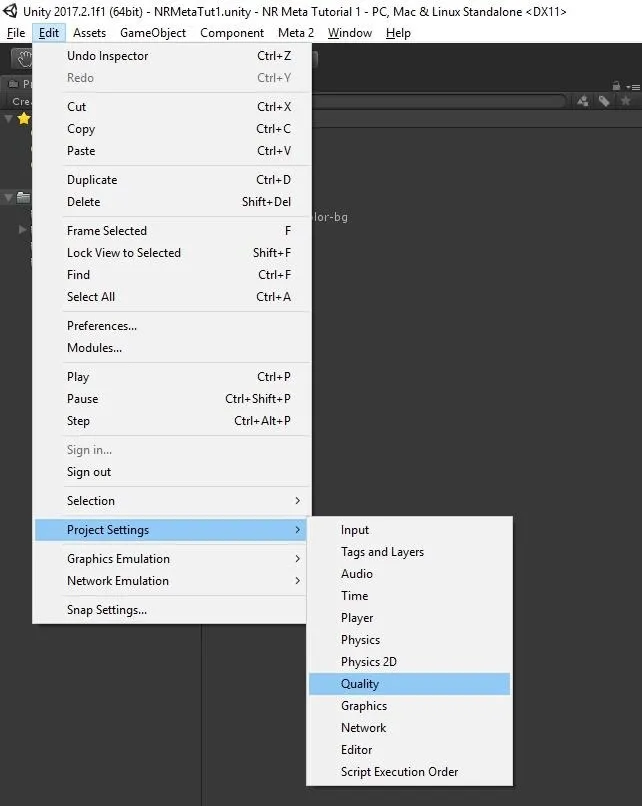
From the main menu, go to Edit -> Project Settings -> Quality.
The Quality Settings window will appear in the Inspector window. Look for the Anti Aliasing option, click on the drop-down bar, then select "Disabled."
Move down further, to the V Sync Count label, and select the drop-down bar and change the option to "Don't Sync."
Import Our Model
Alright, the setup is now finished. Now we need to import our model and texture, so we can display them when our application starts. In order to do that, be sure to extract the ZIP file that was downloaded into a folder, then copy the Next Reality graphic as mentioned above into the same folder.
Once complete, the folder should look something like this:
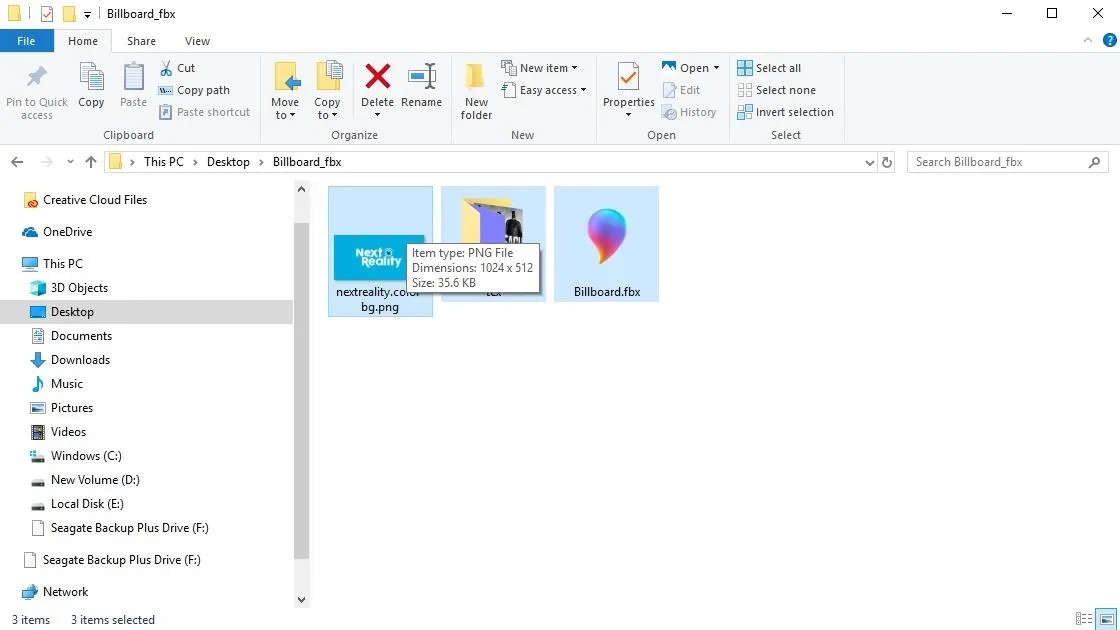
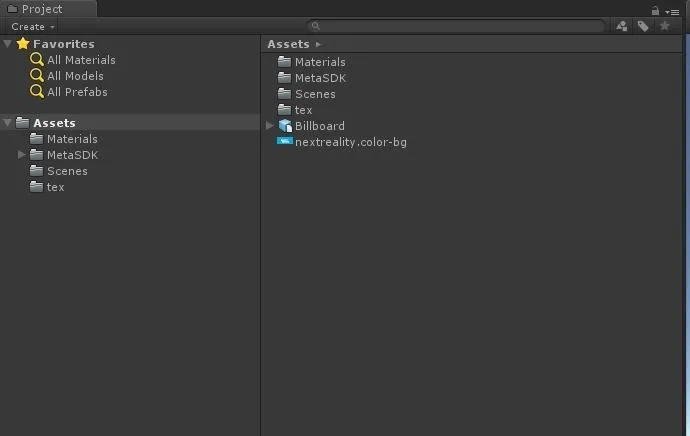
Now with everything selected, as seen in the picture above, drag and drop all the files into the "Assets" folder of the Project view. Once it has finished copying all of the files into your project, your Project view should have a few new additions.
Add the Billboard to the Scene
Now that the billboard is in Unity, let's add it to our scene.
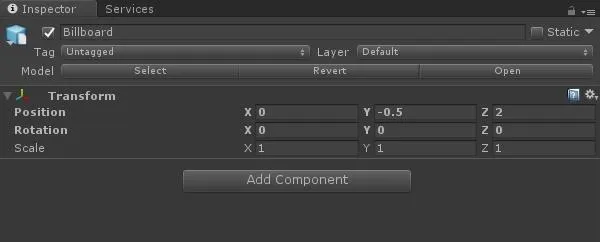
Simply drag the "Billboard" object in the Project view over to the Hierarchy view and drop it. The billboard should appear in the Scene view. At the same time, "Billboard" should be added to the list in the Hierarchy window.
With the Billboard object selected, look at the Inspector window and inside its Transform component, change the position of the y parameter to "-0.5" and the position of the z parameter to "2." These are just a couple of quick adjustments to get the object positioned in front of the camera, instead of directly on top of it.
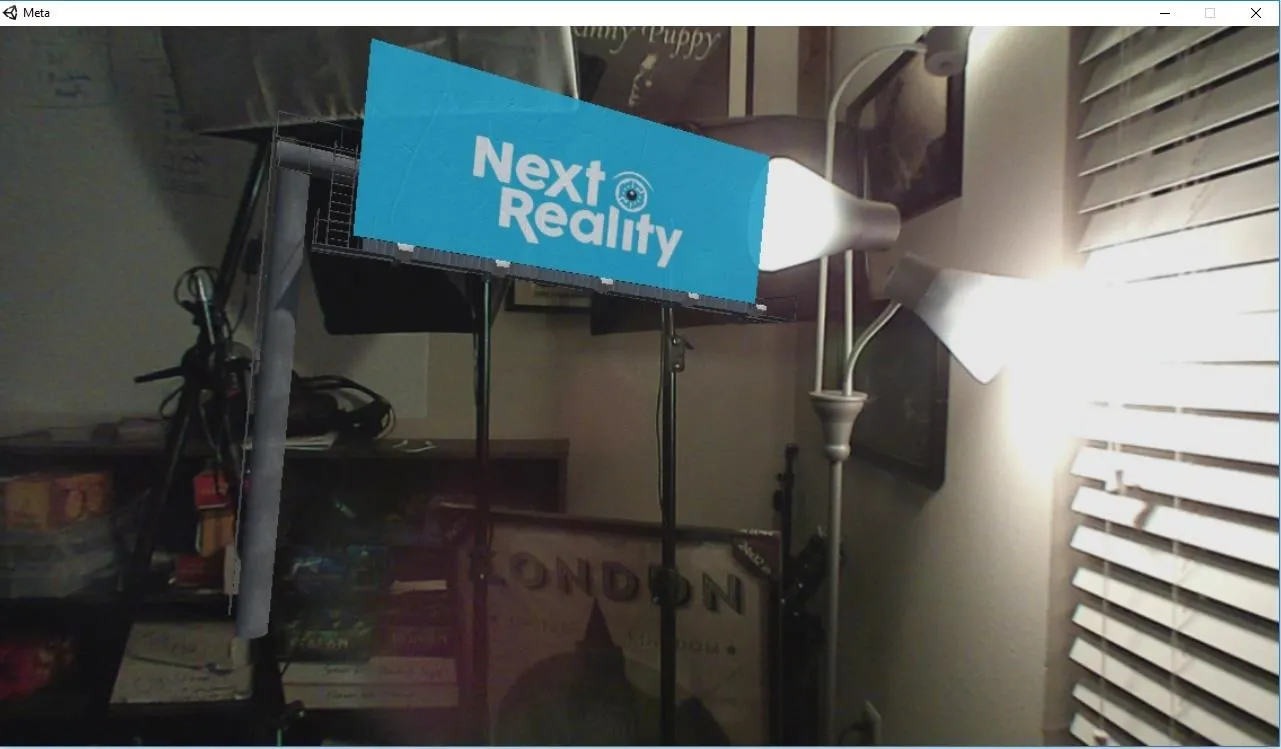
Change the Texture
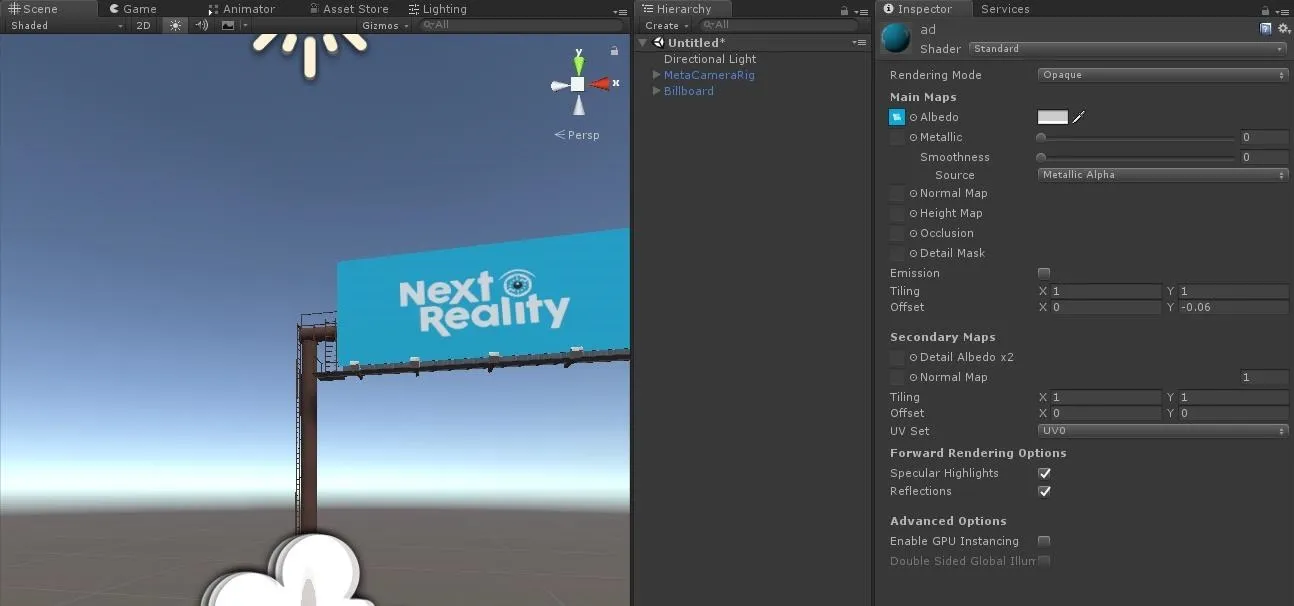
The model that we downloaded from TurboSquid is a billboard with an ad for the Justice League movie. In order to change the ad, we need to change the texture (or graphic image) associated with that part of the model. Fortunately, this particular object is made up of a bunch of small objects. Each has its own texture, so all we need to do is replace the texture associated with the ad itself. It will take just a few clicks of the mouse to accomplish this.
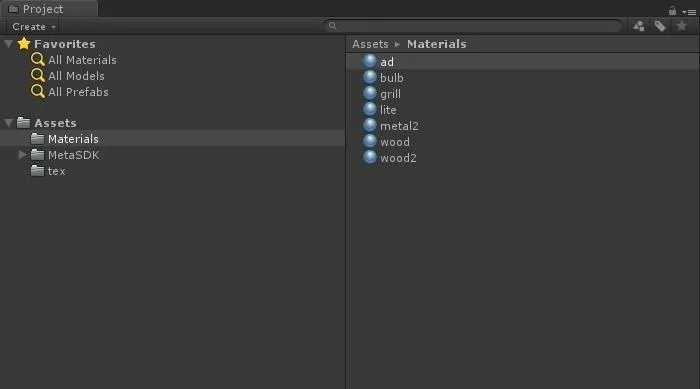
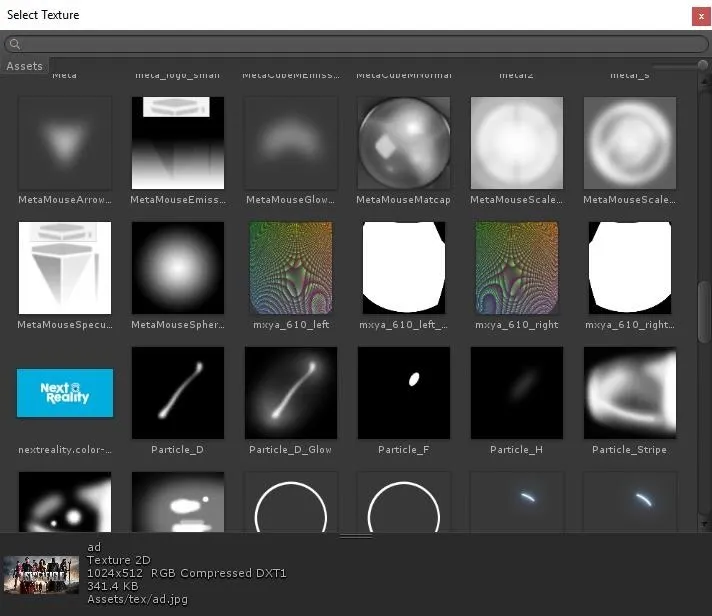
In the Project window, select the "Materials" directory, then click on the "ad" material.
In the Inspector window under the Main Maps heading, look at the Albedo label. This is the color information of a texture. In our case, the Justice League ad. Click on the small circle between the label and the tiny thumbnail to bring up the texture picker.
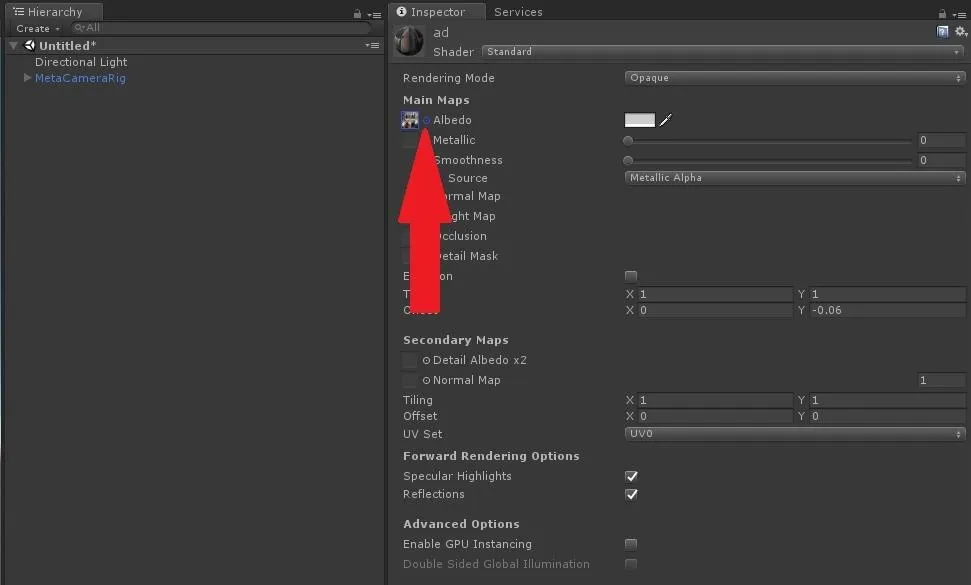
In the Select Texture window, scroll through and find "nextreality.color-bg" and click on it.
In an instant, our billboard ad is transformed.
Build & Run the Application
Alright, now that we have everything in our application that we need. It's time to build and run the app. But before we can do that, we need to save our scene. Simple enough.
Click on File -> Save Scene or press the Ctrl + S keyboard shortcut and name the scene "NRMetaTut."
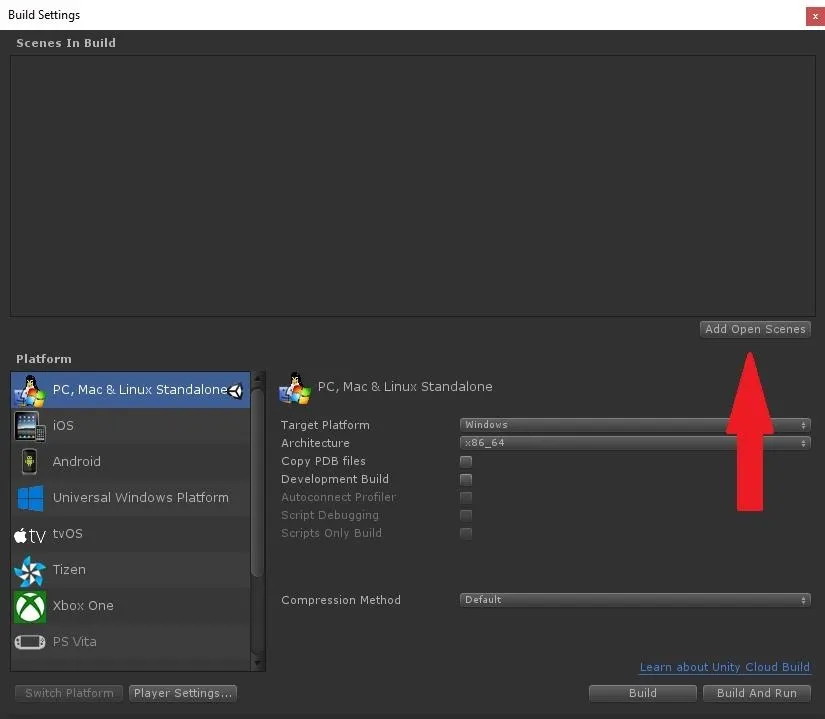
Next, we need to add our scene to our Build Settings.
A single Unity program can be made from a large number of scenes. At the end of a project, there will likely be test scenes that you don't want to delete but also don't want to include in your final build. So here's the solution to that issue.
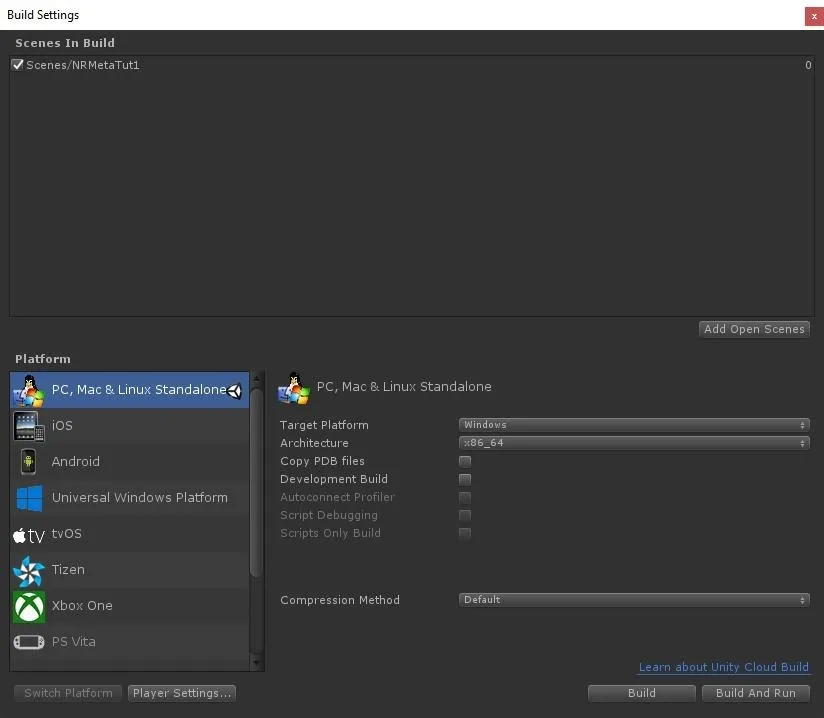
Click on File -> Build Settings to bring up the Build Settings window. Click "Add Open Scenes." As the label implies, it will add the currently open scene(s) to be built into the finished program.
Once our scene is included in the Scenes In Build section of the window, click on the "Build And Run" button to see it go.
Congrats on your first Meta 2 application!
If this is your first AR application, welcome. Let this be a jumping point for bigger and better things.
A Quick Recap
In this tutorial, we learned how to get a fresh Meta 2 project using Unity started. Once the setup process was completed, we added an object and changed one of its textures. We were then able to build the application and try out the Meta 2 with our own creation.
If you wanted to continue building on this, the next steps would be creating interaction through taking input of various types. Keep an eye out for more tutorials on the Meta 2 in the near future, as we might just show you how to do that!
- Follow Next Reality on Facebook, Twitter, Instagram, YouTube, and Flipboard
- Sign up for our new Next Reality newsletter
- Follow WonderHowTo on Facebook, Twitter, Pinterest, and Flipboard
Cover image and screenshots by Jason Odom/Next Reality


Comments
Be the first, drop a comment!