


Way back, life on the range was tough and unforgiving for a HoloLens developer. Air-tap training was cutting edge and actions to move holograms not called "TapToPlace" were exotic and greeted with skepticism. The year was 2016, and developers had to deploy to their devices to test things as simple as gauging a cube's size in real space. Minutes to hours a week were lost to staring at Visual Studio's blue progress bar.
That all changed when Holographic Remoting was introduced later that year in part as a tool to help speed up development. This new feature would allow developers to play a scene in Unity and see it in real time through their HoloLens. Developers (and designers) now had the ability to rapidly test, iterate, and experiment directly in their device all without leaving the comfort of their Unity windows. A few of the many beneficiaries of these abilities included menu layout construction, gesture sensitivity tuning, and end user comfort enhancements.
This tool has, with great reason, become indispensable for cutting the time and cost of building apps and demos for HoloLens. In my travels, however, I'm still finding a large number of people yet to implement this feature in their pipelines. Thus, this week's tutorial was born.
Set Up the Basics
This tutorial uses Unity 5.6 and the May 3, 2017, version of HoloToolkit, which you can directly download by clicking here.
Once you have created a new project, import the HoloToolkit. Now we can use the toolkit's Configure options to get us up and running quickly. For this to work, you will first want to save the scene and add it to the "Scenes In Build" window under File -> Build Settings.
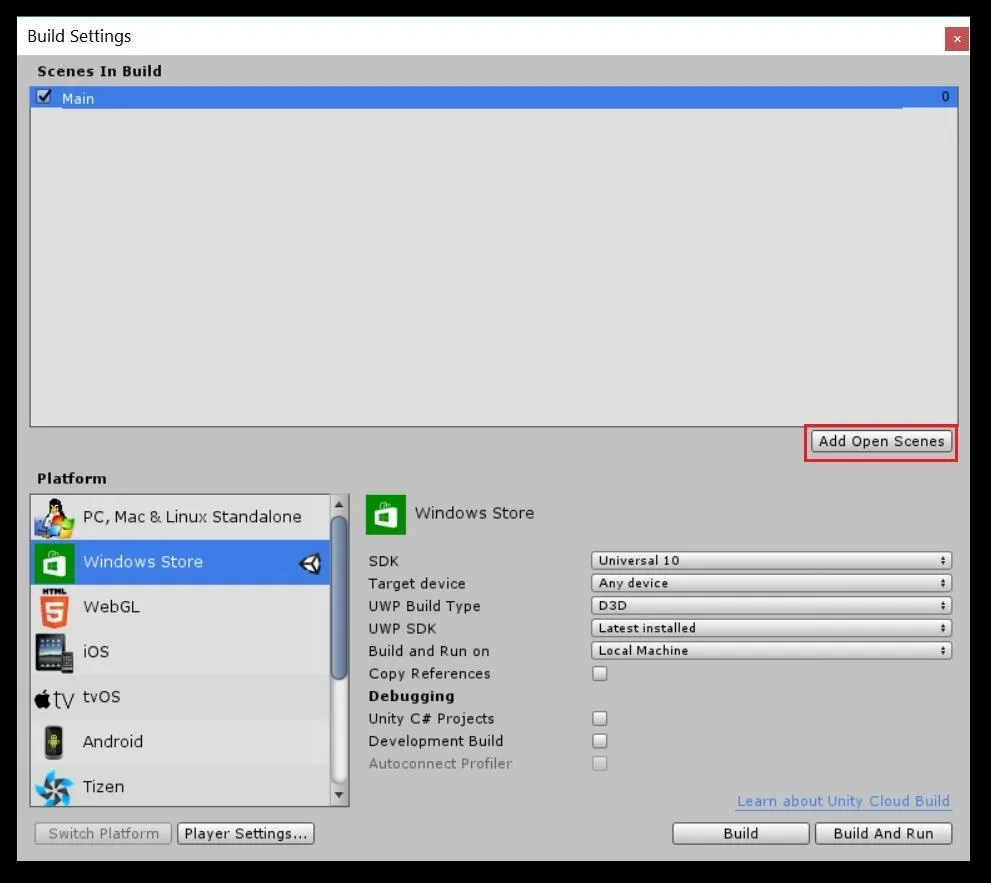
If we did not do this, the next part of this step would simply be discarded upon reloading the project.
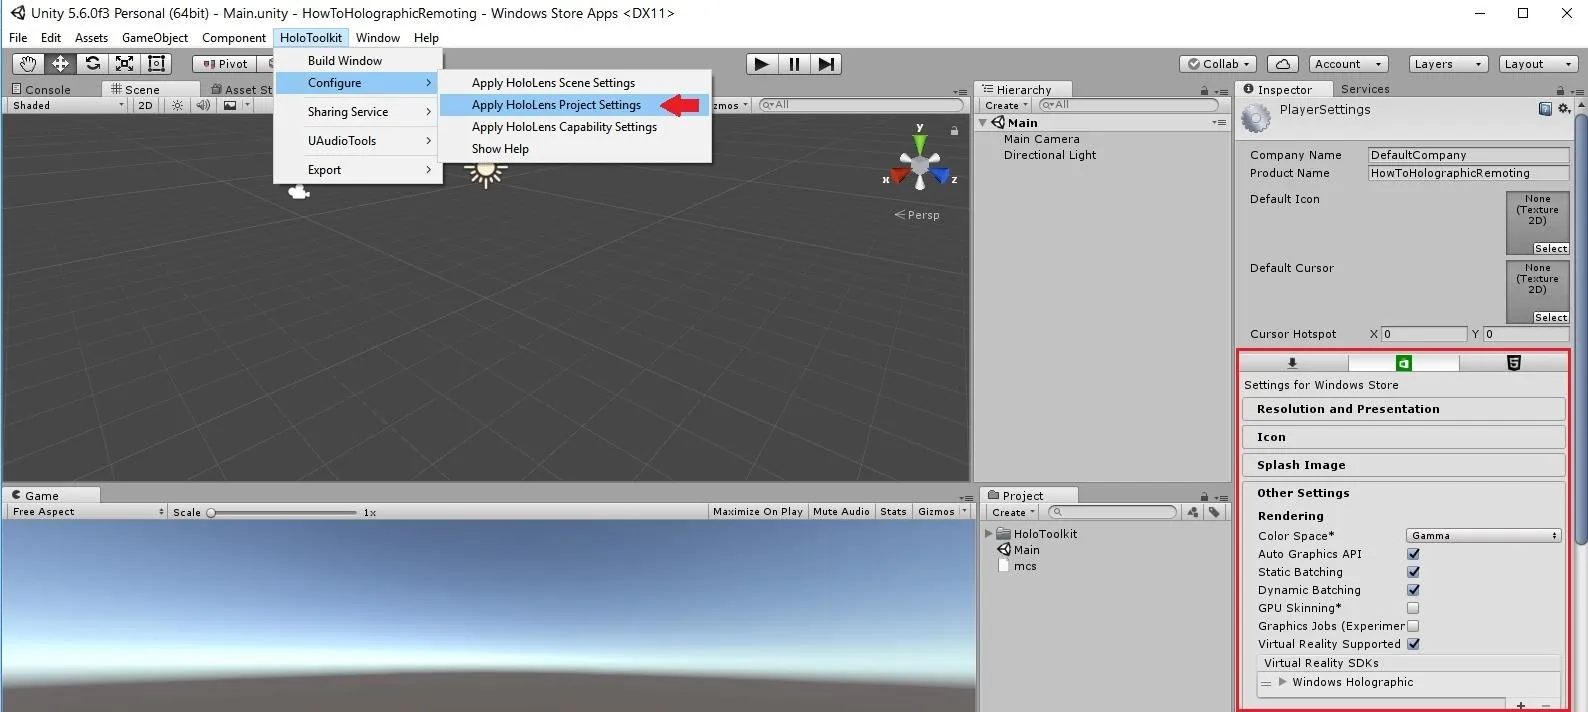
Next, we will want to prep our project settings by selecting HoloToolkit -> Configure -> Apply HoloLens Project Settings. All four boxes should be checked by default. Click the "Apply" button. Click "Yes" when prompted by the "Project reload required!" popup. Your settings should now appear similar to the image below.
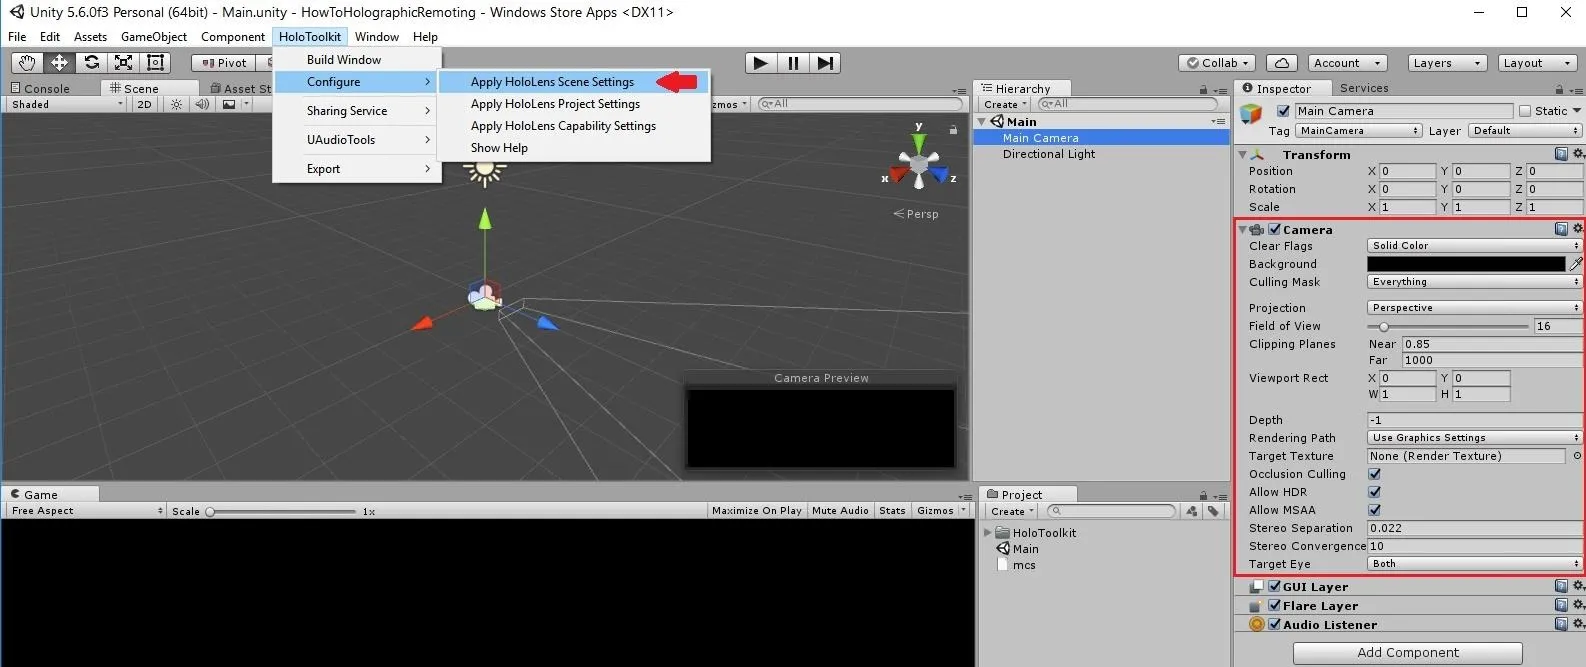
Now apply our scene settings by selecting HoloToolkit -> Configure -> Apply HoloLens Scene Settings. You should see the following settings in your Main Camera.
Download Required App
For us to be able to use the remoting feature, we will need to download and install the Holographic Remoting Player application from the Windows Store to our HoloLens.
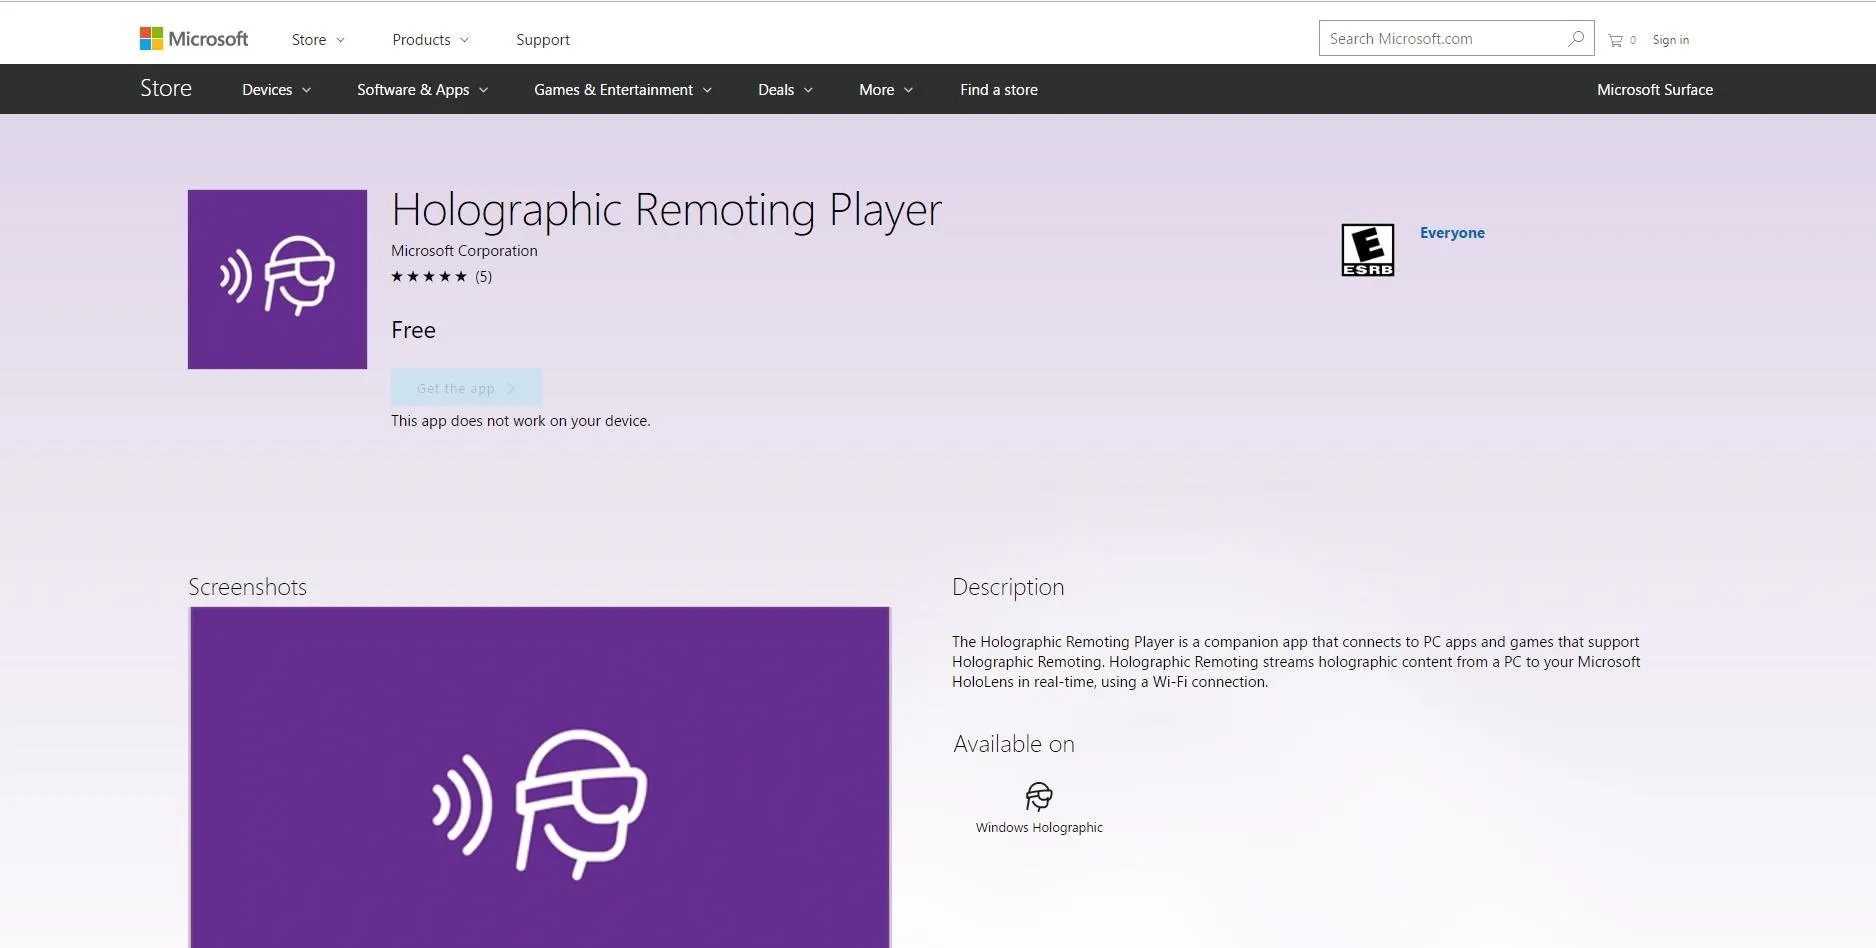
It's rated "E" for Everyone. Seriously, everyone should be using this.
Create a Simple Scene
To be sure the remoting is working, we will first need to add something to our scene for reference. We'll keep it simple.
First, create a primitive object and set its Position (0, 0, 2) and Scale (0.25, 0.25, 0.25). Click "Add Component" and add the "Hand Draggable" script.
Now, drag the SpatialMapping prefab from HoloToolkit -> SpatialMapping -> Prefabs folder in the Project window into the Hierarchy window. Do the same for the InputManager prefab in the HoloToolkit -> Input -> Prefabs folder and the Cursor prefab in the HoloToolkit -> Input -> Prefabs -> Cursor folder.
Launch the Holographic Remoting Player
We are ready to attempt a connection. Check that both your computer and your HoloLens are on the same Wi-Fi network. If so, launch the remoting app from the HoloLens menu.
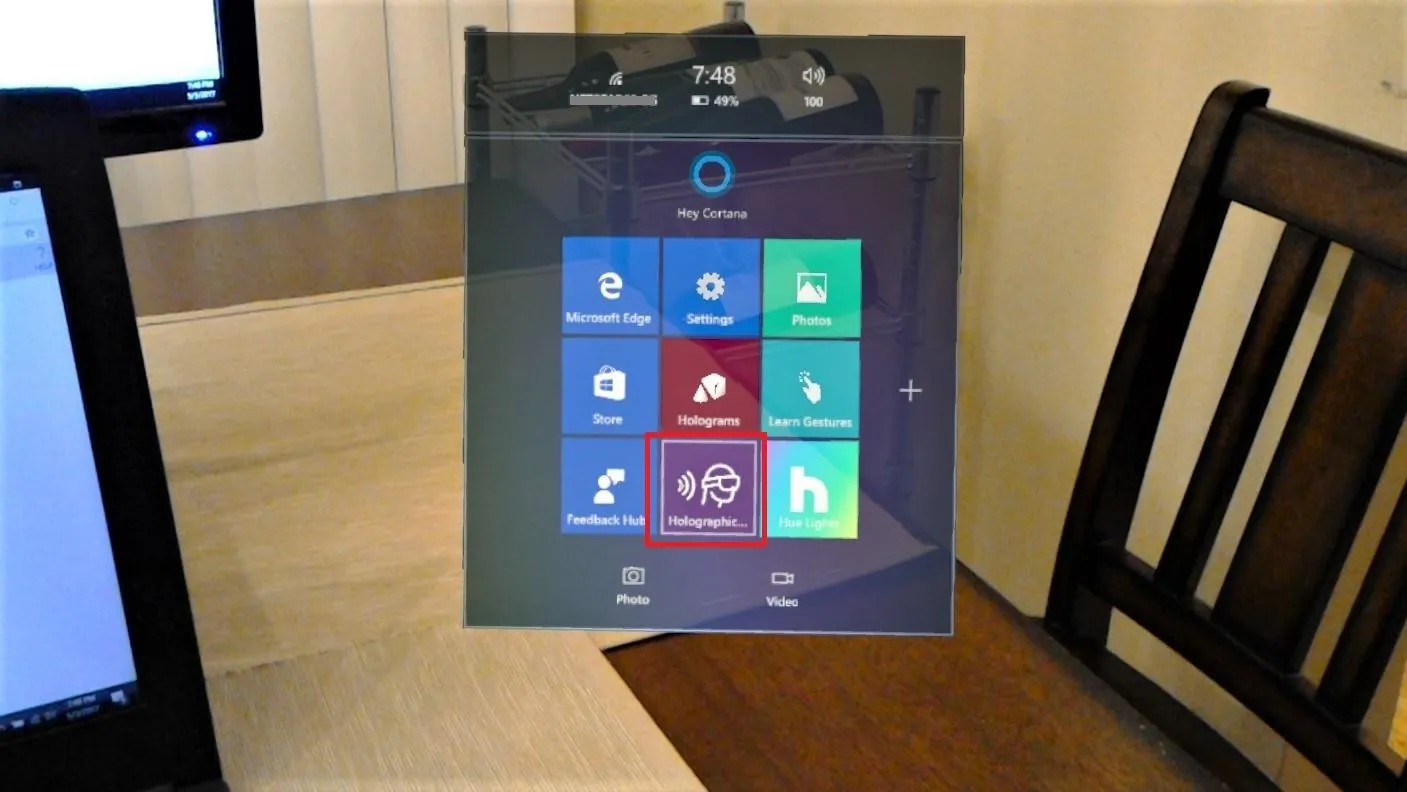
You should see the app logo and an IP address tagging along your view.

Connecting to Your Device
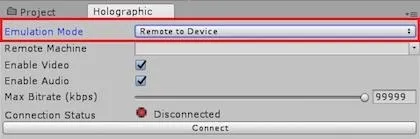
Back in Unity, select Window -> Holographic Emulation. You should be greeted with a tab or breakout window labeled, "Holographic." If you see an error, ensure your settings match those in Step 1. You are now ready to connect ...
But not until you save your scene! After that, save it again. Get in the habit of always saving your scene before you attempt to connect and before you play your scene when remoting. While it has improved greatly, stability is still a work in progress. In its frailty, crashing the remoting player occasionally brings down Unity with it. Better safe than sorry. Save that scene.
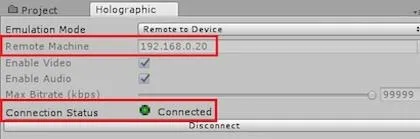
Set the Emulation Mode select input to "Remote to Device." Enter your IP address found floating in front of your face in the Remote Machine field. Click the "Connect" button. Within a few seconds, you should see the light turn green and your HoloLens overlay should disappear.
If the button doesn't seem to respond, try deselecting and selecting one of the check boxes. In some versions of Unity, there was a bug where the IP value was not entered until another field was focused and then unfocused.
Test the Scene
If you were able to connect, you will now be able to test out the wonders of remoting. Play the scene in Unity. Within a couple of seconds, you should see your HoloLens display come to life. The remoting will allow you to see the mesh of your real world space updating in real time. You will see the movement of your head translated to the camera object in Unity. You'll also be able to add, remove, and adjust components and values in the Unity Inspector that will take effect with minimal latency right in your HoloLens. Stopping the scene will return the HoloLens display to an idle state until the next time the scene is played.
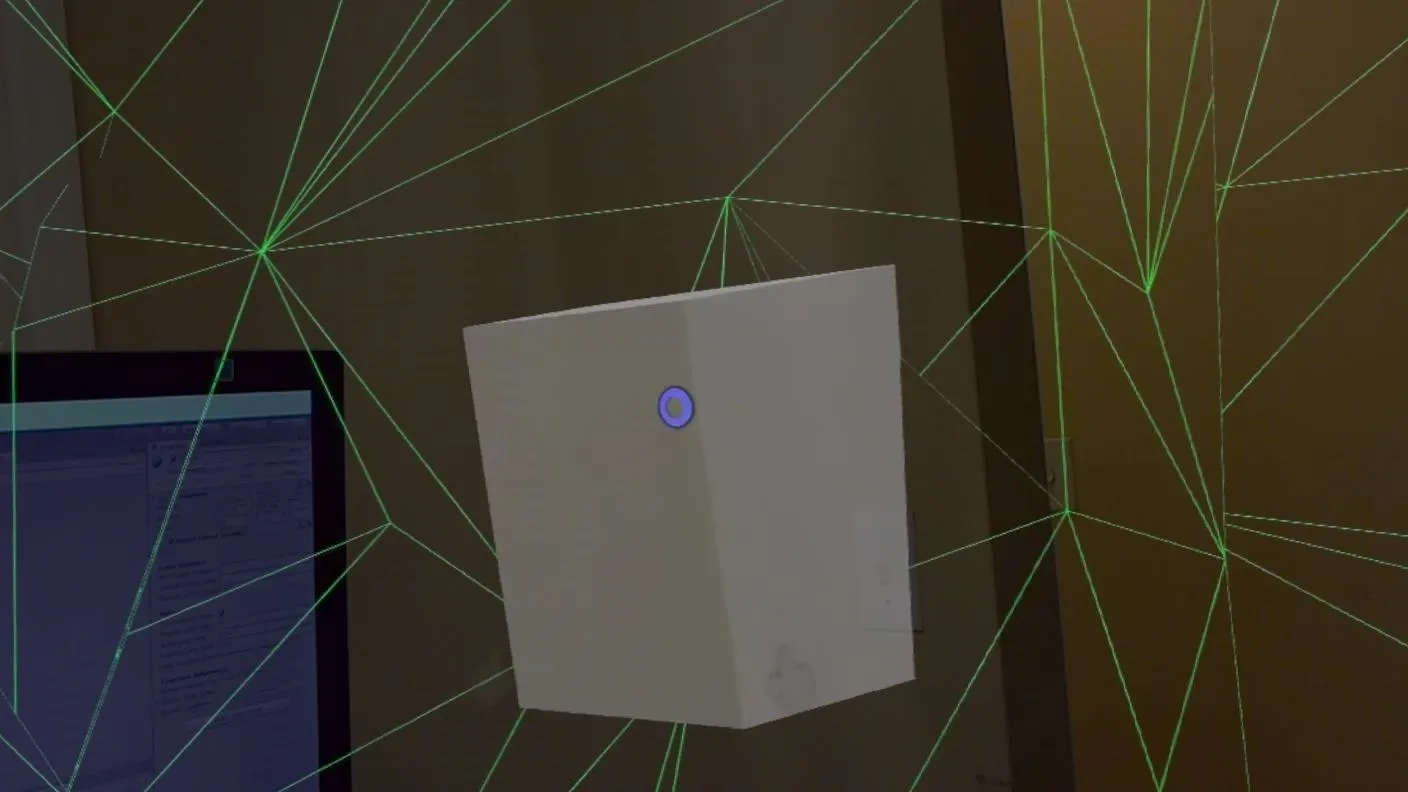
Occlusion and all works when remoting.
There are a few hiccups worth mentioning:
- On occasion, the scene will freeze in the HoloLens, get a case of the bad jitters, or stop responding to gesture inputs. Stopping the scene, pressing the "Disconnect" button in the "Holographic" tab, and then pressing the "Connect" button can cycle the flow and correct this more often than not.
- Remoting relies heavily on your Wi-Fi connection. If you have spotty internet, chances are you will have spotty remoting capabilities.
- Remoting DOES NOT fail gracefully. Blooming out of your remoting app while a still connected through Unity will more than likely result in crashing Unity. If you get a low battery warning or your HoloLens dies while remoting, there is a good chance Unity will crash. You see a trend here. The only advice, as mentioned before is to save and save often when remoting.
That being said, remoting is a tool that simply should not be overlooked. Remoting gives developers and designers the ability to test out and tweak Spatial Mapping and Understanding, physical interactions of holograms against real objects, user interactions, color schemes and designs, and so much more. All of this is achieved in real time and without needing to build and deploy to our devices. Let us rejoice!
Thanks for tuning in for another how-to. Please reach out if you have any questions, comments, or ideas you'd like us to tackle. Cheers!
- Follow Next Reality on Facebook, Twitter, and YouTube
- Follow WonderHowTo on Facebook, Twitter, Pinterest, and Google+
Cover image by Jason Odom/Next Reality
Screenshots by Anthony Corrado/Next Reality


Comments
Be the first, drop a comment!