


Now that we have unlocked the menu movement — which is working very smoothly — we now have to get to work on the gaze manager, but first, we have to make a course correction.
A misunderstanding of how raycasting works on my part forced me to rethink a portion of the dynamic user interface that we've been working on in this series. The majority of these tutorials are not out yet, so I could easily go fix them and make this series look flawless, leaving most none the wiser. However, I believe there is far more value in learning from mistakes than a flawless tutorial.
Something I must have overlooked in my time with raycasting in the documentation; when a ray hits an object with a valid layer, it stops and returns it's hitInfo at that point. I had always assumed it would continue going and hit the next object and so on. Now, knowing that the RaycastHit used as a parameter is not an array, should have made this apparent, but the situation had never come up for me — until now.
Having been a design predicated on this misconception, this system has to be taken a different direction now. Fortunately, it is not a major undertaking to rework our project here.
Learn from My Mistake
While creating this series, once I put the transform tool on its own layer, as was the original plan, so we could use the tools that we are creating, it would deselect the object behind it, which is actually the object that we needed to be selected to manipulate. This obviously was not going to work.
Also, because the menu was using the cursor as its position reference and the cursor was now hitting the menu, it would move the transform menu toward the camera constantly until the cursor was moved to a different surface.
Fortunately, there were many approaches we could take to fix this problem.
The gaze manager is the primary component of the Mixed Reality Toolkit that we have tied our system too. It sends out a ray in order to find the spot to put the cursor. We are using this cursor and the ray associated with it, to both, determine the selected object and use as a position reference for our tools.
Physics.RaycastAll is a version of raycasting that does return an array of RaycastHits. This seemed like a valid path to follow. But as I dug into this as an option, it appeared to be, far more than was needed, and I also wanted to avoid reworking the entire input system for the Mixed Reality Toolkit.
The solution I landed on was to create a second Raycast to find the positioning for our menu and determining the currently selected object while allowing the Raycast from the GazeManager to do its job and allow interaction with our menu.
Set Up the Layers
First up, we need to create a layer for our Transform Tool to exist on.
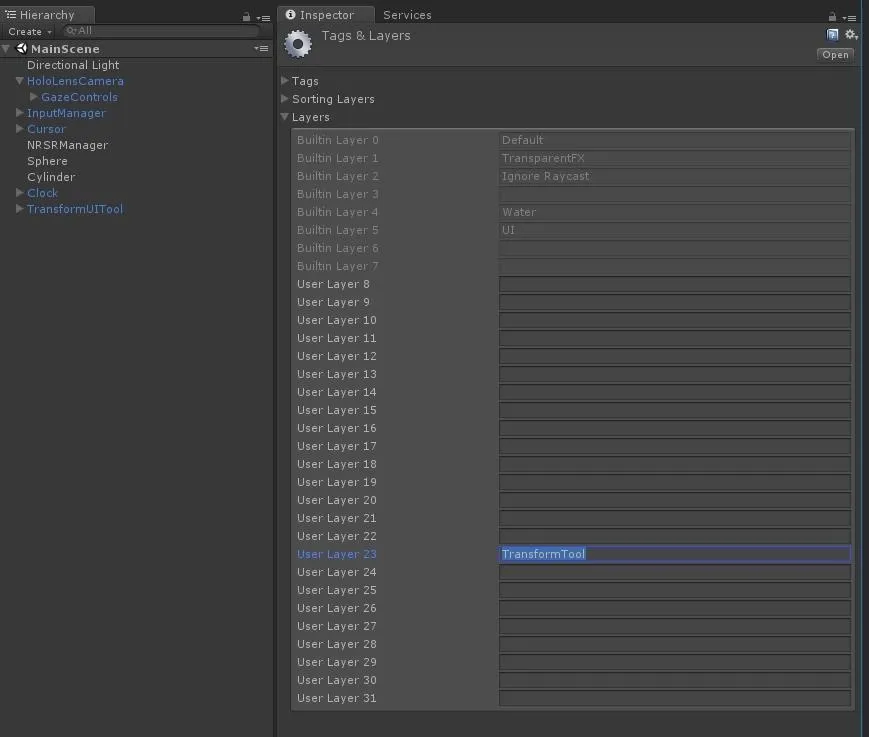
- Using the Unity main menu, click on "Edit" then "Project Settings" and "Tags And Layers." You will arrive at this "Inspector" view.
- In User Layer 23 type TransformTool and hit the "Enter" key.
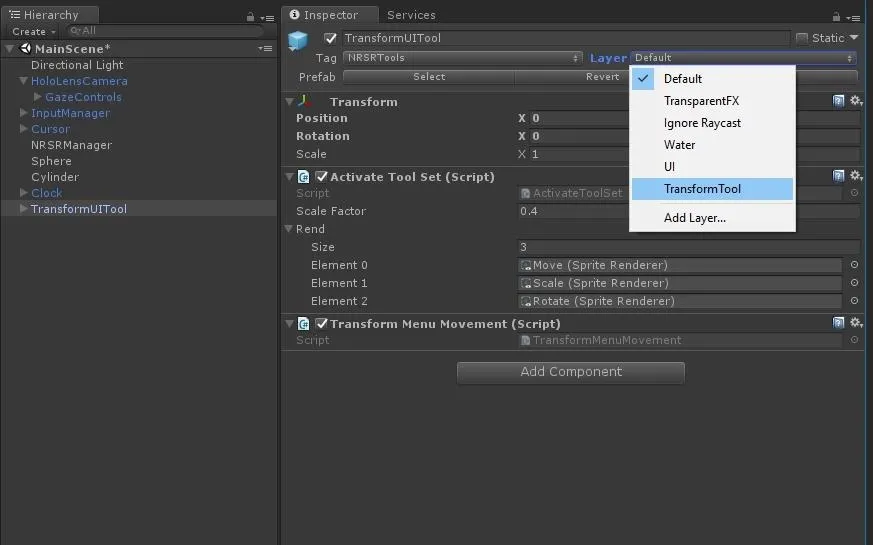
- To assign this new layer to our transform tool, select the "TransformUITool" object in the "Hierarchy" view, and in the "Inspector," click on the drop-down menu next to the "Layer" label and select "TransformTool."
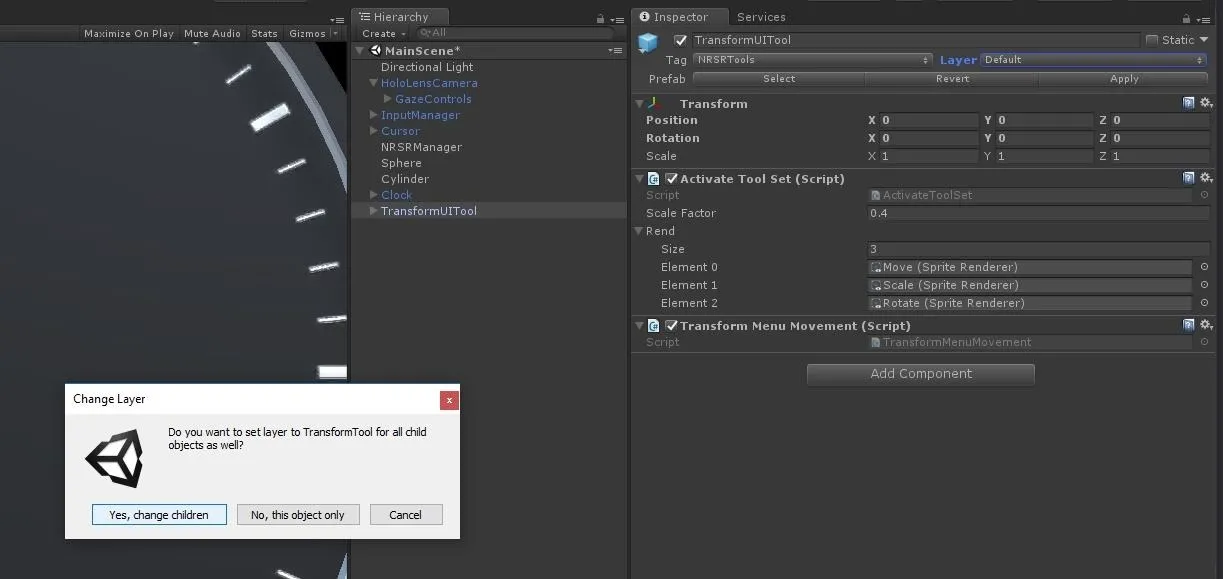
- When the "Change Layer" window appears, select "Yes, change children."
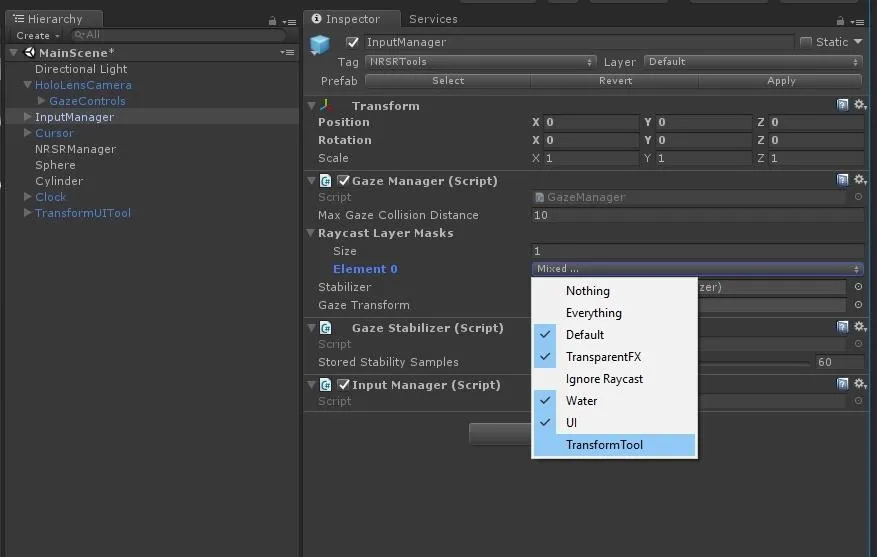
- Select "InputManager" in the "Hierarchy" view.
- In the "Inspector" view, click on the arrow next to Raycast Layer Masks.
- Click on the drop-down menu for "Element 0."
- Select "TransformTool."
wd
Update the Transform Menu Movement Class
Now we need to make a few changes to our movement class from the previous lesson. While we are no longer using the cursor to determine our position, we are still using it to determine the rotation of our menu.
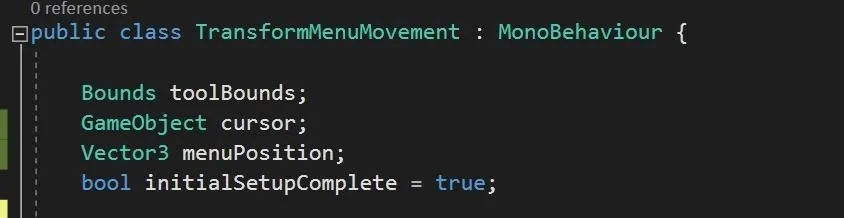
- First we need to add the line Vector3 menuPosition; to our fields.
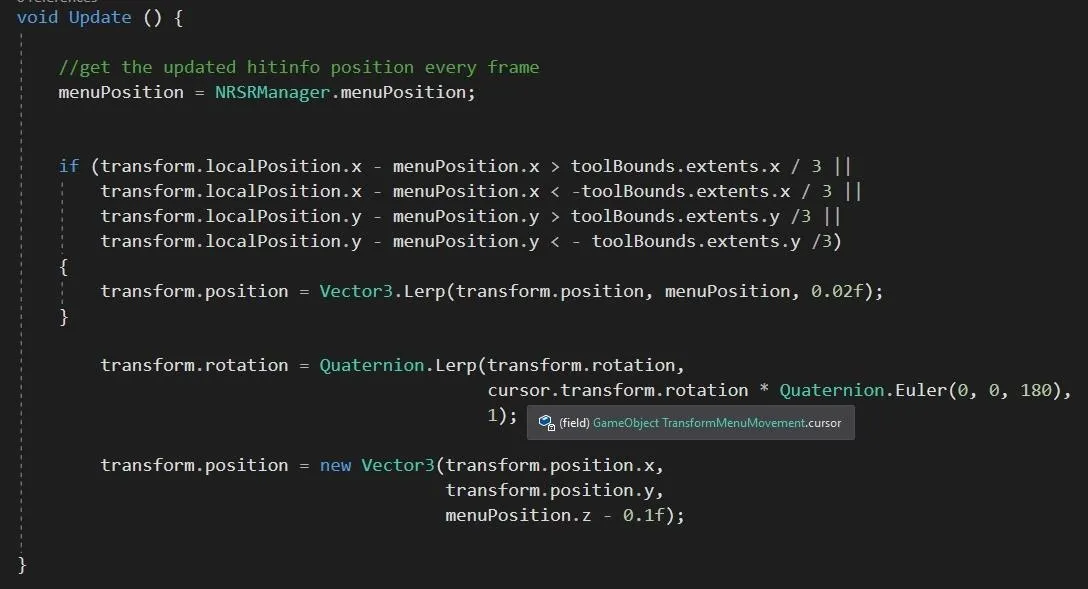
Now we need to look in our Update() and add the line menuPosition = NRSRManager.menuPosition; to the start of that method.
Next, we need to replace any instance of cursor.transform.position with menuPosition while leaving the .x .y or .z behind it.
Update NRSR Manager
NRSR manager is where most of the updates are happening. Here we are going to create our new raycast as well as a few traps to make sure we are a holding our focused object when we are actually focused on the Transform Tool. But at the same time, we want to be able to get through if there is no focus on the object or the tool.
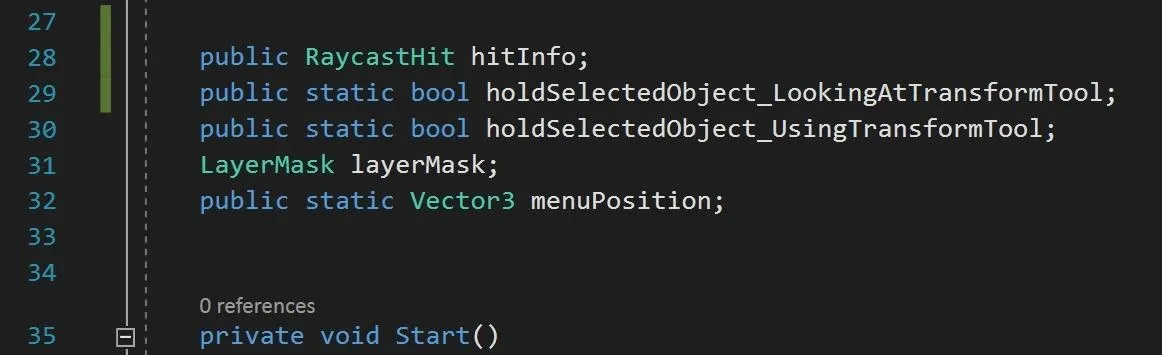
- Add the following fields to NRSR manager:
- In the Start() method we need to set our LayerMask.
Layer Mask:A layer mask is a tool that allows a Ray to hit the collider of a specified object type. A layer mask is set up to select specific layers and turn off the layers you wish to ignore. In the final action of step 2, we saw how it looks in the interface. In code, we use bit masks to change layer masks, which we create using a bitshift operator ( <<).
In the example below, we set the layerMask to layer 23, or our transform tool layer.
In the line following our layerMask declaration, we flip the layerMask. The job of the bitwise complement operator (~ ) is to invert a bitmask. It goes from layer 23 to looking at everything but layer 23.

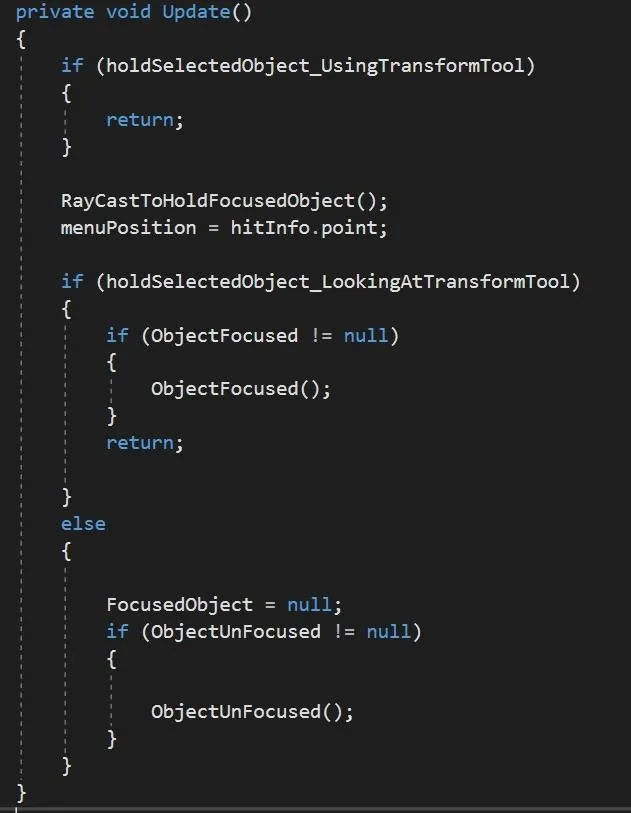
Here is a breakdown of our Update() method.
- If our SelectedObject is using the transform tool immediately leave.
- Run our RaycastToHoldFocusedObject() which we will dig into shortly.
- next we set our menuPosition to the hitInfo.point that we create in the RaycastToHoldFocusedObject()
- Finally, in the last conditional (if/else) block we replaced, the FocusedObject logic with a test based on whether or not we are looking at the transform tool. The bool name would be more accurate to call it holdSelectedObjectLookingAtTransformToolOrObject but it was getting pretty ridiculous as it was.
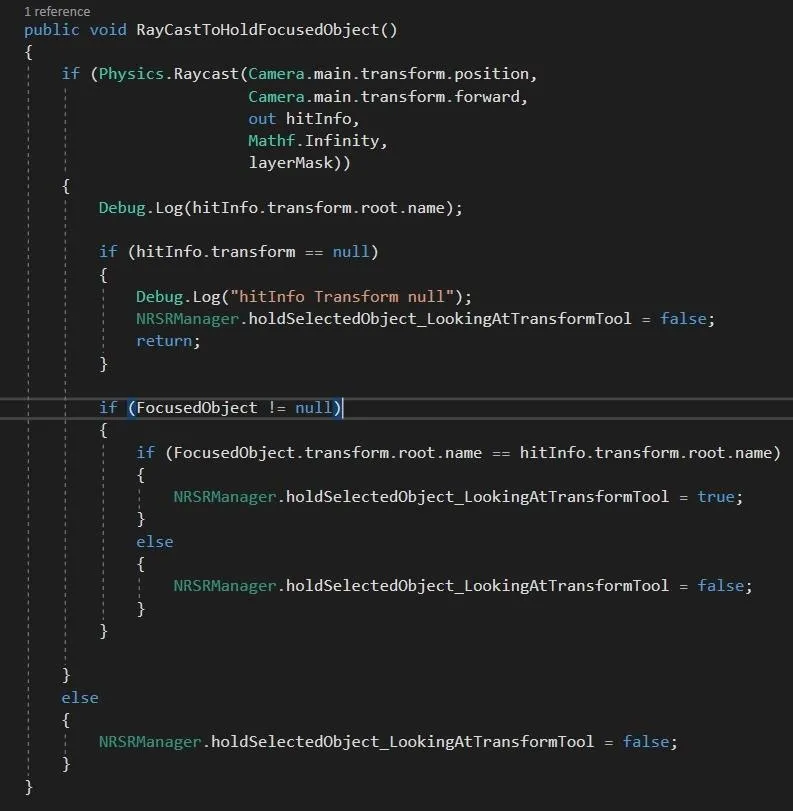
Next is our RayCastToHoldFocusedObject() method.
- Raycasts are generally done in if statements and return true or false. This is exactly we have here. We are using our camera's position and forward vector as for the ray itself.
- If the ray doesn't hit anything we set our LookingAt bool to false and eject.
- If we are looking at something and we have a FocusedObject, we test whether the name of the FocusedObject and the name of the object that is being hit by the ray are the same.
- If so set our LookingAt bool to true.
- If they are not the same set LookingAt to false.
- Finally if the ray did not hit anything at all set LookingAt to false.
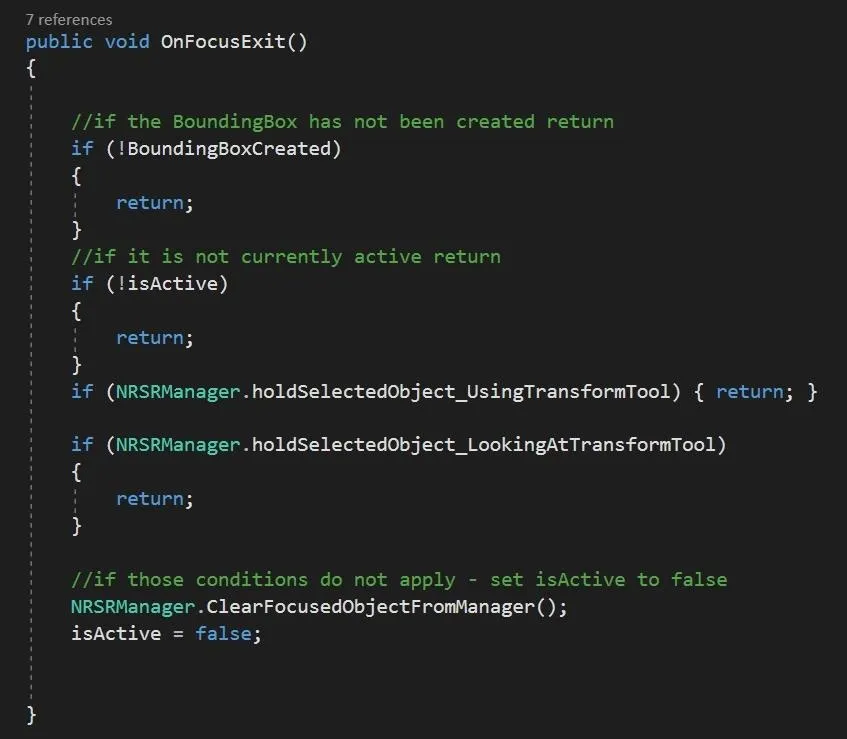
Finally in our bounding box class, in the OnFocusExit() method, we test if either UsingTransformTool or LookingAt are true. If they are, leave. This keeps our object focused when the transform tool is the target.
Update Files for those who want to copy and paste. NRSRManager, BoundingBox, and TransformToolMenuMovement
OK, no more stalling. Next up, we'll transform our object, and then we'll work on scale and rotation in a future guide.
- Follow Next Reality on Facebook, Twitter, and YouTube
- Sign up for our new Next Reality newsletter
- Follow WonderHowTo on Facebook, Twitter, Pinterest, and Google+
Cover image and screenshots by Jason Odom/Next Reality


Comments
Be the first, drop a comment!