
I currently am and have always been what one might call a PC/Android guy. Many that know me well would likely even go so far as to say I am anti-Apple. About an hour after seeing the ARKit demo during the day-one keynote at WWDC, I became the owner of a brand new Mac.
Pair that will the fact that I had recently picked up an iPhone to power my Occipital Bridge and one would have sufficient fodder to dispute that claim. Of course, for me, in the end, this is all about AR development. My loyalty lies first with the technology as a whole, as a disruption, as a movement.
I say that because before two weeks ago, I had never compiled code on a Mac or for an iPhone. I don't have a background in Swift or Objective-C. And though I do have a light background in C/C++ from 15 years ago, I work almost exclusively in C# now. But simply put, this is a new journey for me, and I intend on bringing anyone that wants to read about it along for the ride.
On stage at WWDC when Apple announced the ARKit, they demonstrated it with a simple presentation of placing a lamp and a cup of smoking coffee on a table. The miraculous element of this presentation was the fact that this surface detection demo was working without any additional hardware. The demo was powered simply by the built-in RGB camera that comes stock on an iPhone or iPad. This surface detection was an impressive piece of software and we will take some time to explore it.
Apple has released the Placing Objects demo code to their developer website. With that, we are going to break down the important elements so we can adopt this tech easily into our own projects. This will not be the normal step-by-step tutorial people have come to see from the various 101 series here at Next Reality. Instead, we will explore ideas for use in the next tutorials, on my journey to build my first iOS app.
This post assumes you have done the ARKit 101 tutorial.
Placing Object Demo
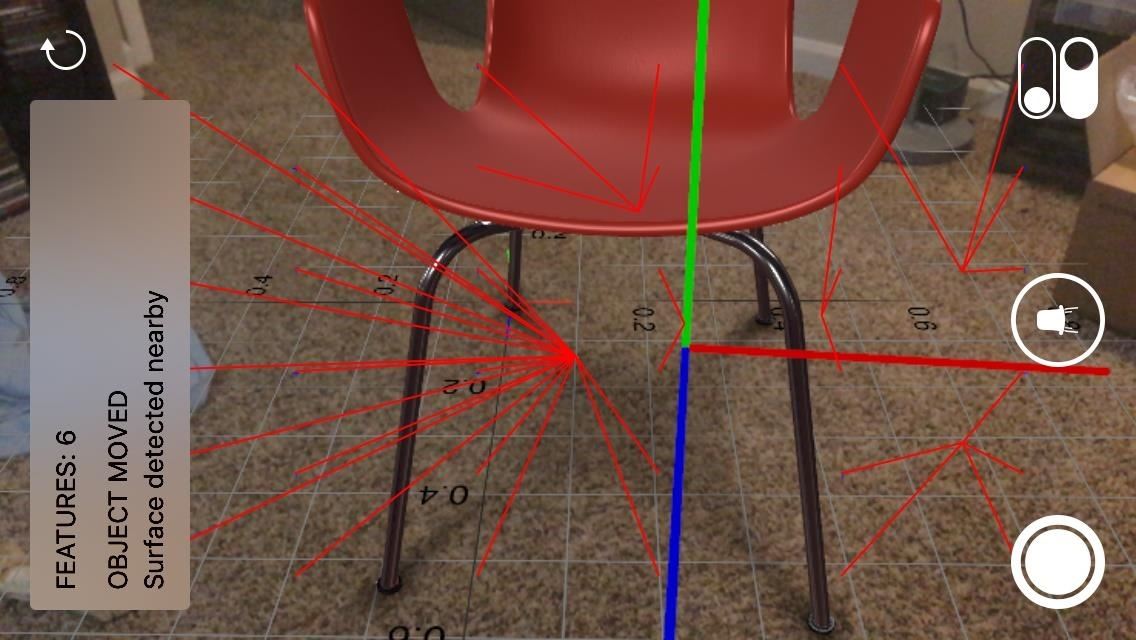
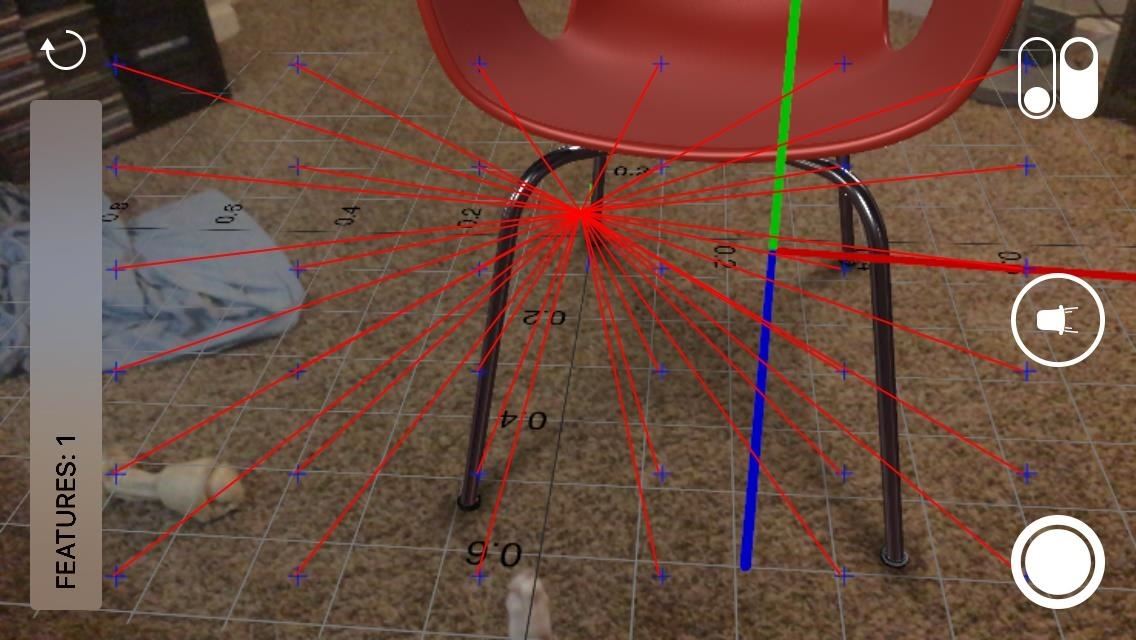
Before we get into breaking down the code, and seeing how it all works, let's look at some of the features in the software itself. Obviously, we have the surface detection since that is the part we are here for. The surface detection allows the iPhone the ability to place the object down in a way that looks at though it is sitting on the surface.
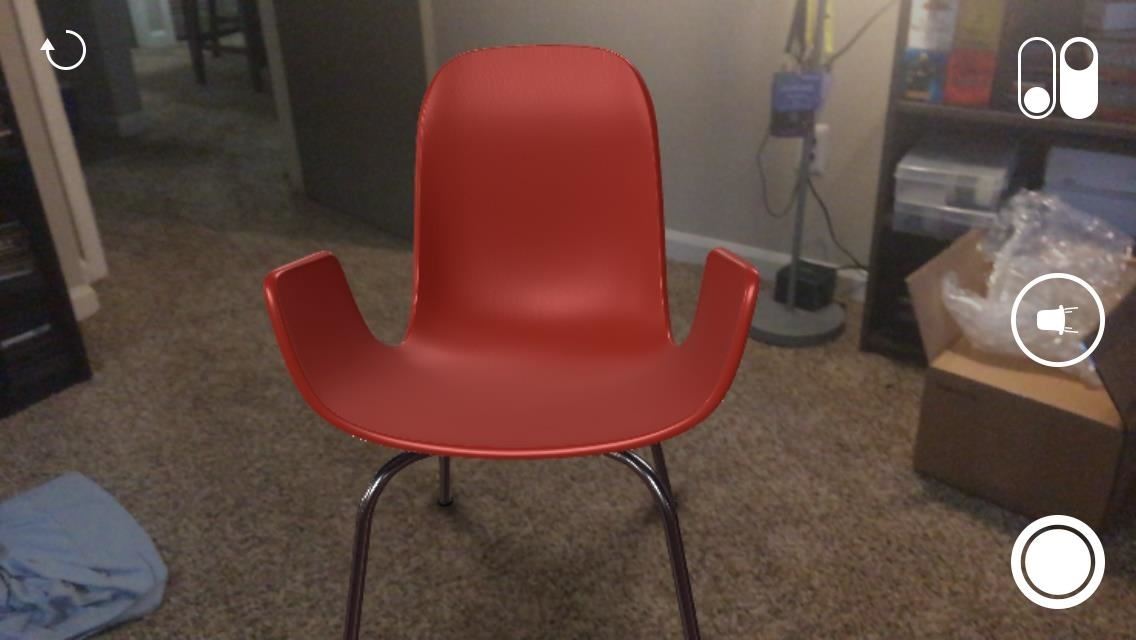
The second primary part of the illusion is world-tracking. When the iPhone moves around, the illusionary object stays in place as though it is actually sitting on the surface. There are many devices out there that can accomplish these feats currently, but not devices that people already have in their pockets.
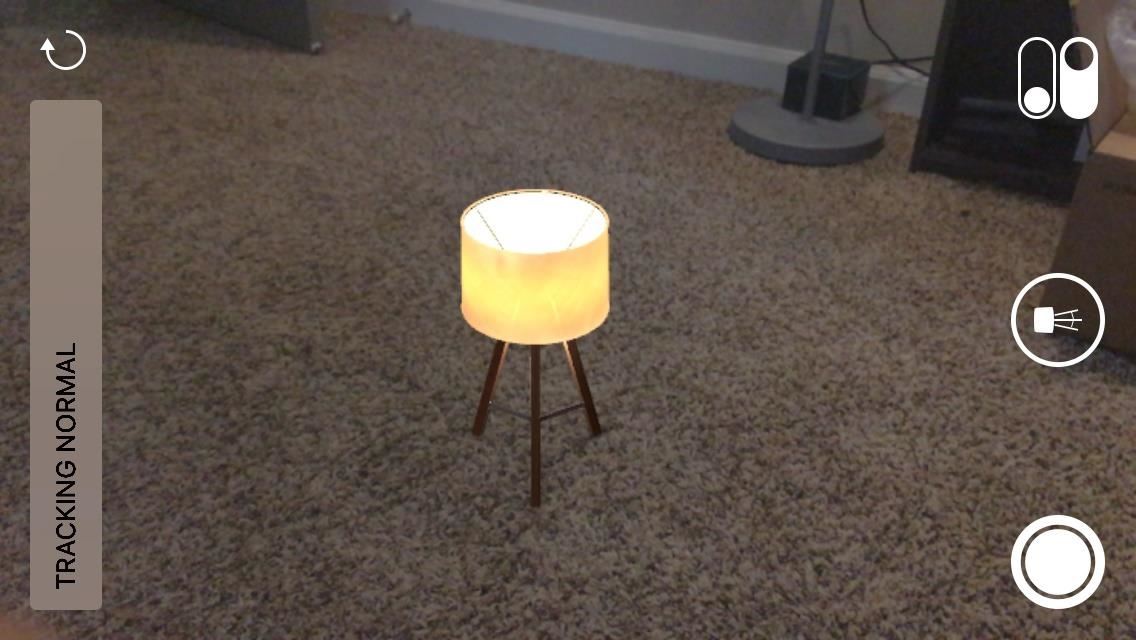
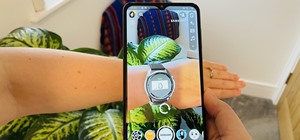
In the above pictures, you can see these objects that are sitting in the middle of my floor at the moment. Believe it or not, they are not actually there. These are 3D models visualized through a phone. The shadows under the chair add a really nice touch of presence.
Aside from the ability to place objects in the world, the demo also comes with tools that give us as developers some understanding of the processes going on internally that make the process work.
Debug Visualizations is a simple grid of the surface that the app is currently using and its relationship to you.
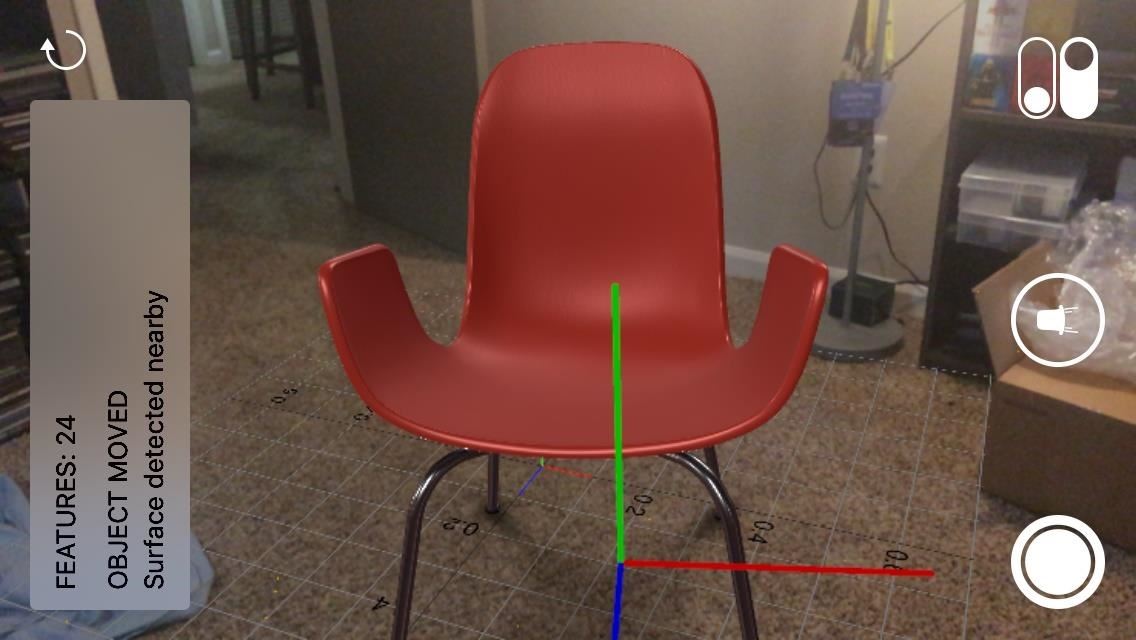
Hit Test Visualization gives us an idea of the system that is being used to find the surface. Hit Tests are where the magic happens with the ARKit system.
Hit testing searches for real-world objects or surfaces detected through the AR session's processing of the camera image. A 2D point in the image coordinates can refer to any point along a 3D line that starts at the device camera and extends in a direction determined by the device orientation and camera projection. This method searches along that line, returning all objects that intersect it in order of distance from the camera.
Now that we have had a look at what the Placing Objects demo does and has to offer us, we are going to spend a little time in the next part of the series learning some of the data structures and terms that are used in the ARKit. This will help us digest the code bits a great deal easier. It also gives us a common language to talk when and if you have questions as we move further into this series.
In the follow-up post to that, we will begin digging into code. So keep your eyes peeled.
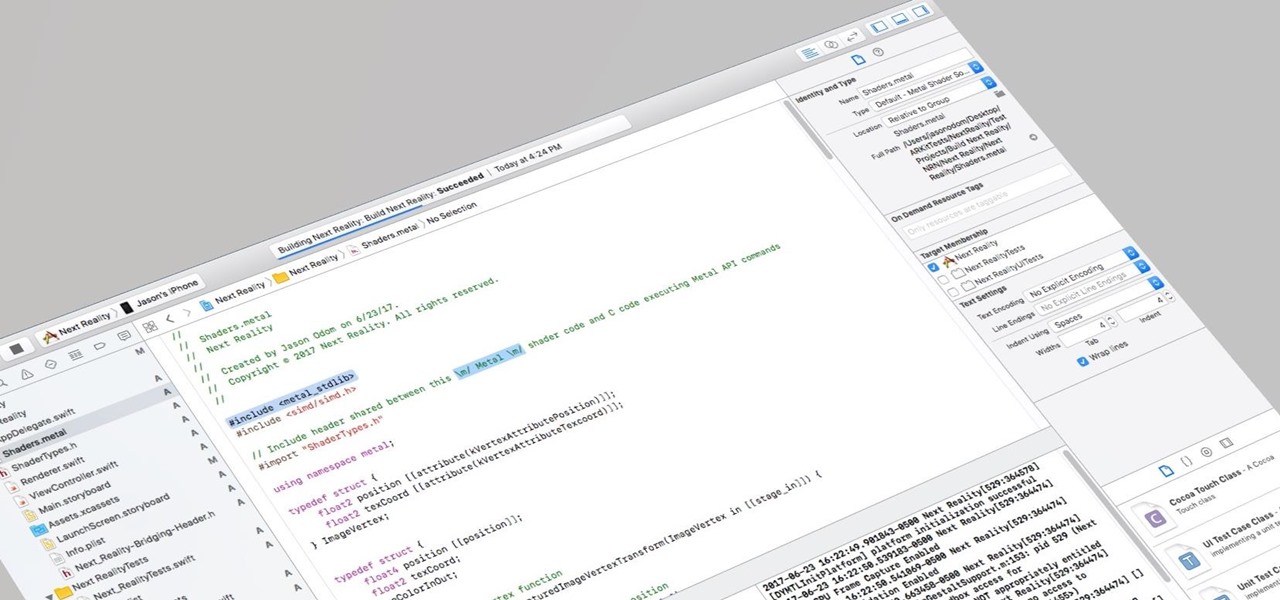
— Build Next Reality: Succeeded
Building Next Reality is an AR development series. In this first section of the series, we will be building our very own ARKit application for iPhone and iPad devices. Leave comments to let us know what you like, what you don't and what you would like to see.
Just updated your iPhone? You'll find new emoji, enhanced security, podcast transcripts, Apple Cash virtual numbers, and other useful features. There are even new additions hidden within Safari. Find out what's new and changed on your iPhone with the iOS 17.4 update.


Be the First to Comment
Share Your Thoughts