
Now that we've set up Vuforia in Unity, we can work on the more exciting aspects of making physical objects come to life on the HoloLens. In this guide, we will choose an image (something that you physically have in your home), build our ImageTarget database, and then set up our Unity camera to be able to recognize the chosen image so that it can overlay the 3D holographic effect on top of it.
While it may sound like a lot of grunt work, this is where the fun really begins, since you're choosing your image and laying down the groundwork for the actual development of the action that will occur whenever you see the object through your HoloLens headset.
Step 1: Choose Your Image
Vuforia uses a system of ImageTargets that area essentially used as visual patterns that the device can translate to the software for it to recognize. Think of QR codes or facial recognition software, which are two sides of the same coin. Vuforia then draws its 3D image or object on top of that in the device you are using.
So, you need to make a decision on which picture you want to use for this effect. I recommend using something that you can find around the house easily. A trading card is what I went with, but a book or even a CD cover would do just fine. Really, anything can work. If it's a flat image, you can find an image of it online or scan it into your computer to use in your ImageTarget database.
Here is my choice for the project, and yes... my nerd flag flies a little bit higher than many. Meet Avacyn, the Purifier.
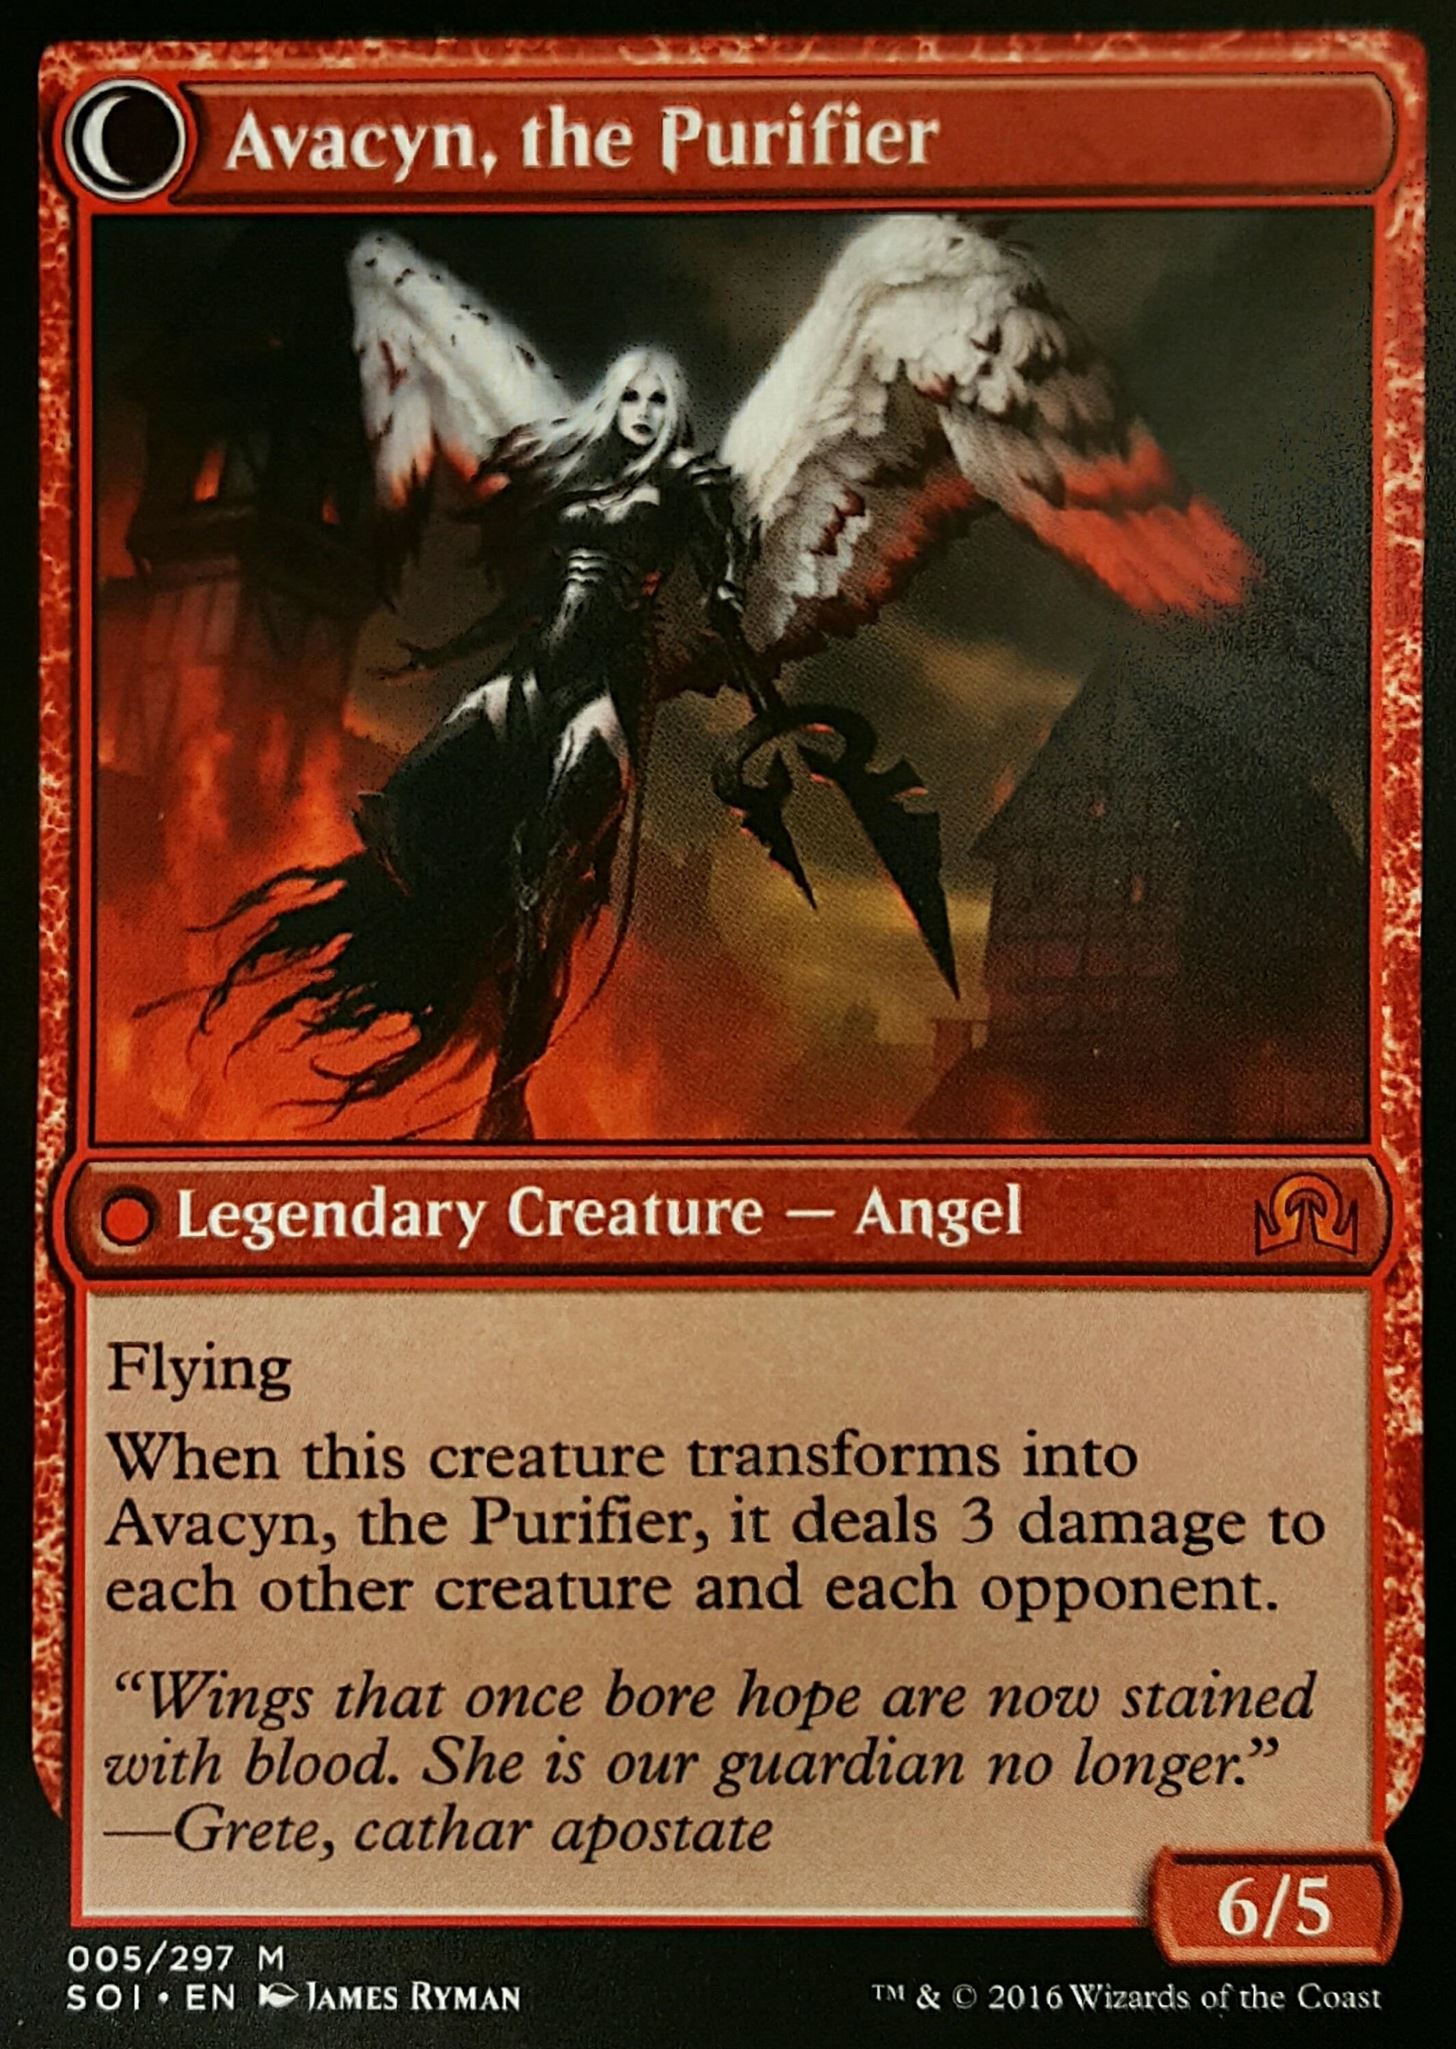
If you don't want to find something around your house to use, I recommend just using the image above. For the two or three of you out there that do not have a copy of this Magic: The Gathering card around your house, just take a copy of this image and save it to your phone. When you are ready to test the project, just use your phone as a replacement for the card.
Step 2: Create a Database
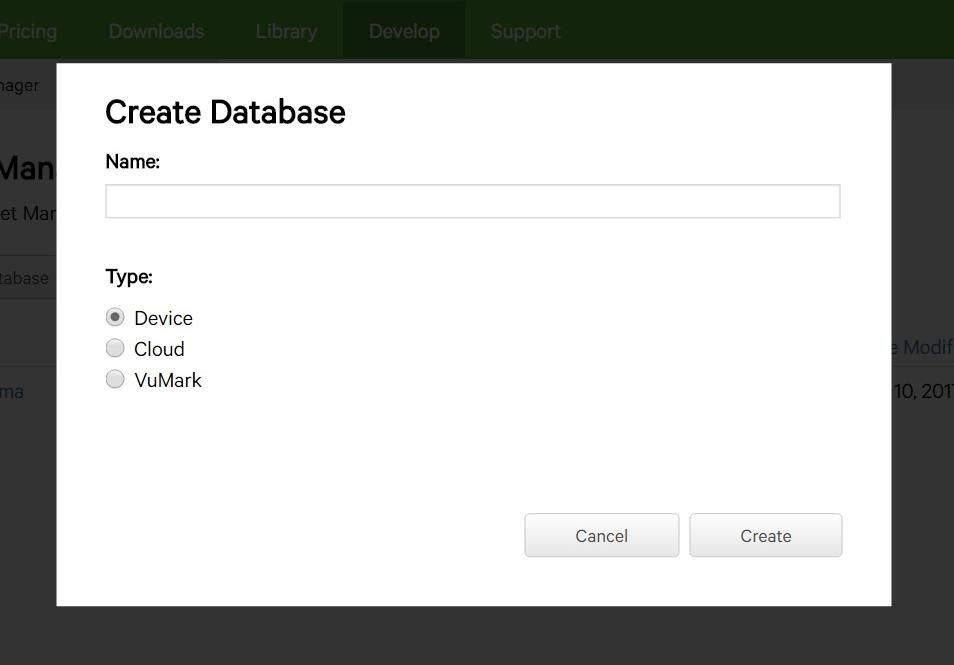
Make sure you're signed into the Vuforia Developer Portal online and select the "Target Manager" button under the Develop tab. When the Target Manager window appears, hit the "Add Database" button, name this database "VuforiaHoloLens" (or whatever you'd like), make sure Device is toggled, and hit the "Create" button.
Step 3: Upload Your Image
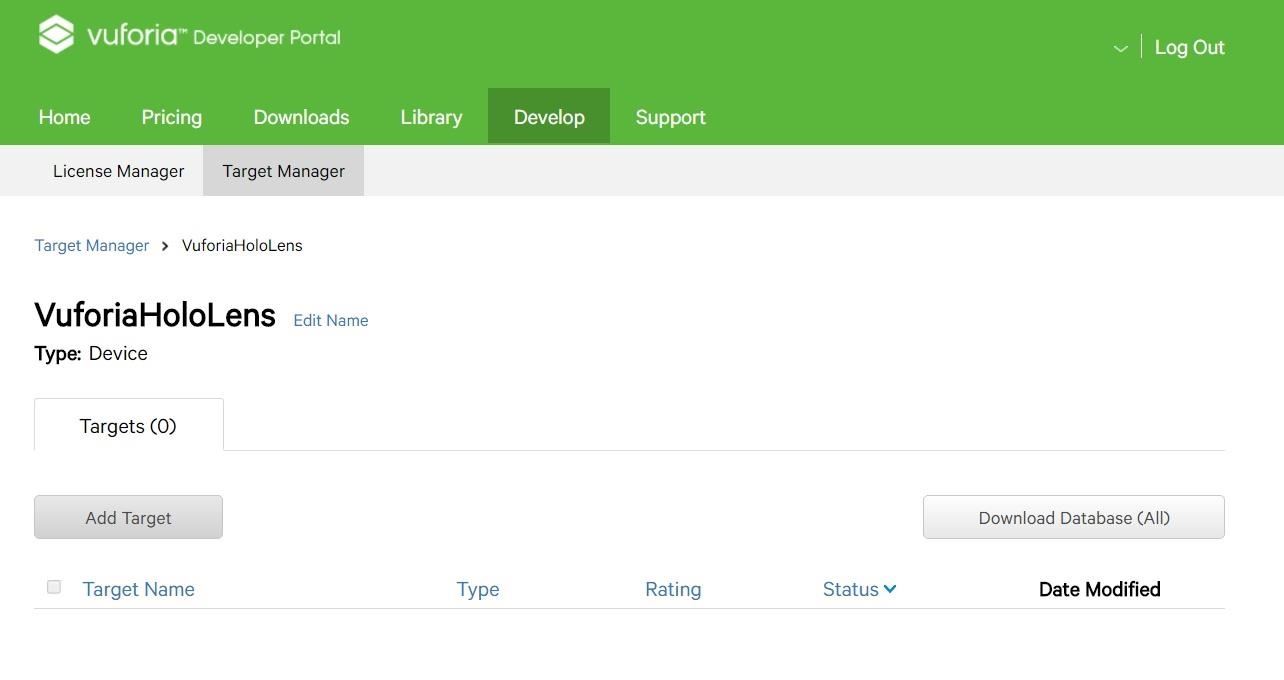
Once you have a database created, it is time to add your target image. This is the image we have chosen to use as a pattern for Vuforia to recognize, i.e., the trading card image above. Click on the "Add Target" button.
Important note: Before uploading, the image file must be 8-bit grayscale or 24-bit RGB, so you'll have to convert the image file that you're using to that first.
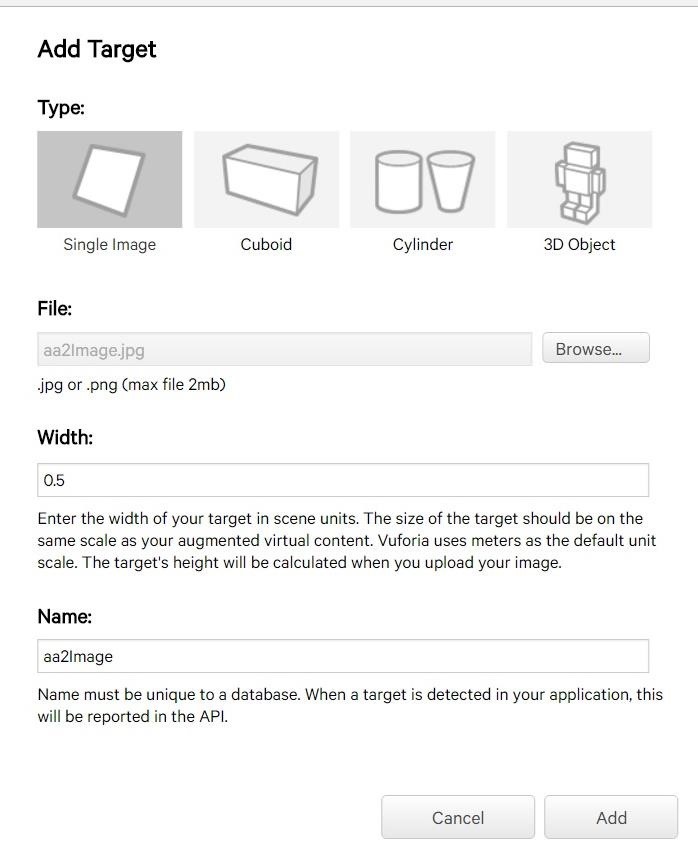
In the Add Target window, make sure you select the "Single Image" option, then click the "Browse" button and select the image you want to use. Enter "0.5" into Width box and then click the "Add" button. If you are using your own image for this project, the number in Width will likely be different. I came to this number through trial and error.
Step 4: Download the Database
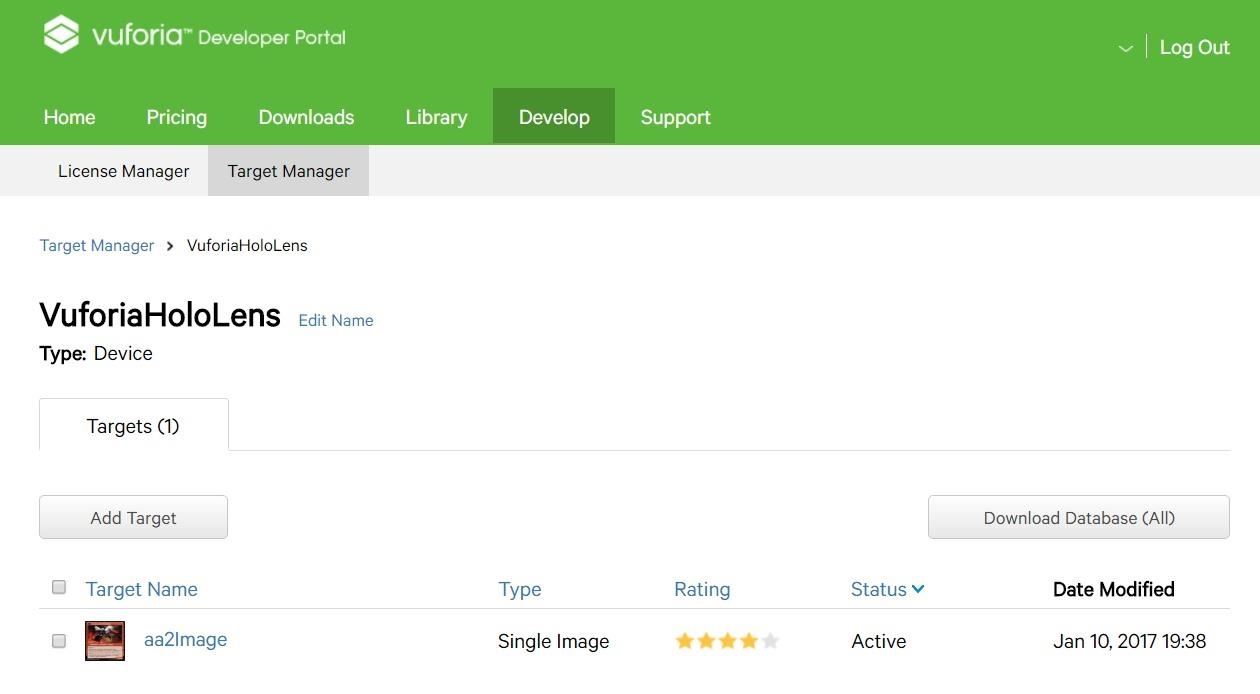
Once back at the Target Manager, with our single target created, click the "Download Database (All)" button.
Make sure and select the "Unity Editor" option on the popup, then click on the "Download" button. This will deliver our database to us in a UNITYPACKAGE file format.

Make sure and store the download somewhere that is easy to get to. We will need it in a while.
Step 5: Create a New Unity Project
As mentioned in the previous guide, I will assume you know how to set up Unity for HoloLens development. That said, we will not be using the HoloToolkit for this tutorial, so I will show you what changes need to be manually made to the camera to make it compatible with HoloLens.
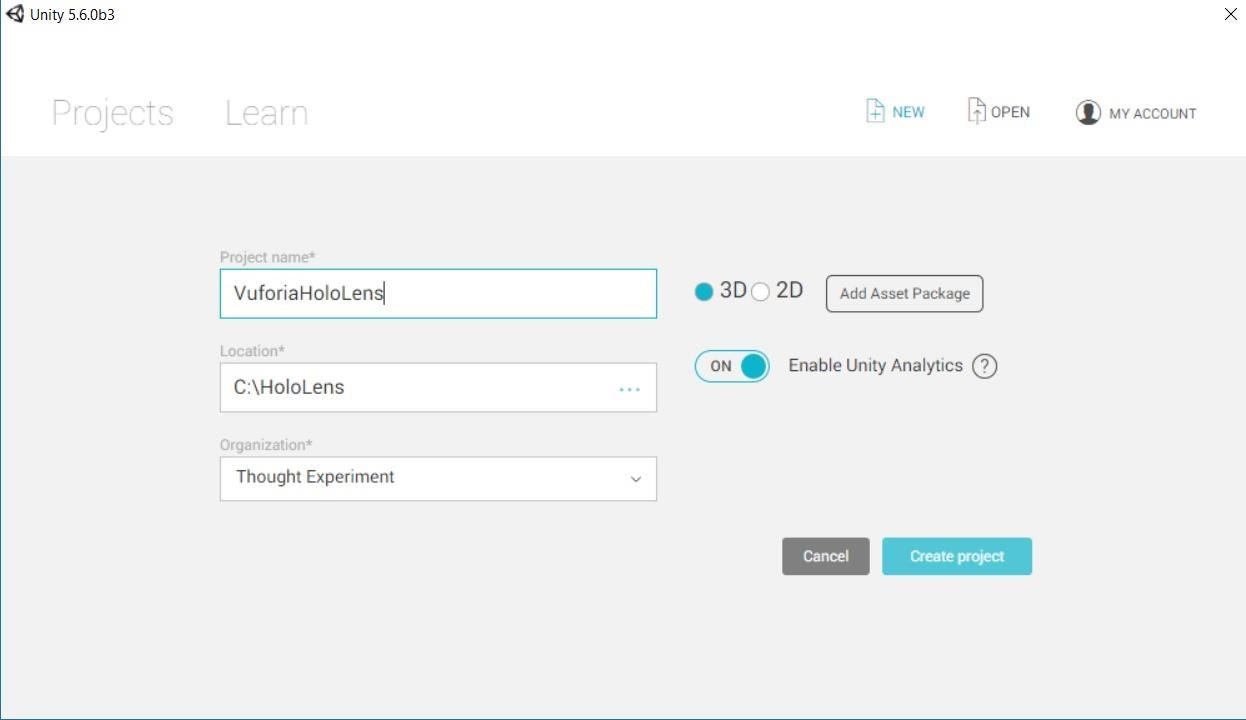
First, let's open Unity, click the "New" button on the Projects selection screen, and name your project "VuforiaHoloLens" (or whatever you called your database, to keep it simple and have an easier time following along).
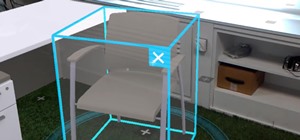
Step 6: Set Up the Camera
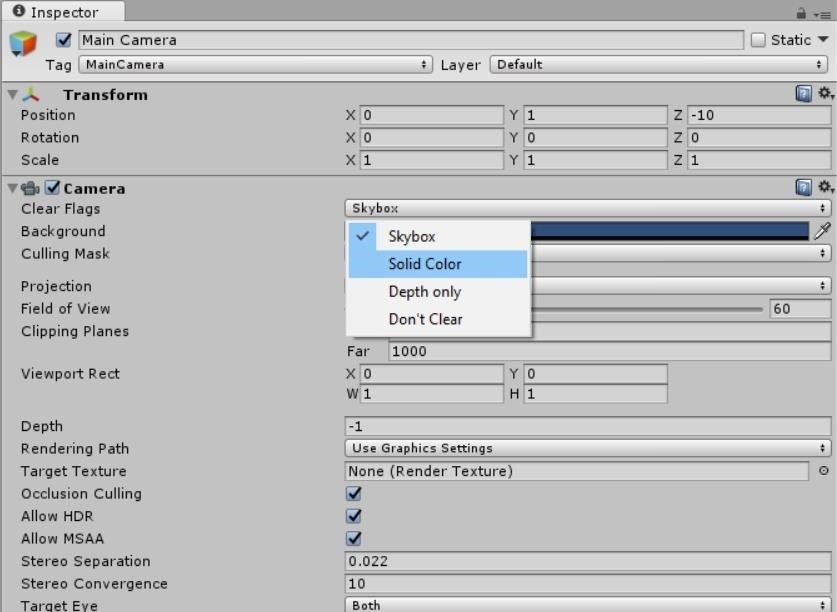
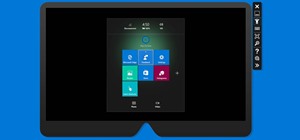
Once the new project has completed the loading process, select the "Camera" in the Hierarchy window and look at the Inspector. You should see this:
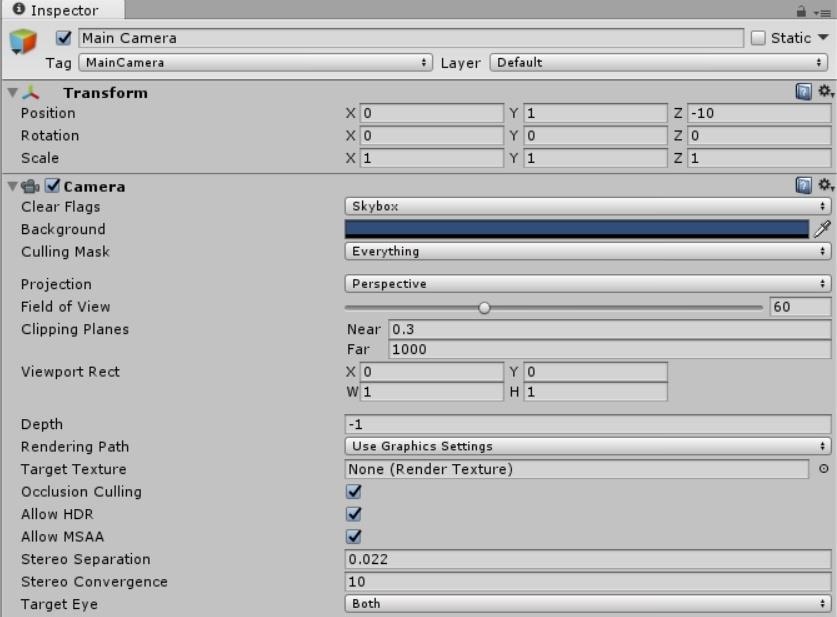
Change the Clear Flags dropdown from "Skybox" to "Solid Color."
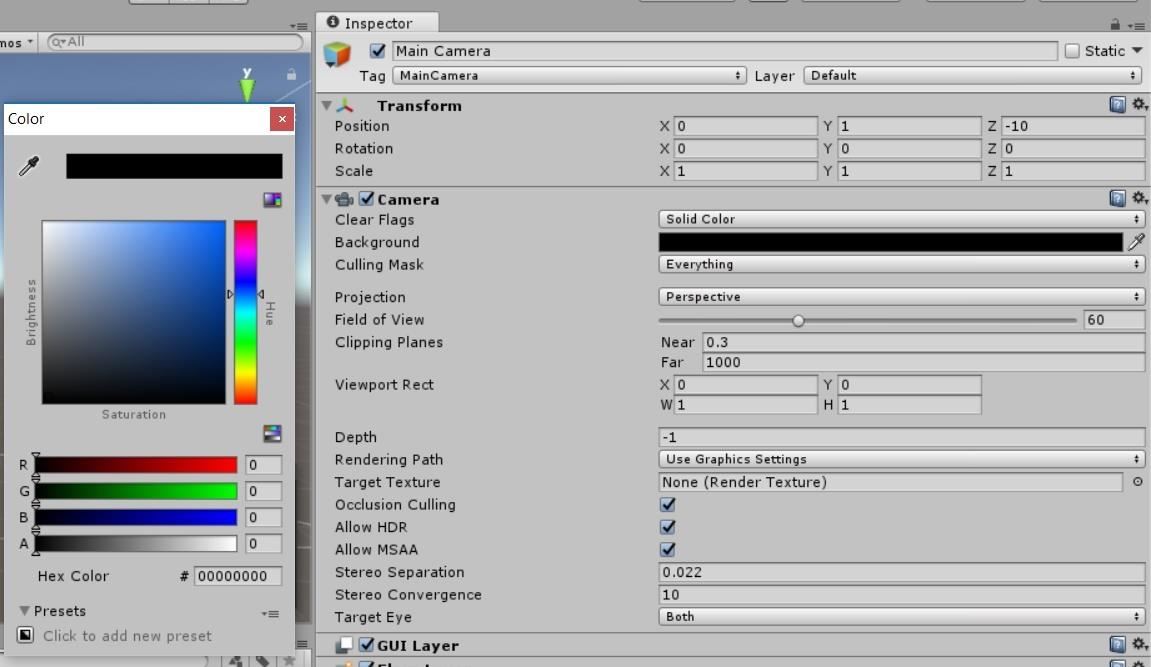
Next click on the Background color swatch. This will pull up the Color picker window, where you'll need to change the color to black—RGBA(0,0,0,0).
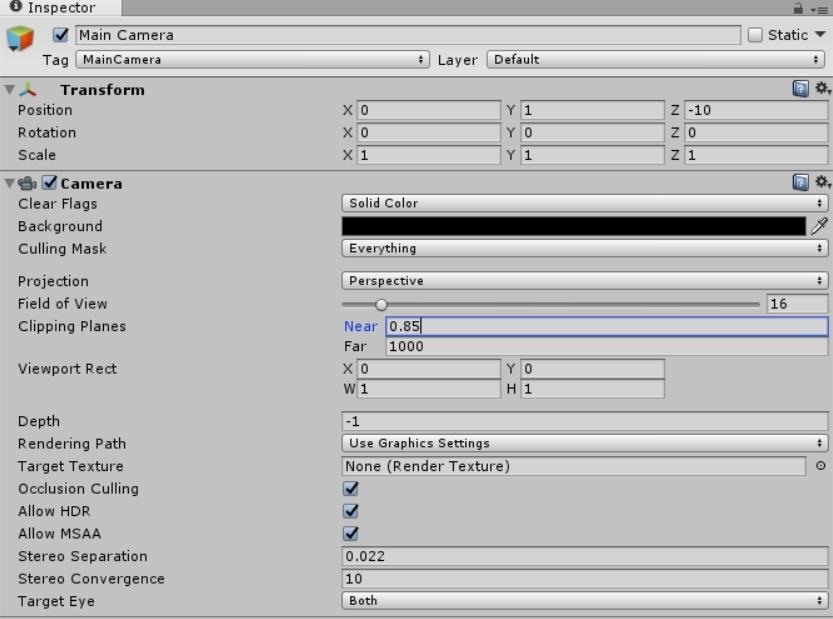
Change the Field of View to "16," then change the Near Clipping Plane to "0.85."
Step 7: Import Your Vuforia Database
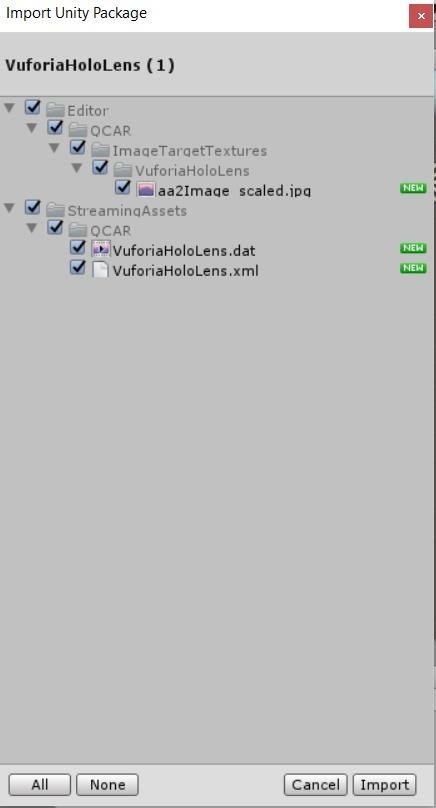
Now we need to install the database we downloaded in Step 4 above. Go to the directory where you downloaded your UNITYPACKAGE file and double-click on it. The Import Unity Package window will appear. Make sure everything is selected and hit "Import."
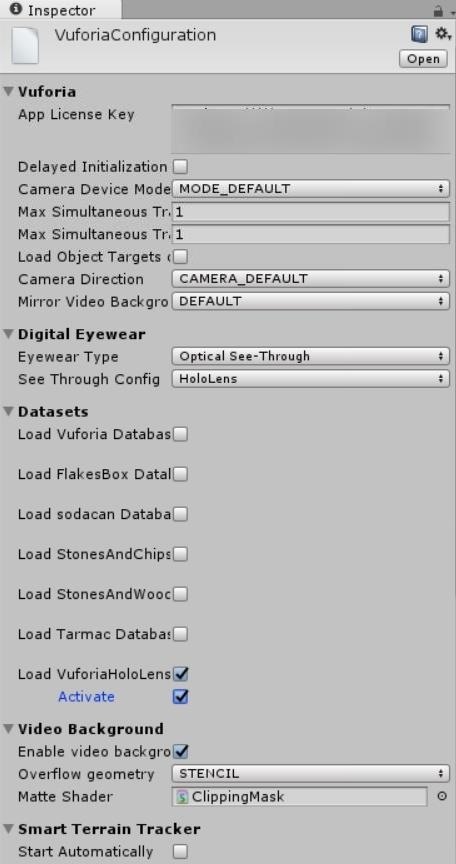
Back in the configuration window in the Inspector, look down at the Datasets section. Check the box next to Load VuforiaHoloLens (or whatever you called the database), then select Activate.
Step 8: Set Up the Vuforia Camera
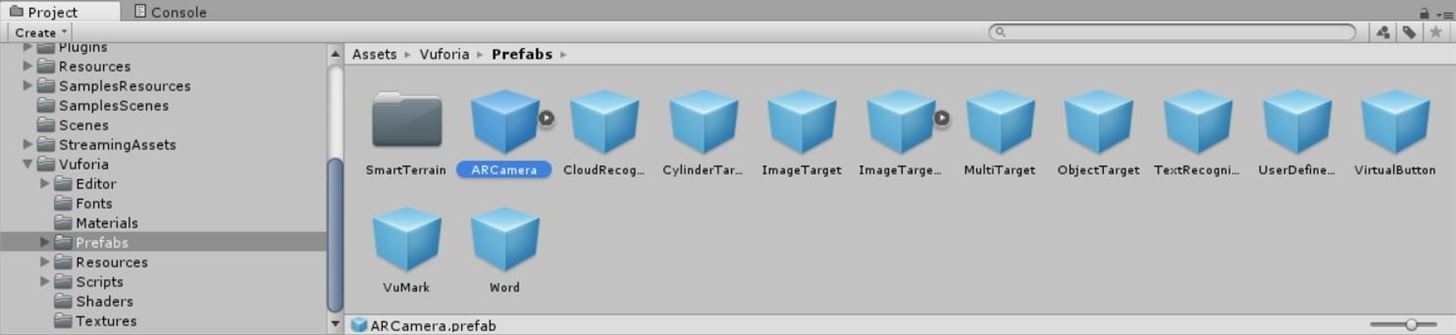
In most cases, having two cameras could be confusing for a system like Unity. However, in our case, the Vuforia camera will use the HoloLens camera as a reference point to do its magic. To make that happen, navigate in the Project window to Vuforia -> Prefabs directory. Select the "ARCamera" prefab and drag it into the Hierarchy window.
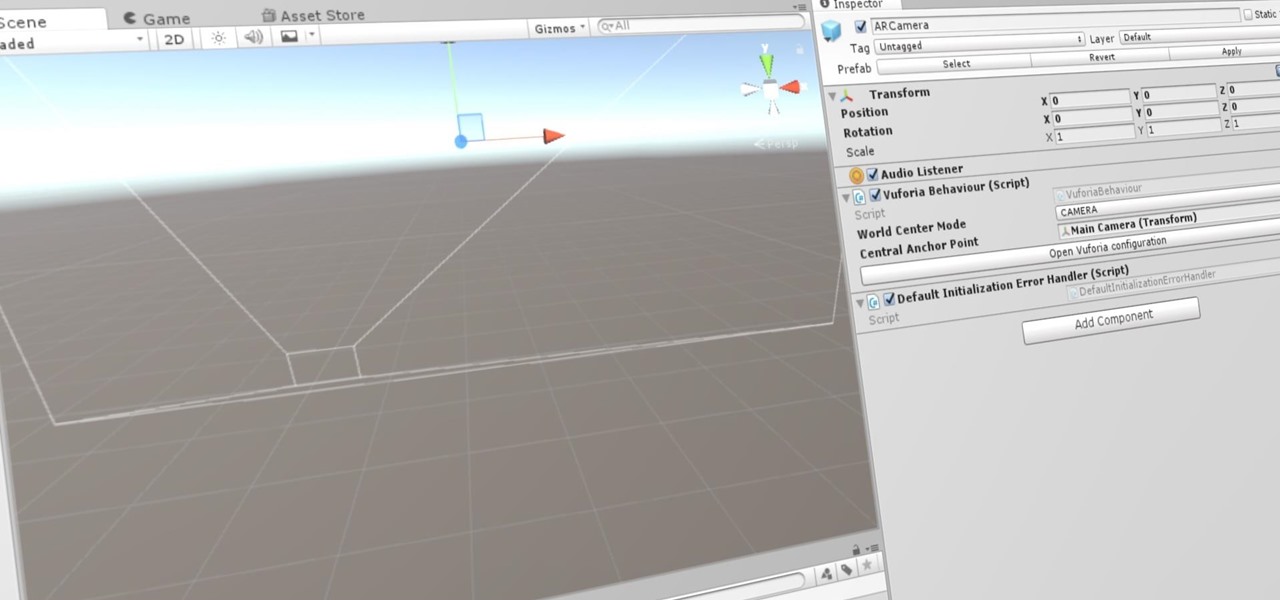
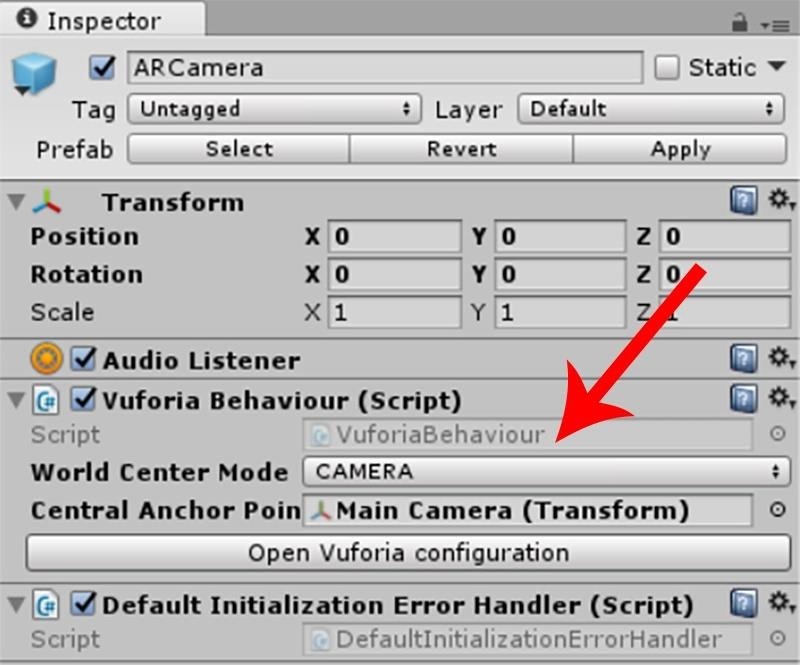
Select the "ARCamera" object in the Hierarchy window, then look in the Inspector and change World Center Mode to "CAMERA" from the dropdown.
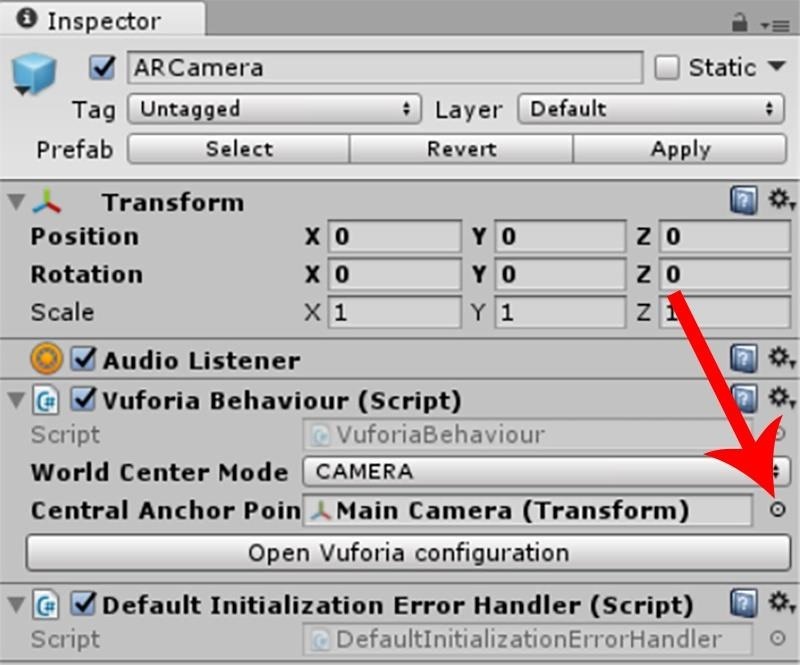
Now click on the donut icon on the far right side of Central Anchor Point and select "Main Camera" to use the transform component of the Main Camera as the center point for Vuforia.
Let's stop here for now. We're just about finished, and in the next (and final) tutorial, you'll be able to see your wok in action. So stay tuned!
Just updated your iPhone? You'll find new emoji, enhanced security, podcast transcripts, Apple Cash virtual numbers, and other useful features. There are even new additions hidden within Safari. Find out what's new and changed on your iPhone with the iOS 17.4 update.


1 Comment
First of all, great tutorial.
I have a problem, though. The dataset that I created at Vuforia does not appear in the "Datasets" section in the Vuforia configuration, what can I do?
Share Your Thoughts