
We started with our system manager in the previous lesson in our series on building dynamic user interfaces, but to get there, aside from the actual transform, rotation, and scaling objects, we need to make objects out of code in multiple ways, establish delegates and events, and use the surface of an object to inform our toolset placement.
This series is big and wide-ranging in ideas and approaches. Our end game is learning to create a set of tools that can be used to transform, rotate, and scale objects in our holographic space simply with a gaze and air tap. Our purpose is to create tools that feel more natural and require less effort than what we have used on 2D screens for the past 20 years — to get away from the current graphical user interface paradigms.
In this how-to, we are going to cover how to utilize the gaze and focus of the user, to make changes in our system. We are also going to cover some basics on the renderer component and an important element related to that component: materials.
With little preamble, let's jump right in; we will chew on the really tasty bits when they get there.
Step 1: Create the Bounding Box Class
Our bounding box class will be what actually draws the surrounding mesh for our UI. We will be using it as an indicator to the user that an object is selected or focused on.
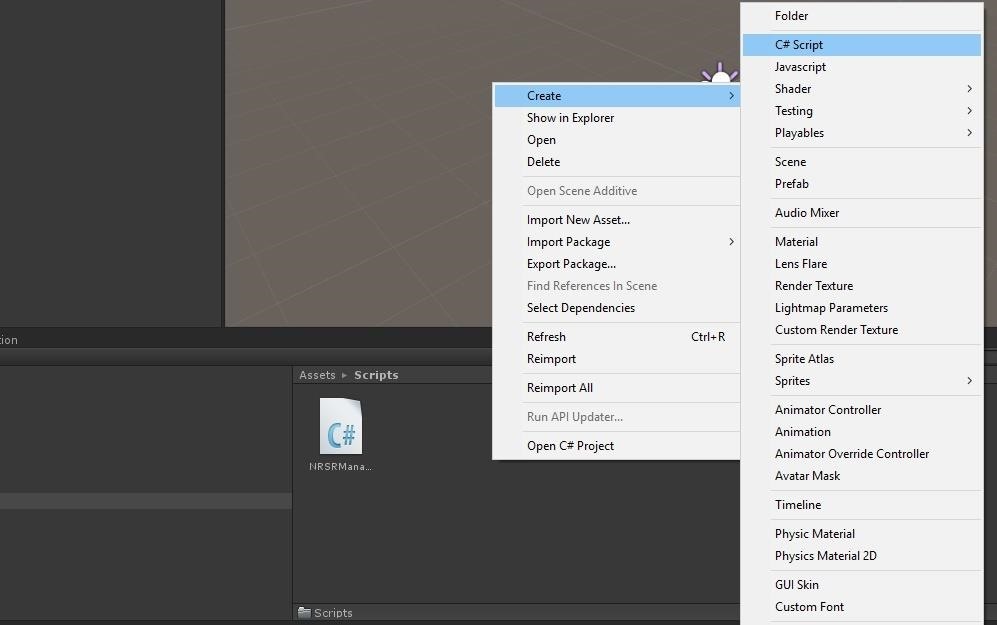
First, create a Scripts folder in our Project view by right-clicking in the view, choosing "Create" and then "Folder," and finally naming the folder Scripts.

Drag and drop the NRSRManager.cs file from the main folder to our newly created Scripts folder. Then, with that folder open in our Project view, right-click again, click "Create" and click on "C# Script." Name this file BoundingBox and double-click on it.
One thing Microsoft has done really well with the tools for HoloLens and Windows Mixed Reality is making it simple for developers to get the various forms of input working on these devices. As you will see in a moment, to get the HoloLens to interact with objects in Unity, through looking at them requires only a few lines of code.
It all starts with an interface.
Step 2: Establish the Interface
Interfaces are a bit tough to explain. Not to be confused with a user interface, interfaces are a way around lack of multiple inheritances in C#. They do not actually implement any code; they only list methods and their associated signatures.
To make this point, we will be using an interface from the MRTK called IFocusable. If you were to pull that interface up, this is exactly what you see.
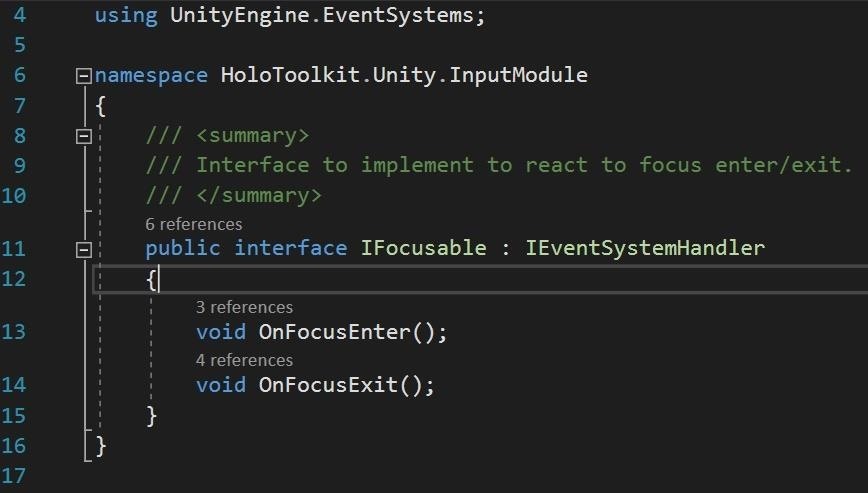
As you can see, the interface really does not have any code in it, just a couple of empty method calls. When you implement an interface, you are, as many will say on the subject, agreeing on a contract. You agree to make those method calls, which we will do now.
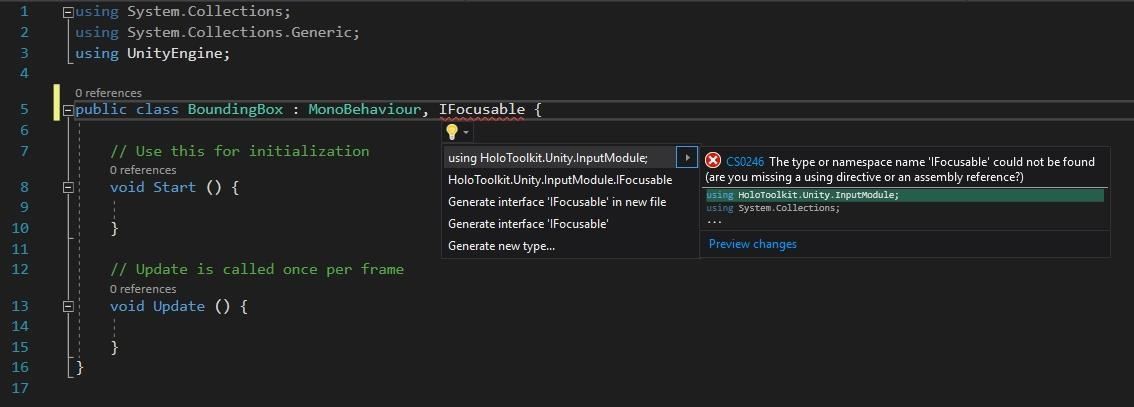
First, in our BoundingBox class, on the class declaration line, add a comma after MonoBehavior and then the word IFocusable. An error line will appear under it; this is because we do not yet have access to this interface.
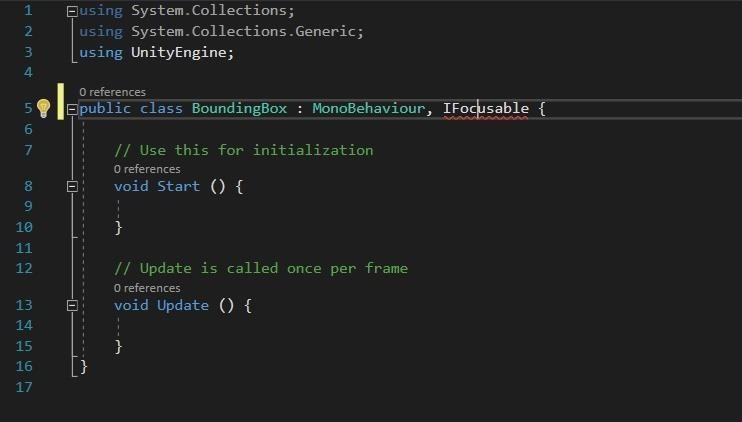
Click on the light bulb and then click on "using HoloToolkit.Unity.InputModule;"
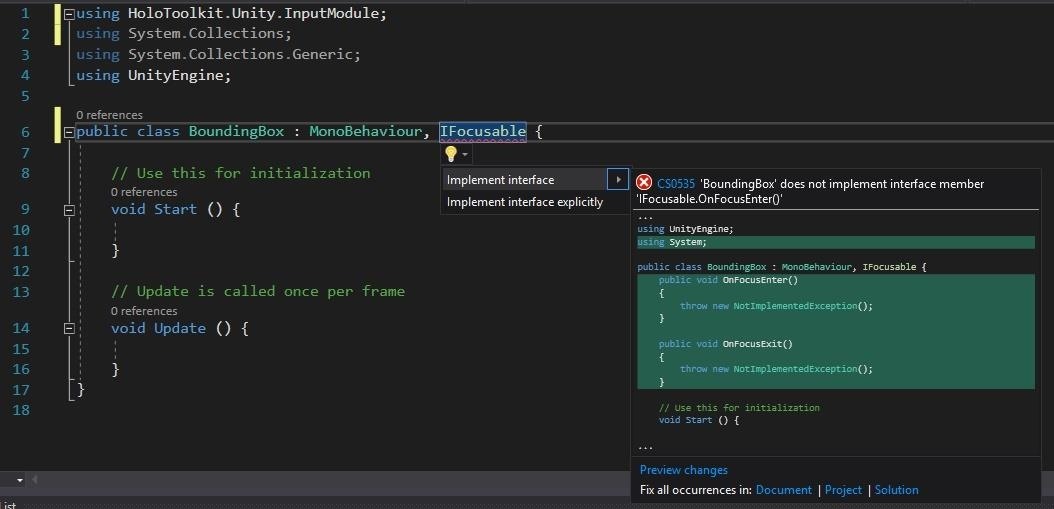
The word IFocusable turns yellow but still has an error line under it. This is because, while we now have access to the interface, we have not yet implemented it.
Click on the lightbulb again. This time, choose the "Implement Interface" option.
Two methods will appear. These just so happen to be the very same methods that we saw in the interface declaration.
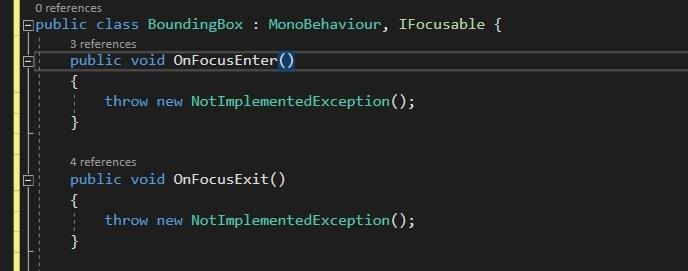
Visual Studio adds the throw new NotImplementedException(); which you can delete with no issue. When projects get large these exceptions can be useful for figuring out if something has been forgotten, but for this is unnecessary.
Step 3: Add Some Objects to the Scene
Before we get into focusing on objects and seeing them change, we need some objects in the scene to work with. Being that I want for this to work with any object that enters the scene, not just standard primitives, I figured I would randomly grab a free model from the Unity Asset Store.
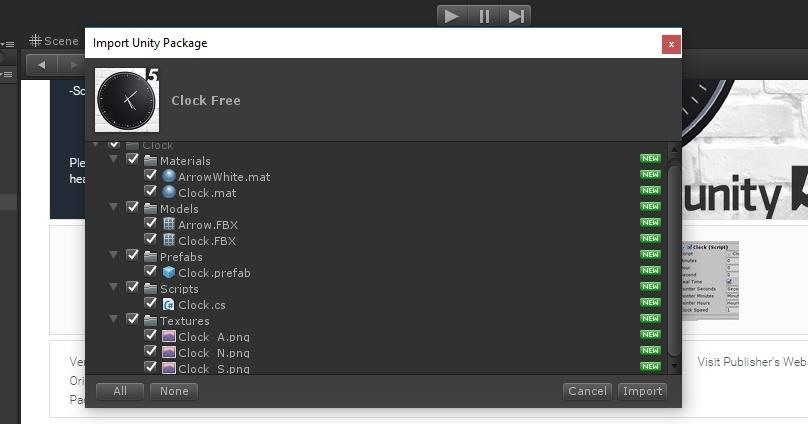
Do a quick search for Clock Free and click on the "Download" button.

Once it is downloaded, click on the "Import" button.
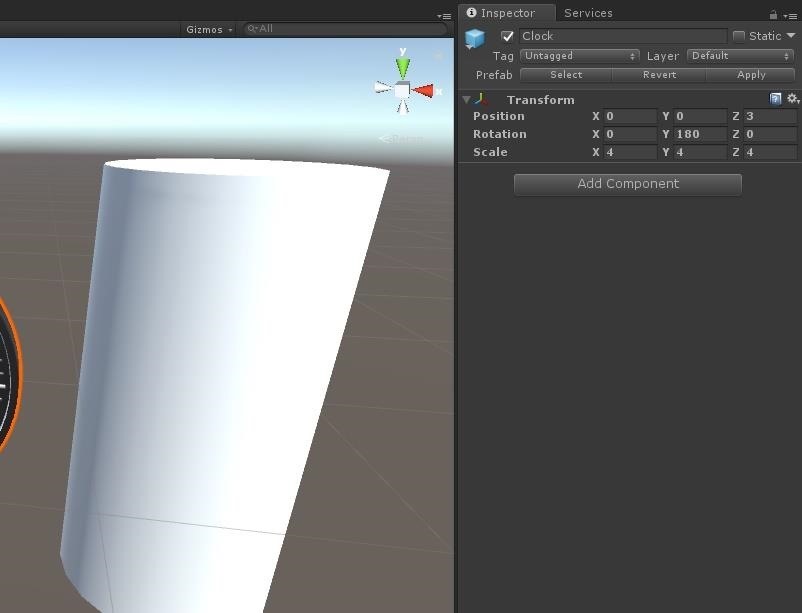
Using the Inspector, set the position of the clock under Transform to:
- Position: X (0), Y (0), Z (3)
- Rotation: X (0), Y (180), Z (0)
- Scale: X (4), Y (4), Z (4)
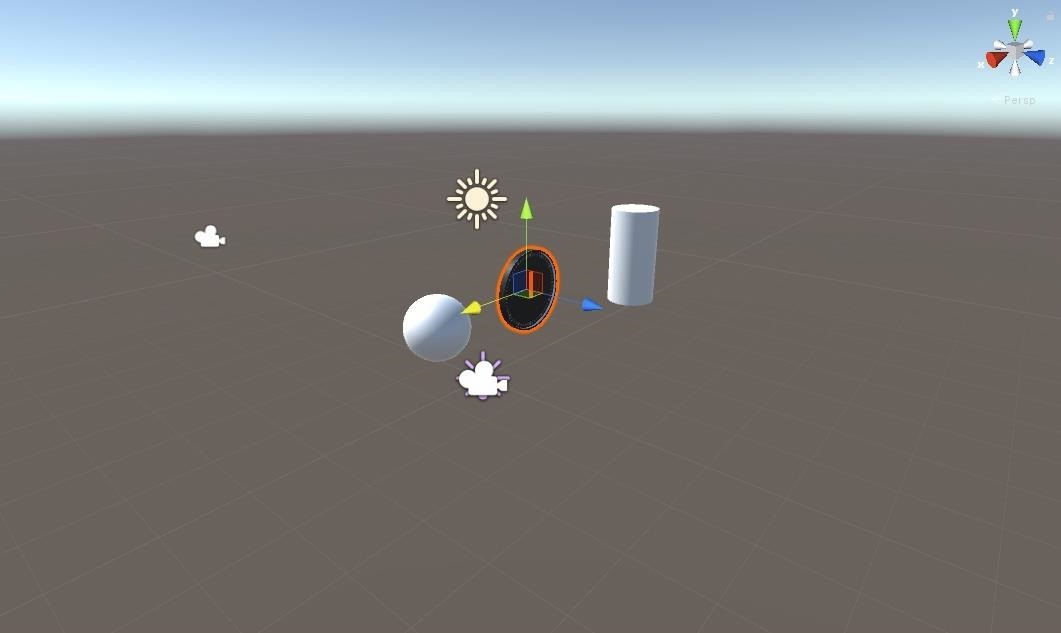
Then, create two other objects and set them off to either side of the clock.
Step 4: Create the Material
Materials are an asset type that are applied to objects. They typically include at least one bitmap graphic of some form called a texture, and an algorithmic instruction set called a shader. A material's purpose is to tell the engine exactly how it should be rendered. Color tinting, texture, and light reaction are a few ways the material helps the objects they are applied to react to the system.
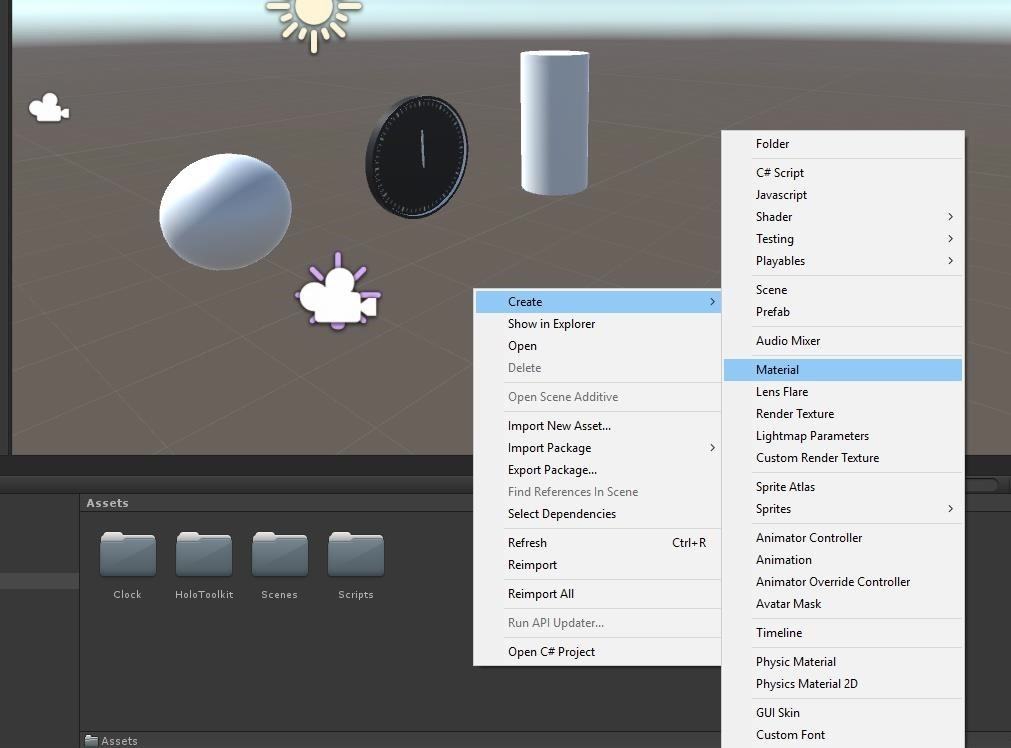
Now, we need to create the material that we will use to react when we focus on an object. Again, right-click in the Assets windows, then click "Create" and then click "Material." Name this new asset BoundingBoxMat.
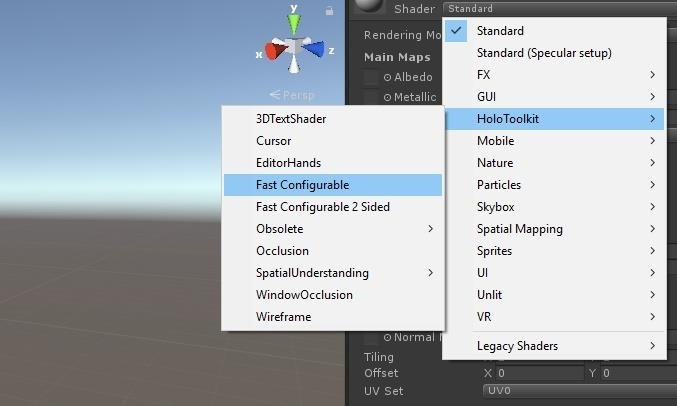
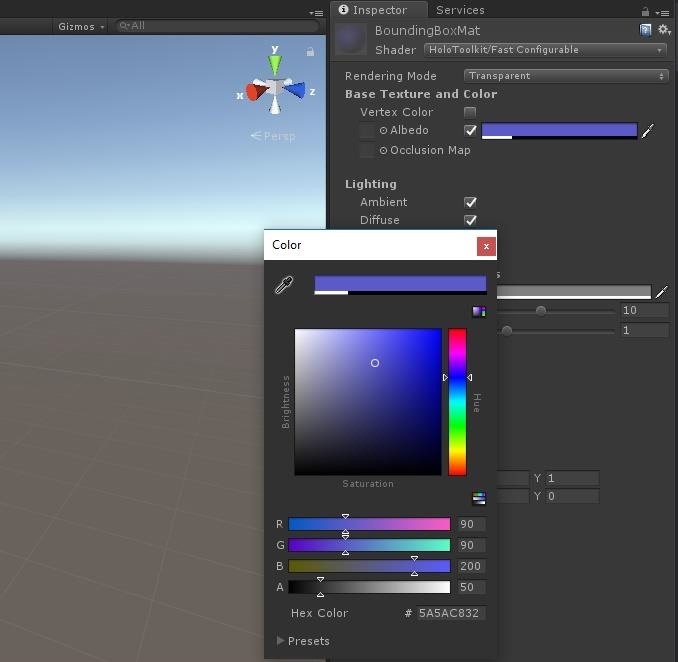
While the standard Unity shader would work fine for our purposes, the MRTK shader is designed to be a bit fast for a mobile device. With that in mind, in the Inspector, click on the drop down list that currently says "Standard." Select "HoloToolkit" and then choose "Fast Configurable."
Under the "Base Texture and Color" section, next to the word "Albedo", click on the check box to activate the color for our material. Then, click on the white box to the right of the check box.

In the color picker that appears, change the RGBA elements to Red: 90, Green: 90, Blue: 200, Alpha: 50, as shown in the picture below.
With that out of the way, now we will get into how we can use this material when we are focused on an object in the scene.
Step 5: Make a Few Changes to the NRSRManager Class
Because the objects we are going to be focused on are not necessarily ones that we have created — being that we are trying to create an open-ended system — we need to use our manager to store a reference to our material. This lets it hand off the material to classes that are assigned at runtime. While there are a number of different approaches we could take, this seemed to fit the scheme the best.
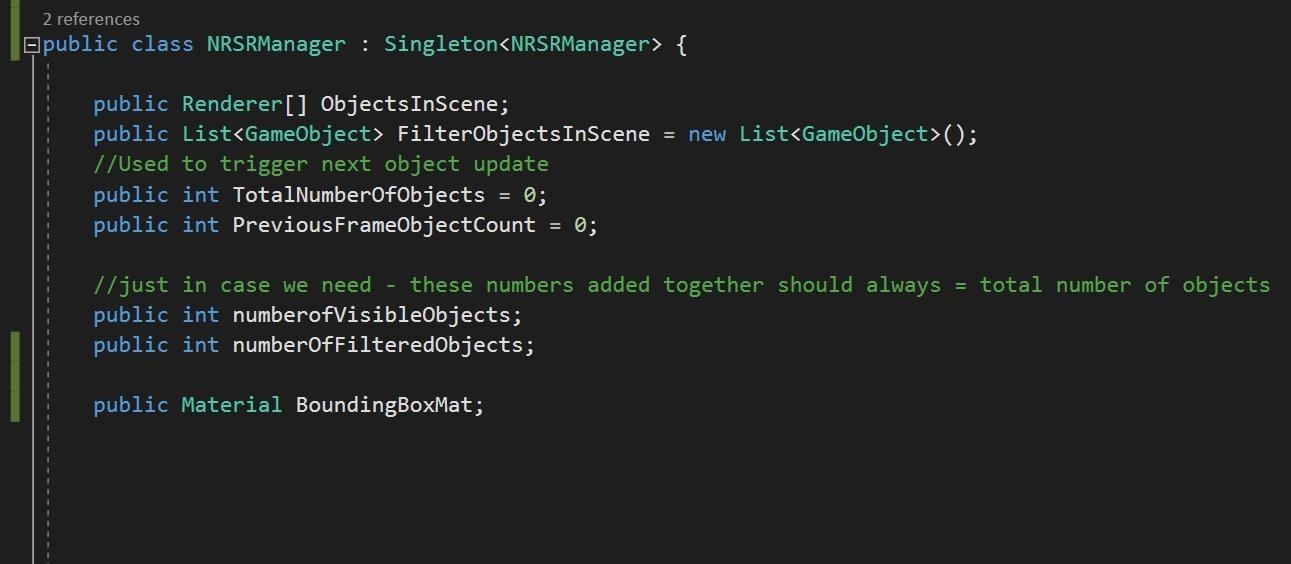
All we have to do in our NRSRManager is declare a variable "public Material BoundingBoxMat;" under the other variables we declared in the previous chapter, as in the picture below.
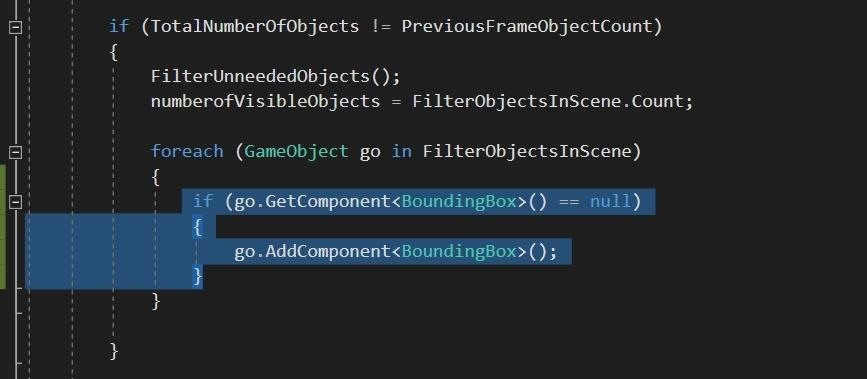
Now we are going to need to add our BoundingBox class at runtime to any object that enters the scene. Fortunately, we are ready for this. We simply need to scroll down to our FixedUpdate() method in the NRSRManger and add in the highlighted lines of code below.
This code block:
- Compares our total number of objects in the scene with the total count from the previous frame.
- Filters the objects we need.
- Loops through the collection of objects, checking if each of the objects already has a BoundingBox component.
- If the object doesn't have a BoundingBox, then it adds that component to the object.
So we have added the material reference to the NRSRManager and, using that manager, added the BoundingBox component to each valid object.
Step 6: Add the Material at Runtime
For the final stretch of this lesson, we will get a reference to our material from the NRSRManager and create a place to store the object's current material. So we can replace it when the user looks away.
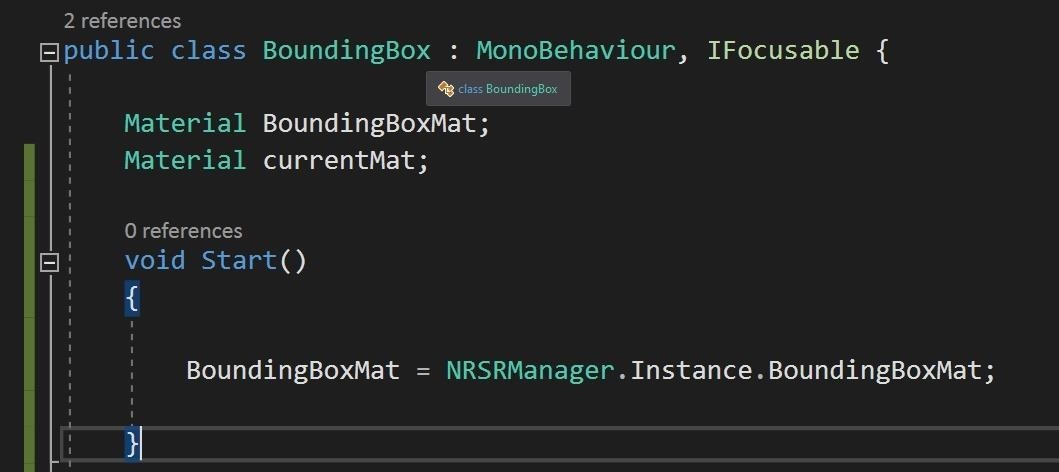
Add the following two material declarations to our empty BoundingBox class:
- Material BoundingBoxMat
- Material currentMat
Then in the Start() method, add the line BoundingBoxMat = NRSRManager.Instance.BoundingBoxMat;.
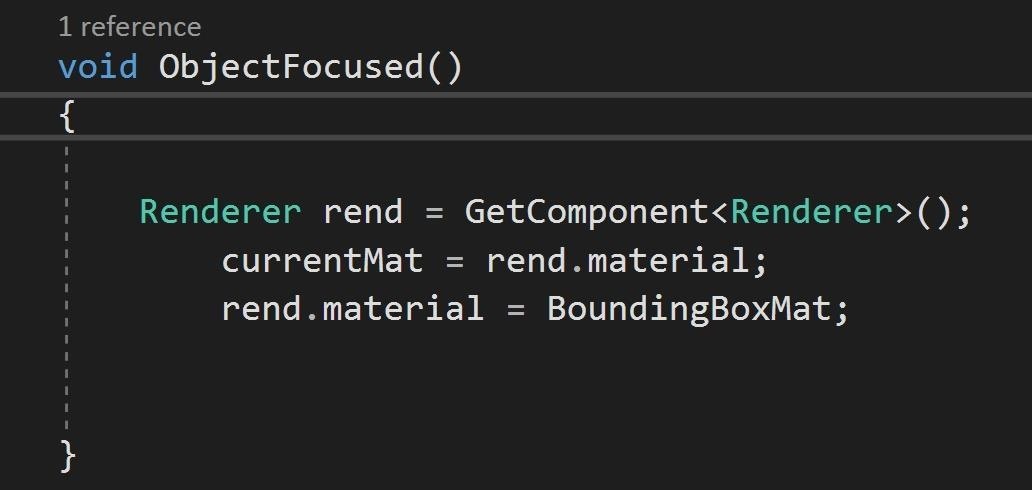
Now, we need to create two simple methods. Type in the following code for the ObjectFocused() method. Here we are getting a reference to the renderer component, and getting a copy of the current material in currentMat. And then assigning the BoundingBoxMat to the renderer.
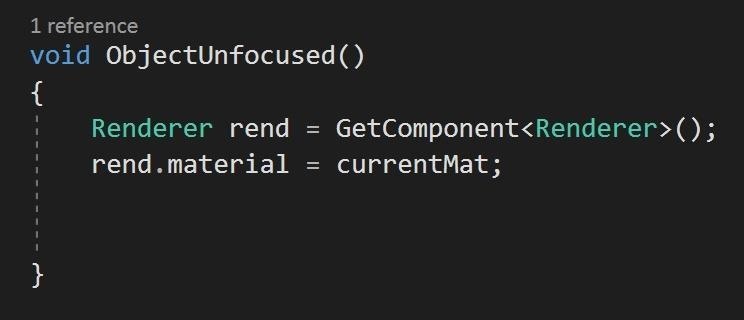
Also, type in the following ObjectUnfocused() method. Again we get a reference to the renderer and but this time we are assigned the stored material back to its object.
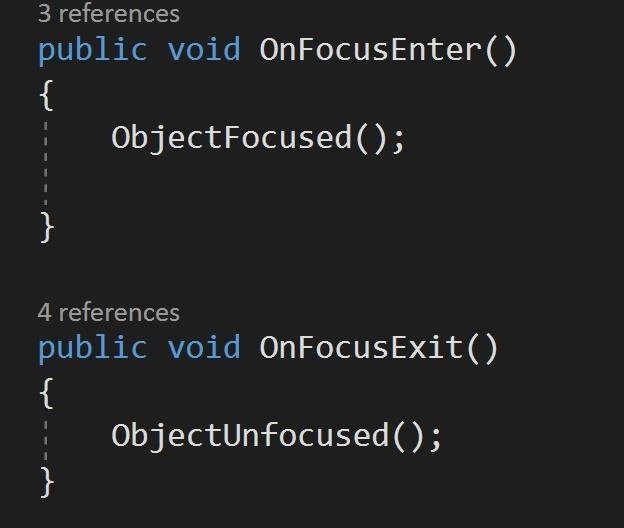
Finally, we need to call these two new methods , using the interface calls from earlier.
- Add ObjectFocused(); to the OnFocusEnter() method.
- Add ObjectUnFocused(); to the OnFocusExit() method.
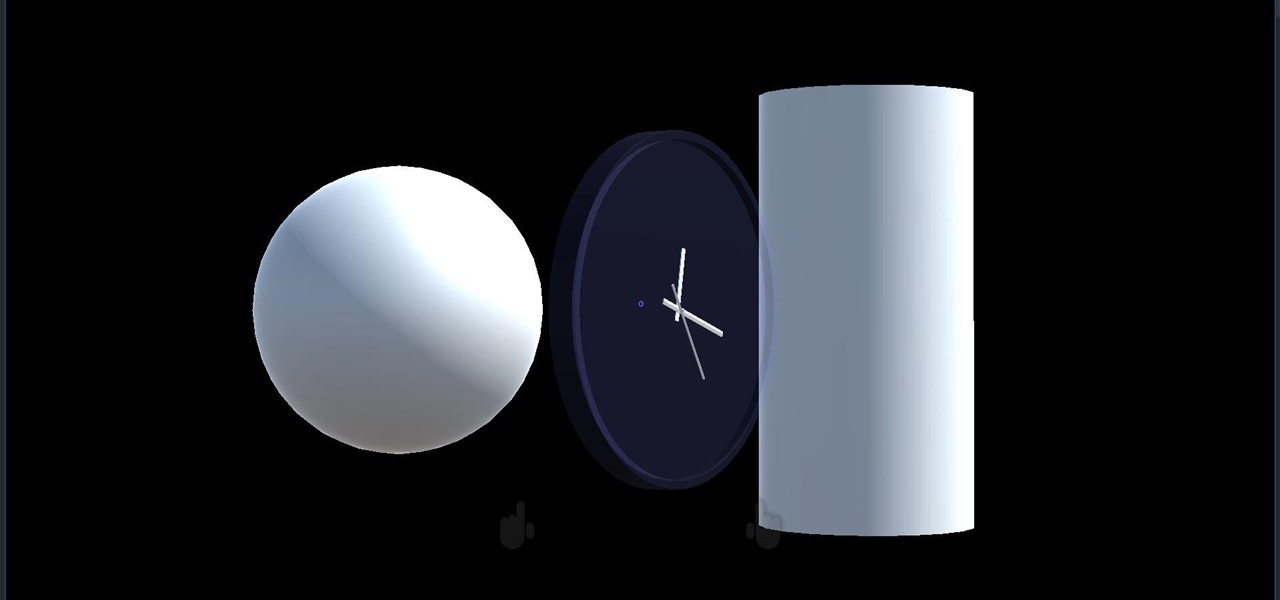
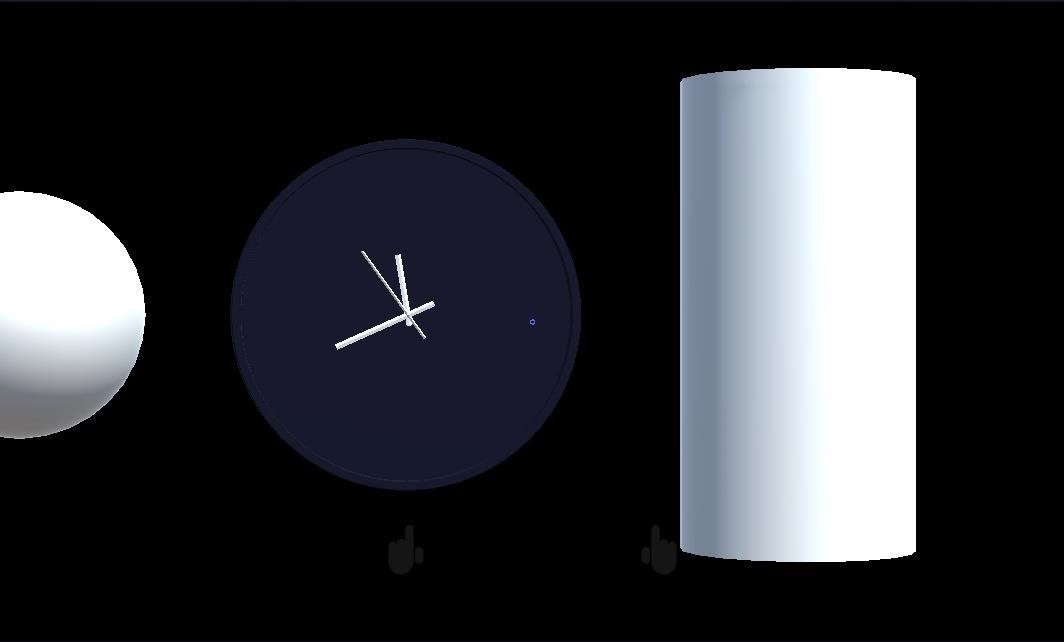
And we are done! Build, compile, and deploy, and you will see something like what we have here in the pictures below. When you look at an object, it should change materials before your eyes.
In the next lesson, we are going to build our bounding box, while using the size and shape of the focused object to inform the size of the newly created object.
Just updated your iPhone? You'll find new emoji, enhanced security, podcast transcripts, Apple Cash virtual numbers, and other useful features. There are even new additions hidden within Safari. Find out what's new and changed on your iPhone with the iOS 17.4 update.


3 Comments
Hi, love your tutorial, but I'm having some trouble with the dynamic interface. I've followed through to part 3, but when I try to run the code, I get an error telling me the "TwoHandManipulatable.cs: error CS1061: Type 'BoundingBox' does not contain a definition for 'Target' and no extension method 'Target' of type 'BoundingBox' could be found. Are you missing an assembly reference?" Any thoughts?
Hey... I had the same problem. Turns out the MRT now also has a BoundingBox class which is obviously different to the BoundingBox class made in this tutorial. Just choose some other name for your BoundingBox class. I used for instance TheBoundingBox throughout the tutorial.
Didn't you forget to add the Material BoundingBoxMat to the NRSR Manager class?
Share Your Thoughts