
With any continuously active software, it can start to become fairly complex after a few years of updates. New features and revisions both get layered into a thick mesh of menu systems and controls that even pro users can get bewildered by. If you are new to a certain application after it has been around for many years, it can be downright intimidating to know where to begin.
Unity has been around since 2005, but surprisingly, they have done a great job of keeping the interface clean and simple. Don't get me wrong, the layers are surely there, hiding away in the deeper levels of the menu system, but the Unity team started with their core design concepts and stuck with them, which is impressive.
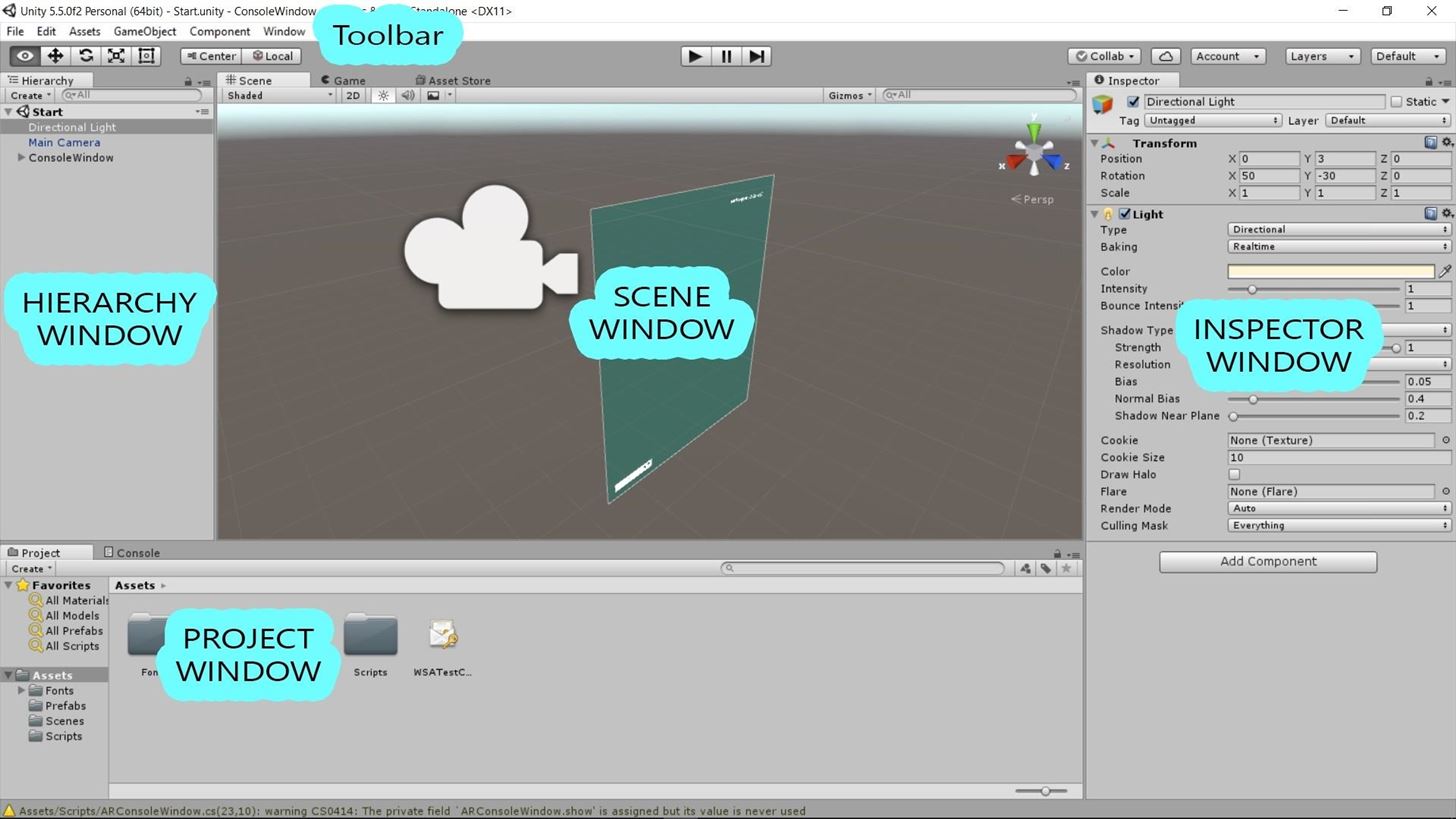
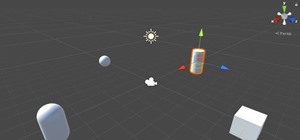
In the last installment of our HoloLens Dev 101 series, we played around with Unity a little as we built a simple application. In this part, as promised, we will be going over some of these core concepts in regards to navigating this great 3D editor. We will look at the important (labeled) UI elements in the picture below and cover what they are used for.
Step 1: Core Concepts
Before we get into the interface itself, let me bring up a few core ideas that are important in working with Unity. Understanding these early on can make a huge difference in the learning curve. I know I wish I had.
Scenes
An application or game in Unity can be made up of many scenes. The most simple analogy for a scene is a game level. That is probably because that is exactly what it was designed to be. A scene will hold a collection of GameObjects (see below) to load and unload based on the conditions that you set. Once those conditions are met, the current scene unloads and the next scene loads. Scenes can be a starting menu, it can be one big open world application, or even just a cut scene. It really is all up to how you want to work with the resources that are there.
GameObjects
GameObjects are the foundation of the entire Unity experience—everything in a Unity project is a GameObject. The few exceptions to this rule are generally attached to GameObjects. The most basic GameObject has only one component, the Transform component (see below). Said another way, for clarity, all GameObjects have the Transform component.
Components
Components are the cornerstone of GameObjects in Unity. Their purpose is to add needed functionality to GameObjects. To break this down a bit further, we need a somewhat simple GameObject. A good example might be a flashing street light in a scene. This GameObject would be made up of several components:
- Transform: As mentioned above, this is in all GameObjects. It sets the relative position, rotation, and scale of the objects.
- Mesh: This is where the actual 3D mesh information is stored—vertex and face order—as well as UV coordinates.
- Mesh Renderer: This component stores the material information and some details about how light effects GameObjects.
- Collider: This component allows the GameObject to detect that it has intersected with another GameObject.
- Script: Technically, almost all components are scripts, but you can create scripts that have specific purposes and attach them to GameObjects. For instance, we would likely have two light GameObjects attached to our streetlight and would need a way to make it flash. Scripting that flash is one simple solution, and once it is attached to its GameObject, it will appear to be a component.
I could easily keep going, with Rigidbodies, Materials, Shaders, and an ongoing list of potential components. Without writing a single line of code, you have access to countless combinations of components in Unity.
Parent-Child Relationships
No, I am not going to tell you to go see someone for family counseling. (Not today anyway.) As you will see in the Hierarchy window below, GameObjects can have other objects attached to them in a full hierarchic fashion. The top-level object being the parent, and each GameObject attached to that parent being a child, grandchild, great-grandchild, and so on.
Step 2: Interface
Now that these ideas are out of the way, let's take a look at the interface and see what we can learn there.
Toolbar
Here we have the Unity Toolbar. For our purposes, though, we will only be focusing on two parts of it.

First, let's talk about the Transform tools, a collection of tools that should be used almost exclusively with Scene View. Fortunately, Unity has been really smart and made these tools context sensitive. Because of this, you rarely have to look at this area of the toolbar.

For those few occasions where you may need to manually select one of these tools, here is a quick list:
- Move: Move objects around in the Scene View.
- Pan: This is used for moving your viewport around in Scene View.
- Rotate: Rotate objects in the Scene View.
- Scale: Scale objects in the Scene View.
- Rect Transform: This tool is used with 2D and UI development.
While simple to understand, the second area of the Toolbar that we care about is the Play, Pause, and Step buttons, what some might refer to as Transport Controls. These controls can change the current mode of your application.

- No Button Pressed: This is the default—Edit Mode. This is where you will spend most of your time.
- Play: Used to start the execution of your project, or Game View. You can hit the now-stop button to stop the program. While Unity is great at letting you change things while in Game View, to see how things are affected real-time, make sure and remember to stop the app before making serious changes. They will disappear when the app is stopped.
- Pause: Temporarily pause your program.
- Step: When a project is paused, you can use the Step button to move through your program one frame at a time. The can be very useful when trying to find problem areas.
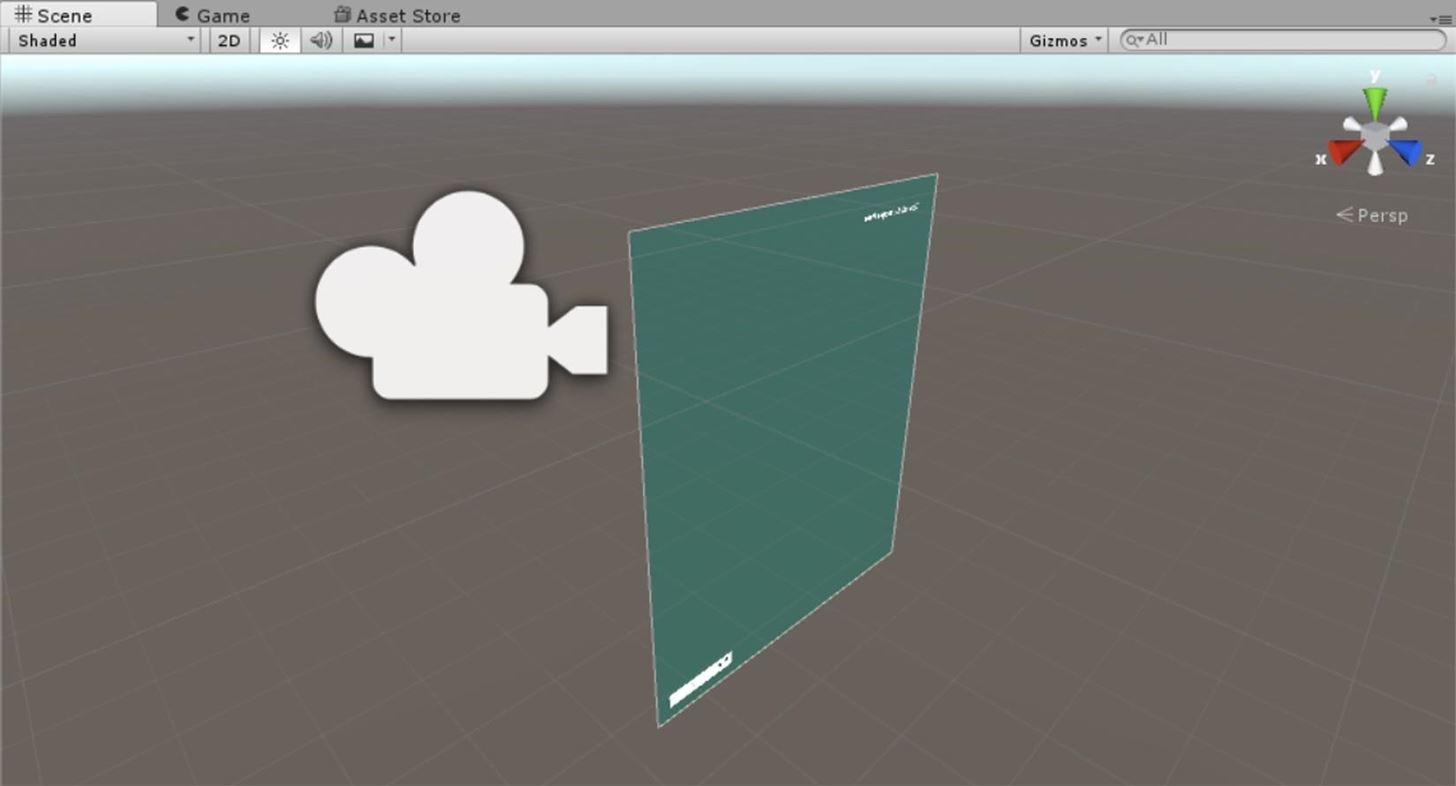
Scene View
The Scene View is the primary staging area for any and all GameObjects in Unity. Here you use the Transform tools to move, scale, and rotate objects in your scene until they meet your needs.
The Scene View also has a toolbar across the top that offers different shading options, 2D or 3D view, the ability to turn the lights on or off, and other features. I highly recommend spending some time playing with these options to get familiar with their capabilities. Understanding the Transform and Scene Control tools in the Scene View is essential as you will be spending a heavy portion of your time working with them.
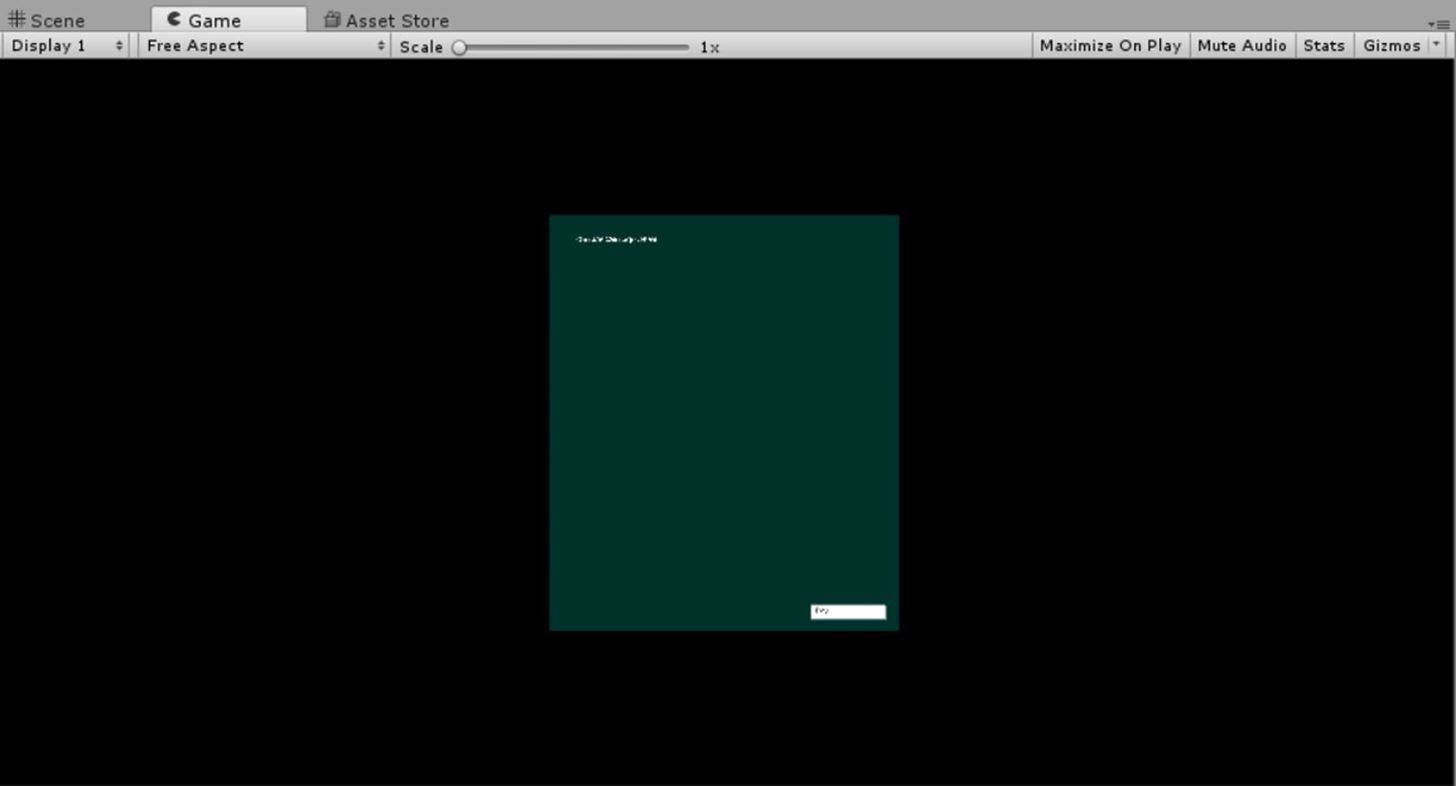
Game View
The Game View is the place to test the project, quickly and easily. You may notice that by default, Game View shares the same screen real estate as the Scene View. If you are making changes to a project and hit the Play button on the Transport Controls, it will automatically become the Game View, and when it is stopped, it becomes the Scene View again.
In case you need to manually change between windows, look at the top of the image below. You will notice three words—Scene, Game, and Asset Store. While they may not appear to be tabs, they do function as though they are. If you wanted to go back to Scene View, you would simply click on the word Scene.
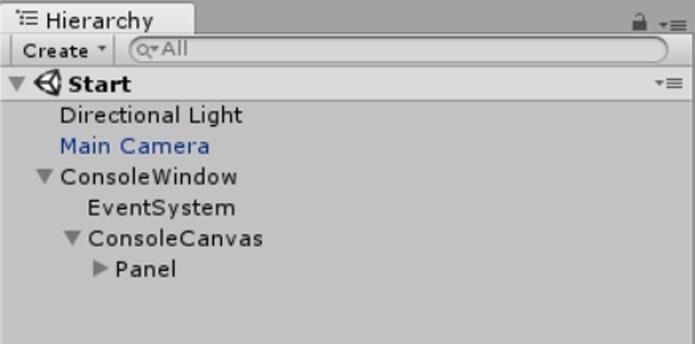
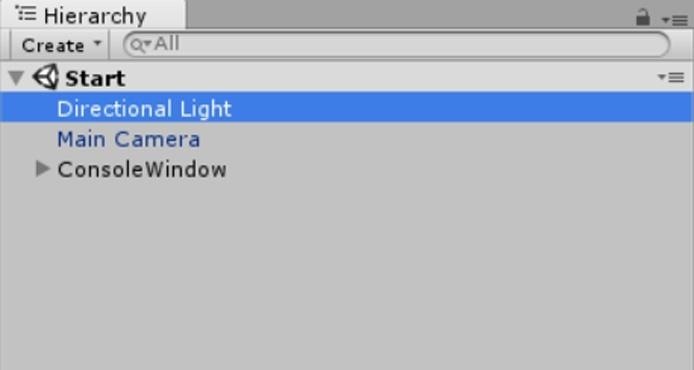
Hierarchy Window
The Hierarchy window is a complete list of every GameObject in your open scene. By default, all GameObjects in the scene will be listed alphabetically. You can, however, manually change the order however you like.
If an object has an arrow next to it, that means the object is the parent object of a child object or a group of children objects (see Parent- Child Relationships above). When a collection of objects are grouped through parenting, moving, rotating, or scaling the parent object transforms all the children objects as well.
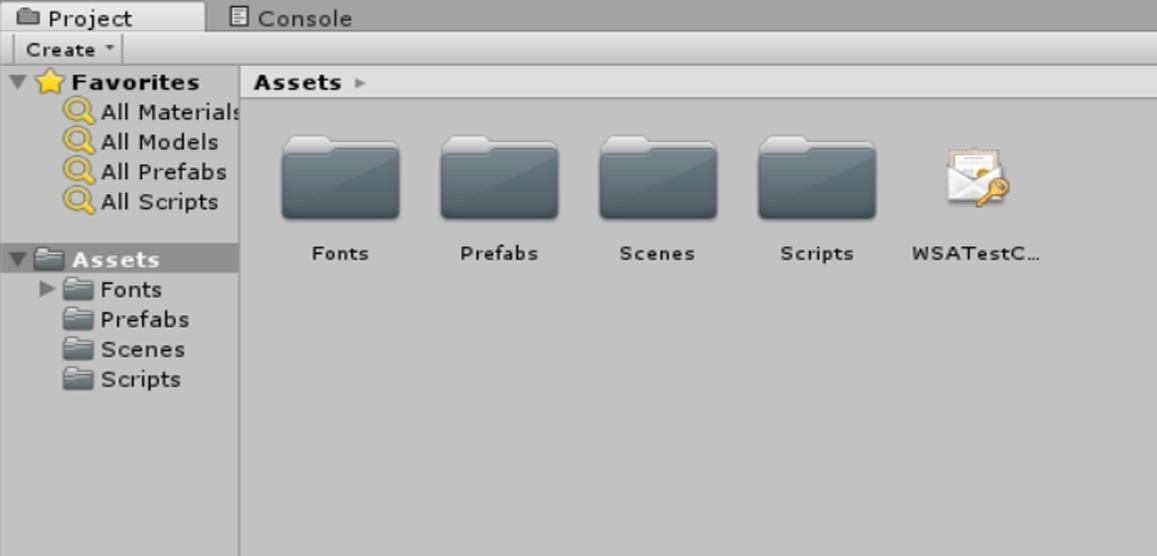
Project Window
The Project window is a where all of the assets of the project are listed. These assets can include scripts, materials, models, Prefabs, or even scenes. In case the distinction is not clear, unlike a scene, which is a collection of your objects in that scene, the Project window is showing the collection of the assets of your entire project. In other words, all scenes combined.
This can become a very cluttered place if you allow it to be. Having directories for every type of object can save a good deal of time from searching for specific assets.
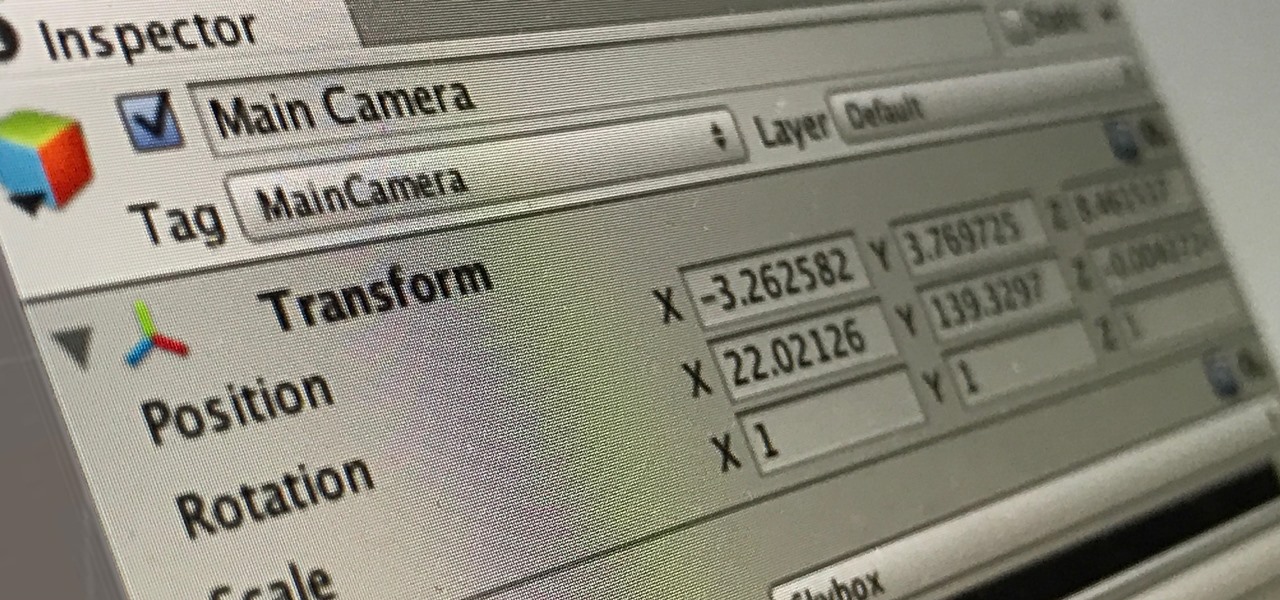
Inspector Window
The Inspector window is the place we can see and change all of the details of a GameObject, and consists of a list of components attached to the GameObject. You can see the Transform component below. Aside from being able to move and rotate these parts of the component with the Toolbar and Scene View, if we need more detail—which we often will—we can type the numbers in manually in the Inspector.

This wasn't an exhaustive run-through of Unity's interface, but it's enough to get you familiar and exploring on your own. And now that you have this knowledge under your belt, you should put it to good use and redo the basic app we built in the previous tutorial. If you really needed this part of the series, than that tutorial most likely took you longer than a few minutes.
How fast was it this time? Does it all make a little more sense now? Let me know in the comments below if you have any questions or need any more information.
Just updated your iPhone? You'll find new emoji, enhanced security, podcast transcripts, Apple Cash virtual numbers, and other useful features. There are even new additions hidden within Safari. Find out what's new and changed on your iPhone with the iOS 17.4 update.


Be the First to Comment
Share Your Thoughts