
Don't let the lack of owning a HoloLens stop you from joining in on the fun of creating software in this exciting new space. The HoloLens Emulator offers a solution for everyone that wants to explore Windows Holographic development.
At $3,000, the HoloLens can be cost-prohibitive for many developers, and understanding if your software idea will even work can help you determine whether or not to empty your bank.
If you do own a HoloLens already, the Emulator is also beneficial to you. Do you need to test a shared experience? Want to iterate faster without constantly putting the HoloLens on and taking it back off? The HoloLens Emulator offers flexibility to a developer's workflow that can save time and money in the process.
Either way, whether you have a HoloLens or not, make sure you've already set up Unity, Visual Studio, and everything else you need to get started developing in Windows Holographic, then proceed below to set up the Emulator.
A Quick Compatibility Note
Before diving right in, there is one important point to make here: If you do not have Windows 10 Pro, the HoloLens Emulator will not work since it requires Hyper-V virtualization; Hyper-V is not supported by Windows 10 Home. However, that does not mean that you can't develop for HoloLens. It just means you can't use the Emulator.
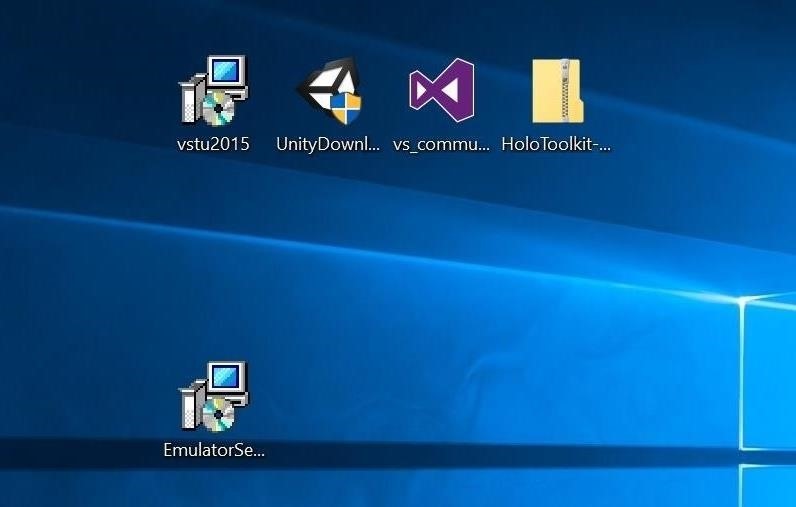
Step 1: Download the Emulator
You can grab the HoloLens Emulator directly from Microsoft. Download it somewhere easy to get to, like your desktop.
Step 2: Install the Emulator
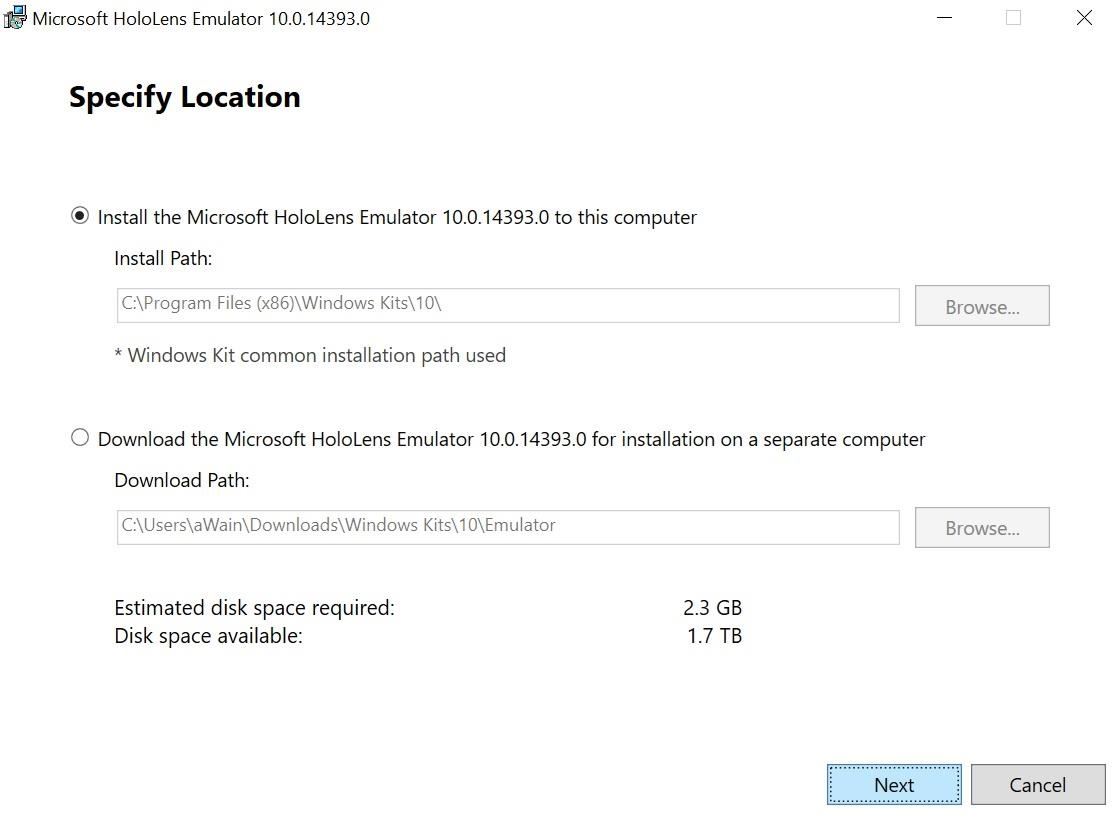
Double-click on the "EmulatorSetup.exe" that you just downloaded. Once it loads, it will bring up the location selection page. If you want to choose somewhere other than the default location, you may so. However, if you are not comfortable with the Windows file system, I would leave it at the default setting.
Click on the "Next" button when ready.
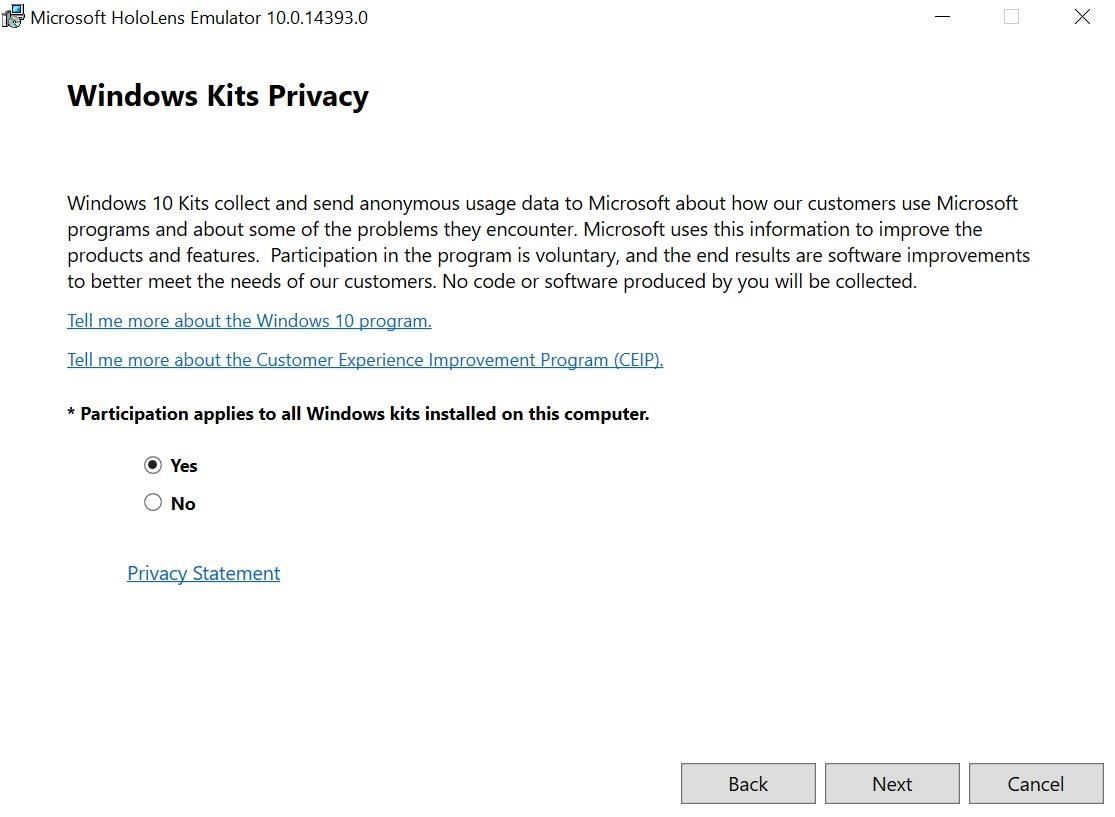
Next, we have the Window Kits Privacy statement. Make your "Yes" or "No" choice and hit the"Next" button.
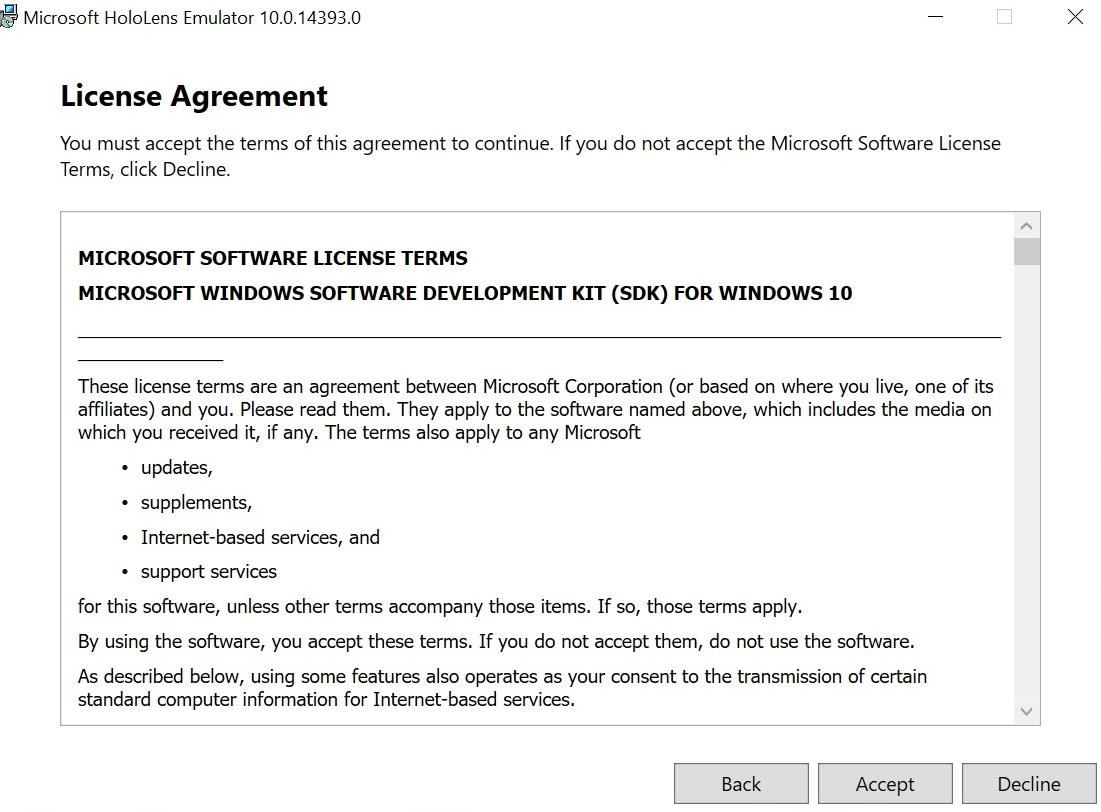
This will bring up the License Agreement page and yet another thing to agree to. Click "Accept" or "Decline."
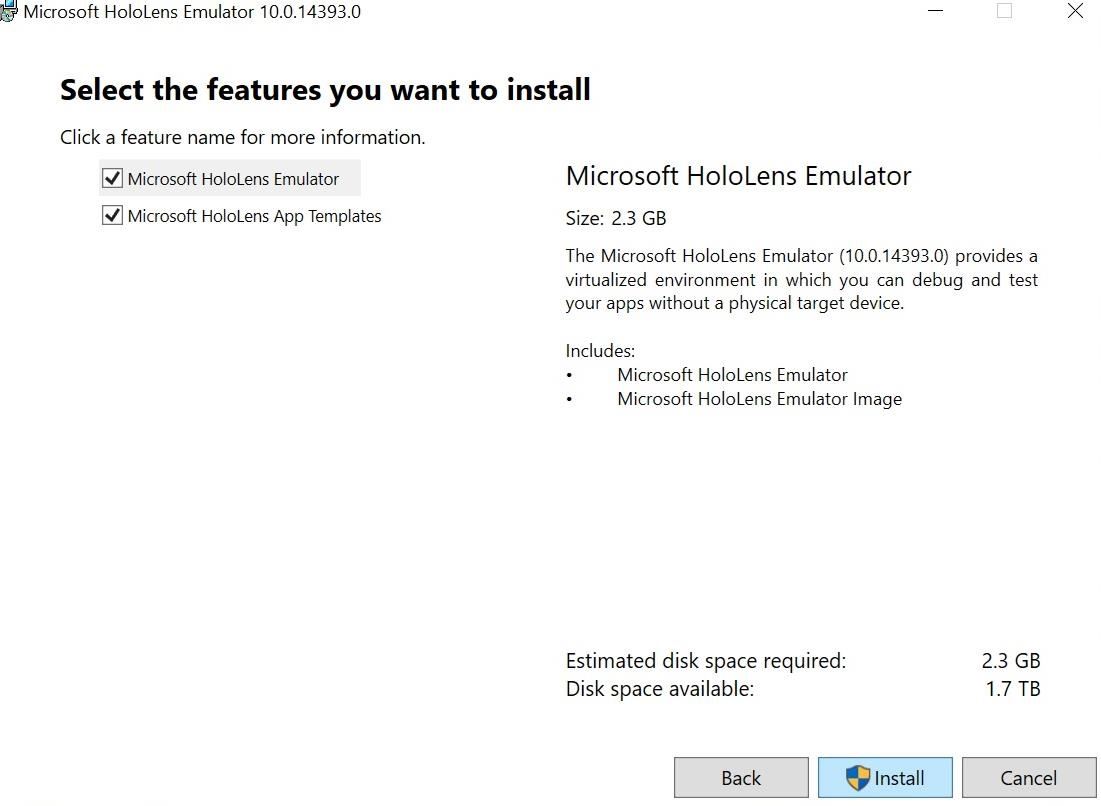
Assuming you want to install the Emulator and the App Templates, which you should, make sure they are checked and click on the "Install" button.
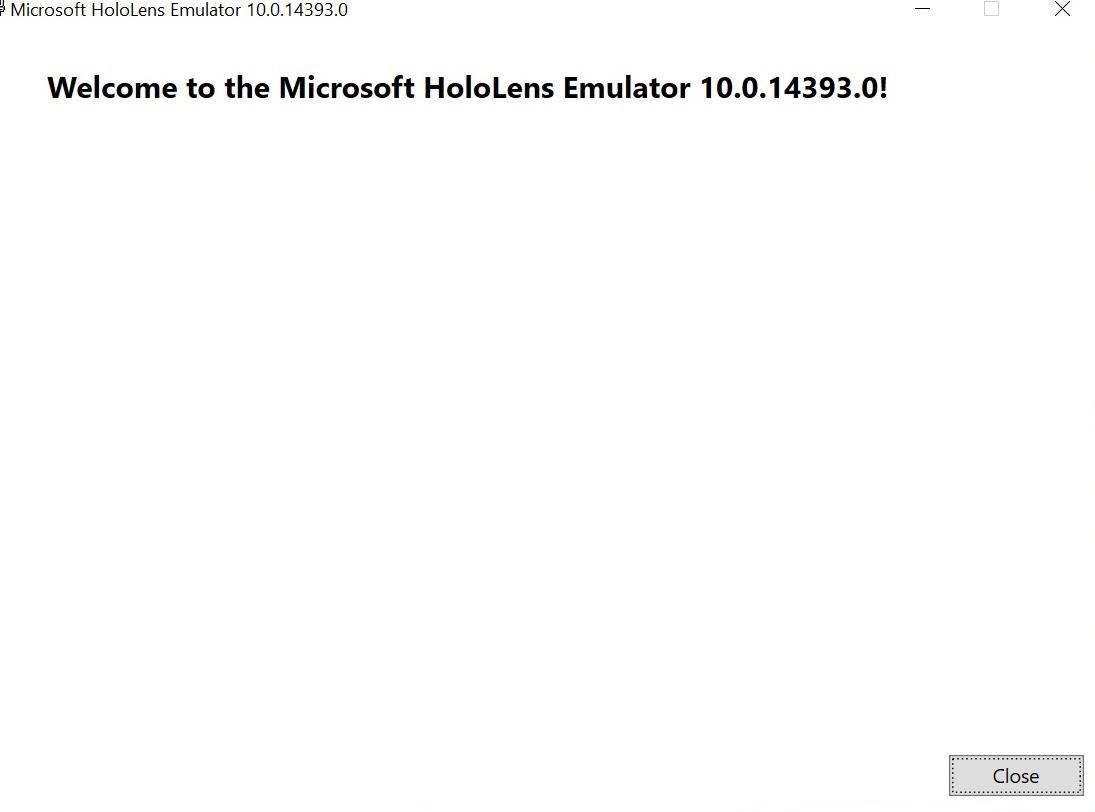
The HoloLens Emulator will begin installing. It should take a decent amount of time, so be patient. When the HoloLens Emulator finally does finish installing, you should see the "Welcome" message. Hooray!
Click on the "Close" button, then make sure you reboot your computer.
Step 3: Now You're Ready to Rock
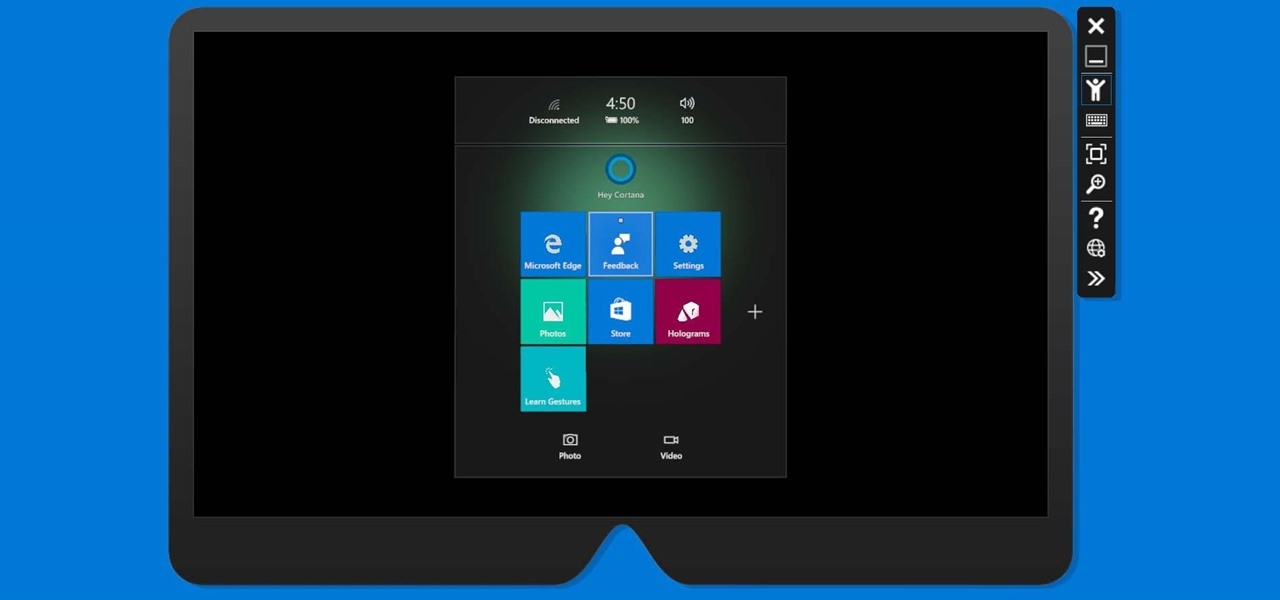
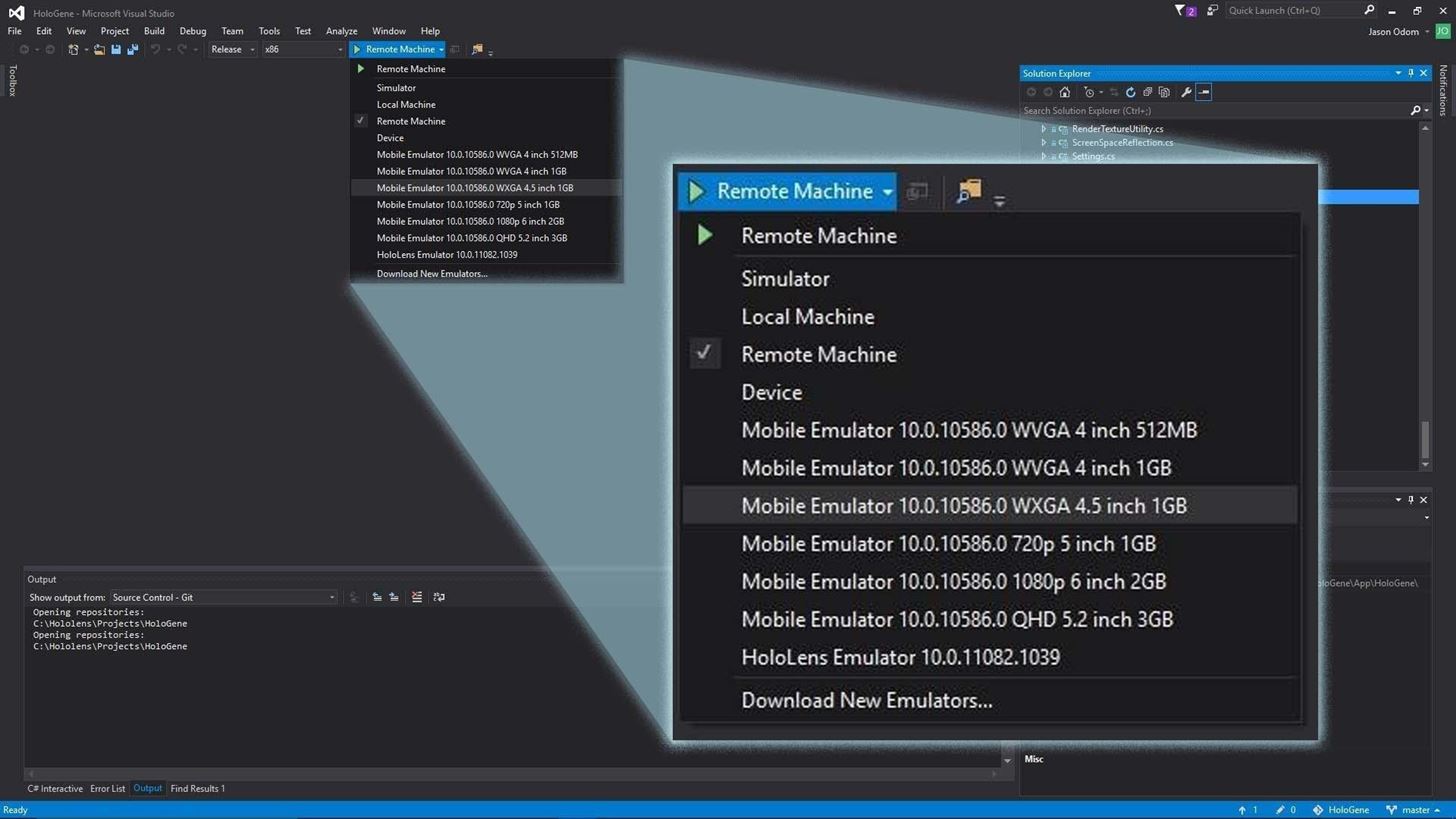
Assuming you ran into no errors, once you have a project in Visual Studio, you should see HoloLens Emulator as an option in the machine list.
Now that we are through the basic installation guides, it's time to move onto the fun stuff. Even better, the rest of these tutorials will have a matching video to walk you through step by step. Bookmark our main HoloLens Dev 101 page to see all the parts; future parts will be added when ready.
Just updated your iPhone? You'll find new emoji, enhanced security, podcast transcripts, Apple Cash virtual numbers, and other useful features. There are even new additions hidden within Safari. Find out what's new and changed on your iPhone with the iOS 17.4 update.


2 Comments
I'm pretty sure Hyper-V works with Windows Pro, Enterprise, and Education. Just not Windows Home.
Also, how did you get to the point where you could check to see that it installed properly in VS? You skipped steps in going through in Visual Studio in a way that lets you see that.
Share Your Thoughts